Advertisement
Quick Links
Need help? Visit our web to view video assembly tips or chat with a live rep.
Prefer the phone?
Share your journey!
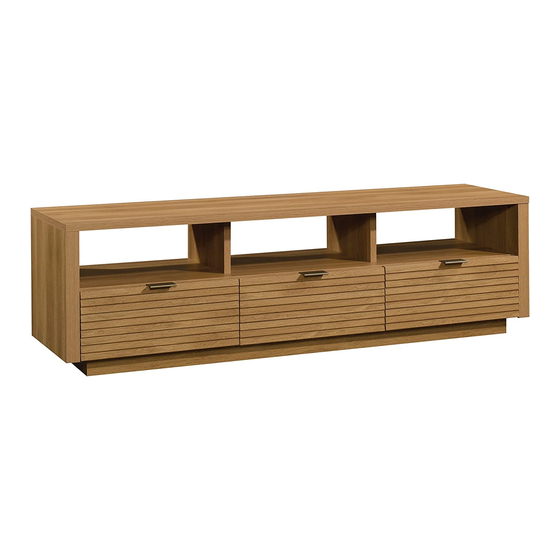
Credenza
Your holder for all
things awesome.
NOTE: THIS INSTRUCTION
BOOKLET CONTAINS IMPORTANT
SAFETY INFORMATION.
PLEASE READ AND KEEP FOR
FUTURE REFERENCE.
English pg 1-21
Français pg 22-24
Español pg 25-27
Be sure to give us a ring before
making any returns.
Advertisement

Related Manuals for Sauder Harvey Park 414986


Summary of Contents for Sauder Harvey Park 414986
- Page 1 Your holder for all things awesome. Credenza NOTE: THIS INSTRUCTION BOOKLET CONTAINS IMPORTANT SAFETY INFORMATION. Need help? Visit our web to view video assembly tips or chat with a live rep. PLEASE READ AND KEEP FOR Prefer the phone? FUTURE REFERENCE. English pg 1-21 Français pg 22-24 Español pg 25-27...
- Page 2 Table of Contents Assembly Tools Required Part Identifi cation No. 2 Phillips Screwdriver Tip Shown Actual Size Hardware Identifi cation Assembly Steps 5-21 Hammer Not actual size Français 22-24 Español 25-27 Safety 28-30 Warranty WARNING Use of a TV that is too heavy or large is hazardous. A TV that is too heavy will create a risk of a tip-over that can cause severe injury or death.
- Page 3 Part Identifi cation å While not all parts are labeled, some of the parts will have a label or an inked letter on the edge to help distinguish similar parts from each other. Use this part identifi cation to help identify similar parts. RIGHT END (1) D723 DRAWER BOTTOM (3) RIGHT DRAWER FRONT (1)
- Page 4 Hardware Identifi cation å Screws are shown actual size. You may receive extra hardware with your unit. CABINET LEFT - 3 35GC DRAWER RIGHT - 3 DRAWER LEFT - 3 35GA 35GB 35GD CABINET RIGHT - 3 ® TWIST-LOCK FASTENER - 8 HIDDEN CAM - 15 SLIDE CAM - 6 CAM DOWEL - 15...
- Page 5 Step 1 Assemble your unit on a carpeted fl oor or on the empty å carton to avoid scratching your unit or the fl oor. To begin assembly, push a TWIST-LOCK® FASTENER å (10F) into the large holes in the ENDS (A2 and B2). Repeat this step for the SHELF (G2).
- Page 6 Step Step 2 Push fi fteen HIDDEN CAMS (1F) into the UPRIGHTS (C å and D), BOTTOM (F), and DRAWER BRACES (M67). Then, insert the metal end of a CAM DOWEL (2F) into each HIDDEN CAM. Do not tighten the HIDDEN CAMS in this step. Arrow (15 used) (15 used)
- Page 7 Step Step 3 Fasten a CABINET RIGHT (35GA) to the RIGHT END (A2) å and a CABINET LEFT (35GB) to the LEFT END (B2). Use four GOLD 5/16" FLAT HEAD SCREWS (3S) through holes #1 and #3. Roller end GOLD 5/16" FLAT HEAD SCREW (4 used in this step) Roller end Page 7...
- Page 8 Step 4 Fasten the CABINET RIGHTS (35GA) and CABINET å LEFTS (35GB) to the LOWER UPRIGHTS (D). Use eight GOLD 5/16" FLAT HEAD SCREWS (3S) through holes #1 and #3. Roller end Finished edge Roller end Roller end Finished edge GOLD 5/16"...
- Page 9 Step 5 Fasten the UPRIGHTS (C) to the TOP (E2). Tighten four å Caution HIDDEN CAMS. Do not stand the unit upright without the BACK fastened. The unit may collapse. S u r Part (E2). Another f a c H I D sturdier, easier, D E N i t h...
- Page 10 Step Step 6 Fasten the SHELF (G2) to the UPRIGHTS (C). Use four å BLACK 1-7/8" FLAT HEAD SCREWS (2S). BLACK 1-7/8" FLAT HEAD SCREW (4 used in this step) Finished edge Page 10...
- Page 11 Step 7 Fasten the LOWER UPRIGHTS (D) to the SHELF (G2). å Tighten four HIDDEN CAMS. Fasten the BOTTOM (F) to the LOWER UPRIGHTS (D). å Use four BLACK 1-7/8" FLAT HEAD SCREWS (2S). BLACK 1-7/8" FLAT HEAD SCREW (4 used in this step) Finished edge S u r f a c...
- Page 12 Step Step 8 Fasten the ENDS (A2 and B2) to the å How to use the TWIST-LOCK ® FASTENER TOP (E2), BOTTOM (F), and SHELF (G2). 1. Insert the dowel end of the FASTENER into the hole of the Tighten eight TWIST-LOCK® FASTENERS adjoining part.
- Page 13 Step Step 9 Fasten four CORNER BRACKETS (31G) to the BRACE (I) and å BASE (M). Use eight BLACK 9/16" LARGE HEAD SCREWS (1S). Fasten four METAL BRACKETS (4G) to the BRACE (I) and å BASE (M). Use four BLACK 9/16" LARGE HEAD SCREWS (1S). NOTE: Be sure the BRACKETS are even with the edges of the å...
- Page 14 Step Step 10 Fasten the BRACE (I) and BASE (M) to the BOTTOM (F). å Use twelve BLACK 9/16" LARGE HEAD SCREWS (1S) Hey! It's starting to look through the BRACKETS on the BRACE and BASE and like something! into the BOTTOM. Fasten the SIDE BASES (N) to the CORNER BRACKETS å...
- Page 15 Step Step 11 Carefully turn your unit over onto its front edges. Lay the å Caution BACK (H) over your unit. Do not stand the unit upright without the Make equal margins along all four edges of the BACK (H). å...
- Page 16 Step Step 12 Fasten the RIGHT DRAWER FRONT (K) to three å MOLDINGS (O). Use twelve BROWN 1" FLAT HEAD SCREWS (12S). NOTE: Be sure to position the MOLDINGS exactly as å shown in the enlarged diagram. BROWN 1" FLAT HEAD SCREW (36 used in this step) Repeat this step for the other DRAWER FRONTS (J and L).
- Page 17 Step Step 13 With the palm of your hand, The tabs should insert freely tap the DRAWER BOTTOM into the slots. Gently tilt the down into the groove. DRAWER SIDES side to side until the tabs slip into the slots. F I N I S H D723...
- Page 18 Step Step 14 Insert a SLIDE CAM (10A) into the DRAWER SIDES (D12 and D13). å Fasten a DRAWER RIGHT (35GC) to the RIGHT DRAWER SIDE (D12) å and a DRAWER LEFT (35GD) to the LEFT DRAWER SIDE (D13). Use four GOLD 5/16"...
- Page 19 Step 15 Fasten a PULL (84K) to the RIGHT DRAWER FRONT (K). å Use two BLACK 9/16" LARGE HEAD SCREWS (1S). Peel a BUMPER from the BUMPER CARD (29M) and stick å it on the PULL (84K) as shown. Repeat this step for the other drawers. å...
- Page 20 Step 16 Carefully stand your unit upright. å To insert the drawer into your unit, tip the front of the drawer down and drop the rollers on the drawer behind the rollers on å the unit. Lift the front of the drawer up and slide it into the unit. Push a CAM COVER (36P) onto each visible HIDDEN CAM in the UPRIGHTS (C).
- Page 21 Step 17 To make adjustments to the drawers, loosen SCREW #3 in the SLIDES a 1/4 turn, then turn the CAM clockwise or å counter-clockwise. Notice how the drawer raises or lowers as you turn the CAM. The higher the screw in the oblong hole, the higher your drawer front will be.
- Page 22 Crédence Utilisez les instructions d’ a ssemblage en français avec les NOUS SOMMES LA POUR VOUS AIDER! schémas étape par étape du manuel d’instruction en anglais. Nous faisons de notre mieux pour nous assurer que votre meuble Chaque étape en français correspond à la même étape arrive dans d’excellentes conditions.
- Page 23 AVERTISSEMENT ÉTAPE 5 L'utilisation d'un téléviseur trop lourd ou trop gros est dangereuse. Attention: Ne pas relever l’élément dans sa position verticale Un téléviseur trop lourd créera un risque de basculement pouvant avant d’ a voir fi xé l’ARRIÈRE. L’élément risque de s’eff ondrer. provoquer de graves blessures ou la mort.
- Page 24 ÉTAPE 10 ÉTAPE 15 Fixer l’ENTRETOISE (I) et le SOCLE (M) au DESSOUS (F). Utiliser Fixer une POIGNÉE (84K) sur le DEVANT DE TIROIR DROIT (K). douze VIS TÊTE LARGE 14 mm NOIRES (1S) à travers les CONSOLES Utiliser deux VIS TÊTE LARGE 14 mm NOIRES (1S). sur l’ENTRETOISE et SOCLE et dans le DESSOUS.
- Page 25 Credencia Use estas instrucciones de ensamblaje en español junto con las ESTAMOS AQUI PARA AYUDAR! fi guras paso-a-paso provistas en el folleto inglés. Cada paso en Tratamos de asegurar que su mueble llega en condición excelente. español corresponde al mismo paso en inglés. Se destacan las Nuestros representantes de Servicio al Cliente son amables y fi...
- Page 26 ADVERTENCIA PASO 5 L'utilisation d'un téléviseur trop lourd ou trop gros est dangereuse. Precaución: No coloque la unidad en posición vertical hasta que Un téléviseur trop lourd créera un risque de basculement pouvant se fi je el DORSO. La unidad podría caerse. provoquer de graves blessures ou la mort.
- Page 27 PASO 14 PASO 10 Insertar un EXCÉNTRICO DE CORREDERA (10A) en los LADOS Fije la RIOSTRA (I) a la BASE (M) y al FONDO (F). Pase doce DE CAJÓN (D12 y D13). TORNILLOS NEGROS DE CABEZA GRANDE de 14 mm (1S) a Fije un CAJÓN DERECHO (35GC) al LADO DERECHO DE CAJÓN (D12) través de los SOPORTES sujetados a la RIOSTRA y la BASE y en y un CAJÓN IZQUIERDO (35GD) al LADO IZQUIERDO DE...
- Page 28 Step WARNING Please use your furniture correctly and safely. Improper use can cause safety hazards, or damage to your furniture or household items. Carefully read the following safety information. Death or serious injury may occur when children climb on audio and/or video equipment furniture. A remote control or toys placed on the furnishing may encourage a child to climb on the furnishing and as a result may tip over onto the child.
- Page 29 AVERTISSEMENT Prière d'utiliser le mobilier à bon escient et avec prudence. Une mauvaise utilisation peut être à l'origine de risques d'accident ou peut endommager le mobilier et les articles ménagers. Lire attentivement l'information suivante sur la sécurité. La mort voire de graves blessures peuvent se produire lorsque des enfants grimpent sur le meuble audio et/ou de matériel vidéo.
- Page 30 ADVERTENCIA Por favor use el mobiliario correcta y seguramente. El mal uso puede causar riesgos de seguridad o daño a las unidades o artículos domésticos. Lea cuidadosamente la siguiente información de seguridad. Pueden suceder lesiones graves o la muerte cuando los niños se suben en los muebles de equipo de audio y/o video. Un control remoto o juguetes colocados en el mueble pueden alentar a un niño a subirse en el mueble y como resultado puede derribarse sobre el niño.
- Page 31 5-YEAR LIMITED WARRANTY So, how did it go? 1. We provide limited warranty coverage to the original purchaser of this product for a period of fi ve years from the date of purchase against defects in materials or Set a world record for speed? workmanship of furniture components.
Need help?
Do you have a question about the Harvey Park 414986 and is the answer not in the manual?
Questions and answers