
Related Manuals for ipf electronic opti-check


Summary of Contents for ipf electronic opti-check
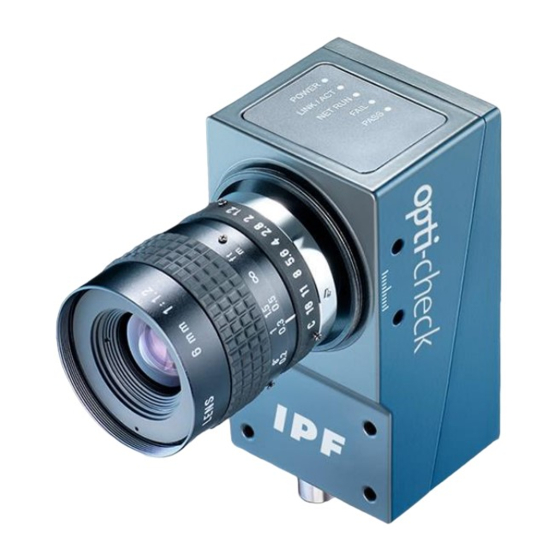
- Page 1 Kurzanleitung DEUTSCH opti-check Quick Start Guide ENGLISH opti-check Guide d‘installation rapide FRANÇAIS opti-check...
- Page 2 Seite page www.ipf.de page Aktuelle Software und technische Dokumentationen DE … 3 Latest software version and technical documentation EN … 11 Dernière version du logiciel et documentation technique FR … 19...
-
Page 3: Wichtige Sicherheitshinweise
Um eine optimale Störsicherheit zu erreichen, wird der Einsatz von abgeschirmten Kabeln empfohlen! Die entsprechenden Kabel können von ipf electronic gmbh bezogen werden. Das Gerät ist eine Einrichtung der Klasse Detaillierte Sicherheitshinweise finden Sie in der A (DIN EN 55022:2011). Er kann im Technischen Dokumentation, Kapitel 3. -
Page 4: Installation Der Software
(OC538 [1 /3/4/5/D/E] XX; OC539 [1/2/3/4/5/C/D/E] XX) (OC538 [3/5/E] XX; OC539 [2/3/5/C/E] XX) * Arbeitsabstände > 400 mm möglich Installation und Timing Schliessen Sie opti-check an die Spannungsversorgung an (Anschlusskabel 12-polig). Verbinden Sie opti-check mit der Ethernet-Schnittstelle Ihres Computers. 4 4 DE... - Page 5 Die Dauer der Ausgabesignale und der Ausgabezeitpunkt werden per Software eingestellt und hängen vom aktuellen Job ab. Ethernet-Verbindung Starten Sie die Application Suite . opti-check und Ihr PC HINWEIS müssen sich im gleichen Netzwerk befinden. Per Default Um Störungen des ist die Verwendung von DHCP aktiviert.
- Page 6 Button stellen Sie eine Verbindung mit dem VERBINDEN gewählten opti-check her. Die Bildanzeige erfolgt über Livebilder von opti-check oder Bilder von PC (Musterbilder). Wählen Sie Ihre gewünschte Bildquelle. Nutzen Sie den Button Bildanzeige starten, falls kein Livebild zu sehen ist.
- Page 7 Deutsch Hinzufügen von Merkmalsprüfungen Nun bestimmen Sie, welche Merkmale des Objektes geprüft werden sollen. Im Parametrierbereich rechts befindet sich der Button zur Einbindung neuer Merkmalsprüfungen. Mit dem Button fügen Sie eine Merkmalsprüfung zu HINZUFÜGEN Ihrem Job hinzu. Da jede Prüfaufgabe Toleranzen bezüglich der Lage des Prüfobjekts aufweist, beginnen die meisten Jobs mit einer Lagenachführung.
- Page 8 (nicht OC5381XX / OC5391XX) Eingaben über die Prozessschnittstelle (nicht OC5381XX / OC5391XX) Konfiguration Web-Interface 4. Gerät aktivieren Nun können Sie opti-check aktivieren. Die Application Suite zeigt Ihnen die aktuelle Statistik jeder Merkmalsprüfung, die gesamte Auswertung und Live-Bilder an. 8 8 DE...
- Page 9 Deutsch Übersicht Merkmalsprüfungen (geräteabhängig) Lagenachführung Lagenachführung Lagenachführung Lagenachführung Lagenachführung an Konturen an Kanten am Kreis an Textzeile Geometrie Abstand Kreis Winkel Kanten zählen Punktposition Kantenverlauf Merkmalsvergleich (Monochrom / Farbe) Konturpunkte Konturvergleich Flächengrösse Flächen zählen Mustervergleich zählen Helligkeit Kontrast Farbbestimmung Farbanordnung Identifikation (Monochrom / Farbe) Barcode Matrixcode...
- Page 10 Mein Gerät befindet sich nach dem Start der Application Suite nicht in der Auswahlliste? 1. Prüfen Sie, dass die Stromversorgung von opti-check korrekt angeschlossen ist. 2. Stellen Sie sicher, dass Ihr PC und opti-check im selben Netzwerk verbunden sind. 3. Prüfen Sie die Netzwerkeinstellungen des PCs, insbesondere die IP-Adresse und die Subnetzmaske.
-
Page 11: Important Safety Instructions
English Important safety instructions WARNING! ATTENTION! opti-check emits bright, pulsed light The device may become very warm during (Risk group 1 or 0 for devices with operation. High temperatures may damage infrared illumination). the device. You must ensure that any heat... -
Page 12: Software Installation
(OC538 [1 /3/4/5/D/E] XX; OC539 [1/2/3/4/5/C/D/E] XX) (OC538 [3/5/E] XX; OC539 [2/3/5/C/E] XX) * Working distances > 400 mm possible Installation and timing Connect the opti-check to the power supply (12-pin connector cable). Connect the opti-check to your computer via its Ethernet port. 12 12 EN... -
Page 13: Ethernet Connection
The duration of the output signals and the time of output are adjusted by software and depend on the current job. Ethernet connection Start the Application Suite . The opti-check and your PC NOTE must be connected to the same network. By default, the To avoid network use of DHCP is enabled. - Page 14 To implement reliable inspection with the opti-check, the features to be inspected must be clearly visible. Set the image focus with an inbus key on the opti-check installed at the testing site. The corresponding inbus screw can be found on the LED panel.
- Page 15 English Add new feature checks Now you can determine which features of the object to be checked. The command to link new feature checks is located in the right hand corner of the parameter area. With the button, you can create a new feature check for your job. As each inspection process has tolerances with regard to the position of the test object, most jobs begin with part location.
-
Page 16: Activate Device
Inputs via the process interface (excluding OC5381XX / OC5391XX) Configuration web interface 4. Activate device You can now activate opti-check. The Application Suite displays the current statistics of each feature check, the entire evaluation and live images. 16 16 EN... - Page 17 English Overview feature checks (device dependent) Part location Part location Part location Part location Part location on contours on edges on circle on text line Geometry Distance Circle Angle Count edges Point position Edge characteristics Feature comparison (monochrome / color) Count Contour Area size...
- Page 18 Instructions on commissioning of the Ethernet interface To use opti-check in your network, you must assign the device a unique IP address. The default factory configuration is: 1. If your network has a DHCP server, the IP address will request from that server.
-
Page 19: Instructions De Sécurité Importantes
Français Instructions de sécurité importantes ALERTE ! ATTENTION ! opti-check émet de la lumière très claire L’appareil peut devenir très chaud pulsée ( groupe de risque 1 ou 0 pour les pendant le fonctionnement. L’appareil appareils à lumière infrarouge ). -
Page 20: Installation Du Logiciel
(OC538 [3/5/E] XX; OC539 [2/3/5/C/E] XX) * Distances de travail > 400 mm possible Installation et synchronisation Raccordez opti-check à l‘alimentation électrique ( câble de raccordement 12 pôles ). Reliez opti-check au port Ethernet de votre ordinateur. 20 20 FR... - Page 21 Les durées du signals de sortie et le déclenchement de sortie sont réglés via le logiciel et dépendent du programme actuel. Liaison Ethernet Démarrez l‘ Application Suite . opti-check et votre PC REMARQUE doivent se trouver sur le même réseau. Par défaut, Pour éviter des...
- Page 22 , vous allez vous connecter au CONNECTER opti-check sélectionné. L‘affichage de l‘image s’effectue par Image en direct de opti-check ou Images du PC ( exemple d‘image ). Sélectionnez la source d‘image souhaitée. Utilisez le bouton Démarrer l‘affichage en cas d‘absence d‘image en direct.
- Page 23 Français Contrôler les caractéristiques Lors de cette étape, les caractéristiques à inspecter sont réunis et paramétrés. ouvre la boîte de dialogue Nouvelle inspection AJOUTER des caractéristiques. Ici une liste de toutes les inspections des caractéristiques disponibles vous est proposée. Puisque chaque processus de contrôle présente des tolérances de positionnement de l’objet, la plupart des programmes commencent par une restitution de la position.
- Page 24 L‘entrée passée à l‘interface processus ( excepté OC5381XX / OC5391XX ) Configuration de l‘interface Web 4. Activer l’appareil Vous pouvez maintenant activer opti-check. Application Suite affiche les statistiques actuelles de chaque caractéristique, l’ensemble de l’évaluation et des images en direct.
- Page 25 Français Aperçu des inspections des caractéristiques ( dépend de l‘appareil ) Repositionnement Repositionnement Repositionnement Repositionnement Repositionnement sur sur les contours sur les bords sur le cercle la ligne de texte Géométrie Distance Cercle Angle Comptage Position Contrôle des bords du point de bords Comparaison des caractéristiques ( monochrome / couleur ) Compter les points...
- Page 26 Information pour la mise en service de l‘interface Ethernet Pour pouvoir utiliser opti-check dans votre réseau, vous devez affecter une adresse IP unique à l’équipement. La configuration suivante est préréglée en usine : 1. Si vous avez intégré un serveur DHCP dans votre réseau, ce serveur demandera l’adresse IP.
- Page 27 Änderungen im Sinne des technischen Fortschritts sowie eventuelle Irrtümer vorbehalten. Die ganze oder auszugsweise Verviel fältigung dieses Dokuments ist nur mit vorheriger schriftlicher Genehmigung der ipf electronic gmbh zulässig. Revisions in the course of technical progress and any errors reserved.
- Page 28 Kalver Str. 25-27 DE-58515 Lüdenscheid Germany www.ipf.de...
Need help?
Do you have a question about the opti-check and is the answer not in the manual?
Questions and answers