Advertisement
Quick Links
Date Code Label
Here
Owner's Manual
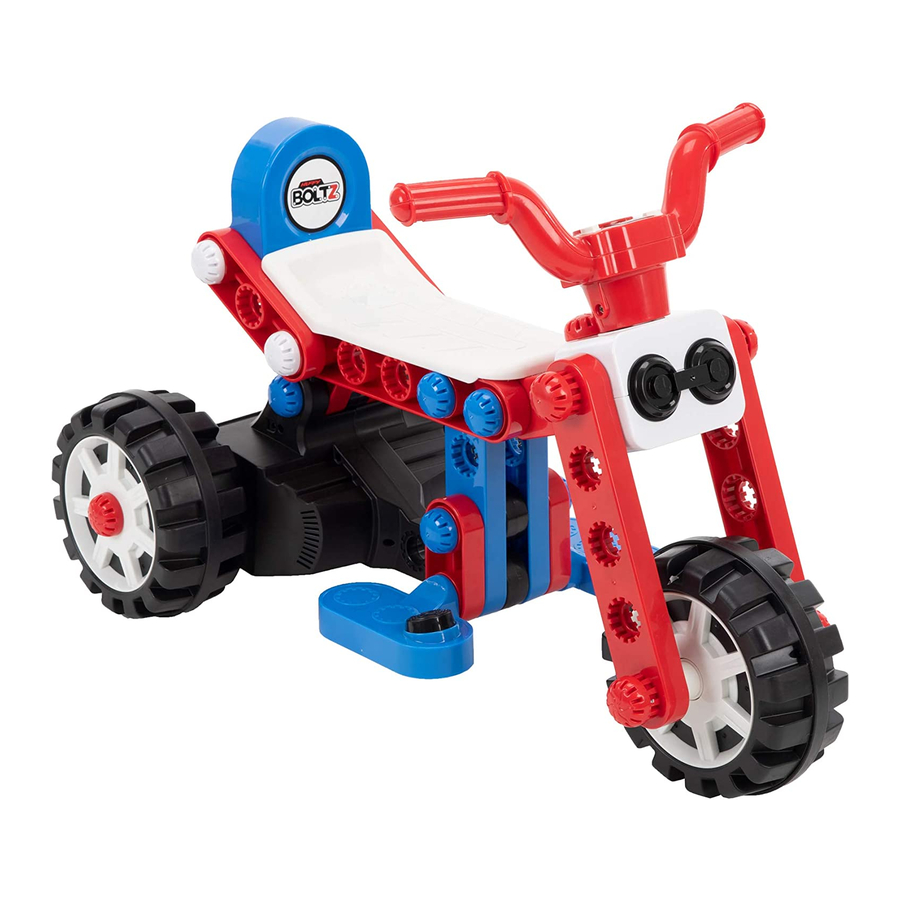
BOLTZ Battery Ride On
* Colors may vary
* Los colores pueden variar
* Les couleurs peuvent être différents
Read Supplied Safety and Warnings Booklet before
using this product!
¡Lea el folleto de seguridad y advertencias antes de
usar este producto!
Lire la brochure des consignes de sécurité et des mises
en garde avant toute utilisation de ce produit!
H-ERO-Boltz Assy TRI 03-12-20
for
m0699
Advertisement

Subscribe to Our Youtube Channel
Related Manuals for Huffy BOLTZ


Summary of Contents for Huffy BOLTZ
- Page 1 H-ERO-Boltz Assy TRI 03-12-20 Date Code Label Here Owner’s Manual BOLTZ Battery Ride On * Colors may vary * Los colores pueden variar * Les couleurs peuvent être différents Read Supplied Safety and Warnings Booklet before using this product! ¡Lea el folleto de seguridad y advertencias antes de...
- Page 2 WARNINGS: • ADULT ASSEMBLY REQUIRED. • ONLY THESE THREE CONFIGURATIONS ARE TO BE ASSEMBLED AND RIDDEN. Failure to follow these exact instructions for these three assemblies may result in serious injury. • Make sure ALL fasteners are TIGHT before each ride. ADVERTENCIAS: •...
- Page 3 How to Operate your Boltz (See Yellow Section) Cómo manejar tu Boltz (Voir les Pages Jaunes) Comment faire fonctionner votre Boltz (Ver Páginas Amarillas) Additional Tool Needed: Philips Screwdriver Herramienta adicional necesario: Destornillador Philips Outil supplémentaire nécessaire : tournevis Philips WARNINGS: •...
- Page 4 Parts Assembly / Lista de partes / Liste des pièces...
- Page 5 Parts Assembly / Lista de partes / Liste des pièces...
- Page 52 FINAL ASSEMBLY EL ENSAMBLAJE FINAL L’ASSEMBLAGE FINAL...
- Page 53 OPERATION FUNCIONAMIENTO FONCTIONNEMENT STEPS: • Press Foot Switch (02) to move Forward. • Release Foot Switch - Motor friction will gradually stop vehicle. PASOS: • Presione el interruptor de pedal (02) para avanzar. • Libere el interruptor de pedal. La fricción del motor detendrá gradualmente el vehículo. ÉTAPES : •...
- Page 54 CHARGING THE DRIVE BATTERY CARGA DE LA BATERÍA DE TRACCIÓN CHARGEMENT DE LA BATTERIE D’ENTRAÎNEMENT IMPORTANT! Before using the unit for the first time the battery needs to be charged for at least 8 to 12 hours - no more than 20 hours. Only an adult who has read and understands the safety warnings should handle, charge or recharge of the battery.
- Page 55 STEPS: Locate Charging Port Plug Charger plug into unit Charging Port. Plug Charger into Wall outlet When battery is fully charged, un-plug charger from the wall outlet and disconnect from charger port. NOTE: • The charger may feel warm during the charging. If excessively hot, unplug and replace. •...
- Page 56 OR TEL: 1 800 872 2453 (US) rápido, visite: OU appelez le 1 800 872 2453 (CANADA) www.huff ybikes.com/ O LLAME AL TEL: 800 1 HUFFY 1 For e-mail: www.huff ybikes.com/contact (800 1 48339 1) Pour communiquer par courriel : huff...
Need help?
Do you have a question about the BOLTZ and is the answer not in the manual?
Questions and answers