Advertisement
Table of Contents
- 1 Table of Contents
- 2 User and Battery Warnings
- 3 Charging Drive Motor Warnings
- 4 Radio Frequency
- 5 Parts List
- 6 Vehicle Assembly
- 7 Operation
- 8 How to Operate Your Vehicle
- 9 General
- 10 Charging the Drive Battery
- 11 Battery Replacement, Disposal and Storage
- 12 Troubleshooting
- 13 Limited Warranty
- Download this manual
Owner's Manual
for
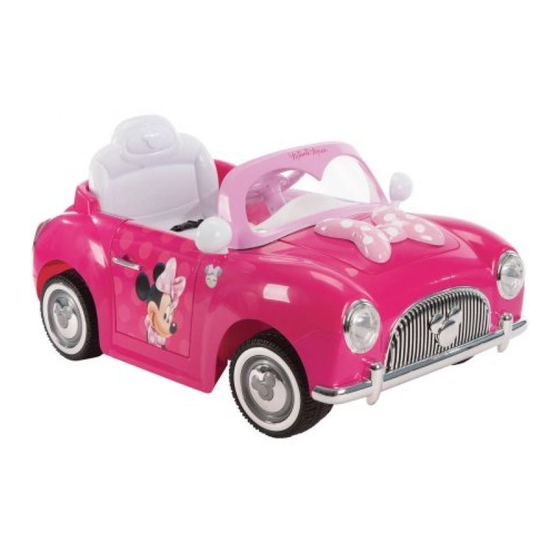
Disney Ride On
This manual contains important safety, assembly, operation
and maintenance information.
Please read and fully understand this manual
before operation.
Save this manual for future reference.
Date Code Label
Here
m0355
BC
H-Minnie-Rideon EN 051716
Copyright Huffy Corporation 2016
Advertisement
Table of Contents

Related Manuals for Huffy Disney Ride On


Summary of Contents for Huffy Disney Ride On
- Page 1 Owner’s Manual Disney Ride On This manual contains important safety, assembly, operation and maintenance information. Please read and fully understand this manual before operation. Save this manual for future reference. Date Code Label Here m0355 H-Minnie-Rideon EN 051716 Copyright Huffy Corporation 2016...
-
Page 2: Table Of Contents
Owner’s Manual Index Safety and Warnings • User and Battery Warnings ..............3-4 • Charging Drive Motor Warnings ............5 • Radio Frequency ................... 6 Assembly • Parts List ....................7 • Vehicle Assembly ..................8-9 Operation • How to Operate your Vehicle ..............10 Maintenance and Service •... -
Page 3: User And Battery Warnings
WARNINGS Before using the vehicle the child must understand the controls and safety issues. They must also demonstrate the capability to handle the vehicle and operate its con- trols. It is the responsibility of the adult to educate the child, determine if they are fit to operate the vehicle, and supervise use. - Page 4 WARNINGS - continued • Do not drive into fixed objects, which may cause the wheels to spin, causing the mo- tor to overheat. • Do not drive in very hot weather, components may overheat. • Do not allow water or other liquids to come in contact with the battery or other elec- tric components.
-
Page 5: Charging Drive Motor Warnings
WARNINGS - Charging the Drive Motor Battery The following safety hazards may result in serious injury or death to the user of the vehicle: • Use of a battery or charger other than the supplied rechargeable battery and charger may cause a fire or explosion. Only use the sup- plied rechargeable battery (or suitable replacement) and charger with the vehicle. -
Page 6: Radio Frequency
Radio Frequency Information (charger/adapter) CAUTION: Changes or modifications to this unit not expressly approved by the party responsible for compliance could void the user’s authority to operate the equip- ment. This device (charger/adapter) complies with Part 15 of the FCC Rules. Operation is subject to the following two conditions: (1) this device may not cause harmful interference, and (2) this device must accept any interference received, including interference that may... -
Page 7: Parts List
Parts List Desc. QTY No. Desc. Desc. Front Wheel Steering Wheel Charger Drive Wheel Windshield Drive Motor Side Mirrors Seat Washer... -
Page 8: Vehicle Assembly
Assembly STEP 1: Install the Steering Wheel: • With Steering Wheel facing forward, connect the steering wheel wire plug to the plug ex- Car body hole tending out of the car body hole. • Put the connected plugs and wires down into the car body hole. - Page 9 Assembly STEP 4: Install the Front Wheels: 1. Remove axle protection caps from axles. (Ensure washer is on axle) 2. Attach both Front wheels by fitting wheels fully onto the Axle while pushing in the center hub-cap button until the wheels SNAPS into place. •...
-
Page 10: Operation
Operation Open and close door: • Pull inside Latch of the door and push open. • Pull inside Latch of the door and pull closed. Power on: • Press the Power Switch button to turn unit • Move the Shift Lever to FORWARD to go forward when the Foot Switch is pressed. -
Page 11: General
Maintenance The vehicle should be checked for damage, missing or badly worn parts before each use. • Check the tightness of the fasteners before each use. • Check the tightness of the wheels: • Note: If the drive wheel is not tight, it will not engage the gears and the vehicle will not run. -
Page 12: Charging The Drive Battery
Drive Battery Charging Interval and Time IMPORTANT! Check the drive battery and charger (supply cord, connector) for wear and damage before charging. Do not charge the battery if damage has occurred. Only replace with the same type 6V rechargeable battery and charger supplied by the manufacturer. •... -
Page 13: Battery Replacement, Disposal And Storage
Drive Battery Replacement and Disposal The drive battery will eventually lose the ability to hold a charge. Depending on the amount of use, and varying conditions, the battery should operate for one to three years. Follow these steps to replace and dispose the battery: 1. -
Page 14: Troubleshooting
Troubleshooting Guide: Problem Possible Cause Solution Vehicle does not run Battery low on power Recharge battery (see Battery: Recharge interval and time) Thermal fuse has tripped Let Fuse reset (approx. 5 minutes) Battery connector or wires are Check that the battery connectors are rmly loose plugged into each other. -
Page 15: Limited Warranty
Vehicle other than for its intended purpose. How do you get service? Contact Huffy Consumer Service. See included list for Customer Contact information. This product meets ASTM F963 and CPSIA requirements for electric... - Page 16 WARNING: ALWAYS WEAR YOUR HELMET WHEN RIDING THIS PRODUCT! • Helmet should sit level on your head and low on your forehead • Adjust the strap sliders below the ear on both sides. • Buckle the chin strap. Adjust strap until it is snug. •...
Need help?
Do you have a question about the Disney Ride On and is the answer not in the manual?
Questions and answers