Table of Contents
Advertisement
Perfect 16
®
Medical-Grade HVAC Air Filtration System
Installation Manual
Features
• High-efficiency: close to 100% removal of pollution particles ≥ 0.3 microns
• Low pressure drop: 0.18 to 0.22 inch w.g. at rated airflow
• Low maintenance: up to 3 year filter life
• Safe: produces no ozone and no ions
• Green: fully insulated housing
• Reliable: lifetime warranty
Advertisement
Table of Contents

Related Manuals for IQAir Perfect 16


Summary of Contents for IQAir Perfect 16
- Page 1 Perfect 16 ® Medical-Grade HVAC Air Filtration System Installation Manual Features • High-efficiency: close to 100% removal of pollution particles ≥ 0.3 microns • Low pressure drop: 0.18 to 0.22 inch w.g. at rated airflow • Low maintenance: up to 3 year filter life •...
-
Page 2: Table Of Contents
Before supply plenum Cutting Round Openings into Panels with Hole Cutting Tool................Page 8 Panel selection Insulation cutting Collar attachment Disassembling the Perfect 16 Frame ..........................Page 10 Frame deconstruction Frame reconstruction Filter Replacement Instructions ............................Page 12 Performance Data..................................Page 13 Usage v. Resistance Resistance v. -
Page 3: Product Data
Application The Perfect 16 is a high-performance air cleaning system that connects to the return or supply air duct of a forced air system. This medical-grade air filtration system has been designed to provide the highest possible air cleaning rate at the lowest possible pressure drop for residential and commercial forced air systems (HVAC). -
Page 4: Residential Installation Instructions
Attach ducting. For duct connection, follow the local installation codes. If the Perfect 16 system is to be connected directly to the furnace, remove all filters and secure the cabinet via panel from inside to the furnace using sheet metal screws. -
Page 5: Residential/Commercial Installation Examples
Residential/Commercial Installation Examples Up-Flow Furnace Up-Flow Furnace (5 ton application) Filter system is installed vertically and return air enters Filter system is installed vertically and return air enters the furnace side inlet (up to 4 ton application). the furnace side inlet (5 ton application). Up-Flow Furnace Down-Flow Furnace Filter system is installed horizontally beneath the furnace. -
Page 6: Commercial Installation Instructions
When positioning the system, ensure that “Dirty Air In” is in your air inlet. Attach ducting. For duct connection, follow the local installation codes. If the Perfect 16 system is connected directly to the air handler, remove all filters and 5. Attach ducting secure the cabinet via panel from inside to the air handler using sheet metal screws. -
Page 7: Commercial Installation Examples
Important note: It is not recommended to install the Perfect 16 where airflow or ambient temperature exceeds 149°F (65°C). Supply Duct The Perfect 16 can be installed on supply ducts, provided the airflow of the duct is 2000 cfm or less. Balance volume dampers and/or registers as necessary. Supply Duct Branch The Perfect 16 can be installed on supply duct branches, provided the airflow to the branch is 2000 cfm or less. -
Page 8: Cutting Round Openings Into Panels With Hole Cutting Tool
1. Remove the panel with sticker “Cut This Panel for Duct 2. For round openings, adjust the cutting tool to the right position Connection” from the Perfect 16 system. Detach the insulation and fix it in the center hole of the panel. - Page 9 DP 1010. 11. Stick the tape tightly to the insulation. Slice or notch the tape 12. Attach the connection panel again to the Perfect 16 system, to secure it smoothly to a round opening. using the supplied TX30 Stainless Steel Screws. The screws are included with the panel.
-
Page 10: Disassembling The Perfect 16 Frame
Disassembling the Perfect 16 Frame The Perfect 16 can be disassembled to fit through smaller openings when space or size may be an issue. 1. Remove all of the panels by removing all eight screws from 2. Remove all four filters. - Page 11 Disassembling the Perfect 16 Frame 1. Pull down the insulation and carefully tap the top into the 2. Reinstall the insulation strips into the grooves. bottom. 3. Reinstall the panels by replacing all eight screws on each panel. 4. Leave the filter access panel off until after all four filters are replaced.
-
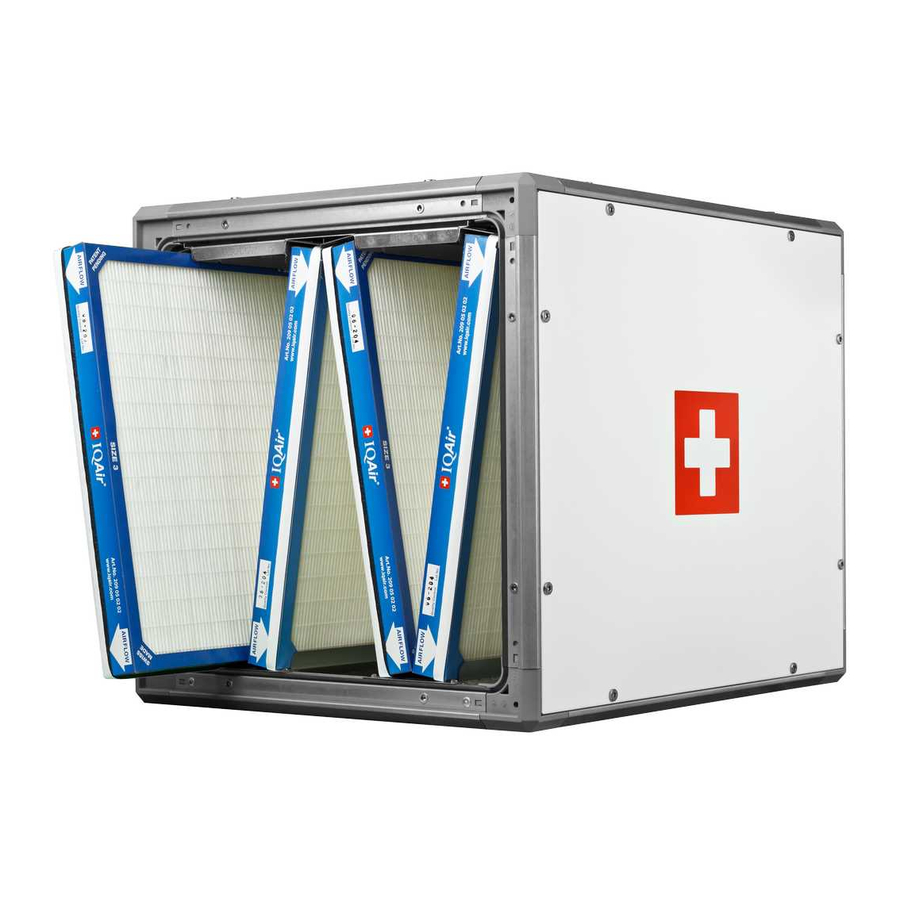
Page 12: Filter Replacement Instructions
Perfect 16 Filter Replacement Instructions 1. Access to replace filters is gained from the side panel with the 2. Remove all eight finger screws. Turn screws counter clockwise. finger screws attached to it. 3. Remove access panel. 4. Remove filters starting from the top. Dispose or recycle used filters per local laws or regulations. -
Page 13: Performance Data
Performance Data Usage vs. Resistance Average home based on 50% duty cycle ID-2225 at 1200 cfm ID-2530 at 2000 cfm Filter Usage in H in H 0.18 0.22 3 months 0.18 0.22 6 months 0.19 0.23 9 months 0.20 0.24 12 months 0.21 0.25... -
Page 14: Iqair Technical Support
North America (United States, Canada and Mexico) Our website www.iqair.com is available 24 hours per day and has answers for your most frequently asked questions. Technical Support is available from 8 a.m. - 4:30 p.m. PST Monday-Friday. Call 1-888-560-1020, or visit: www.iqair.com/support. -
Page 15: Notes
Notes Page 15... - Page 16 © 2013 The IQAir Group. All rights reserved. 208 04 01 01 | 130724_IQ_MA_P16_Installation_E...
Need help?
Do you have a question about the Perfect 16 and is the answer not in the manual?
Questions and answers