Table of Contents
Advertisement
Available languages
Available languages
Quick Links
Advertisement
Table of Contents

Related Manuals for AllPondSolutions CUP-311


Summary of Contents for AllPondSolutions CUP-311
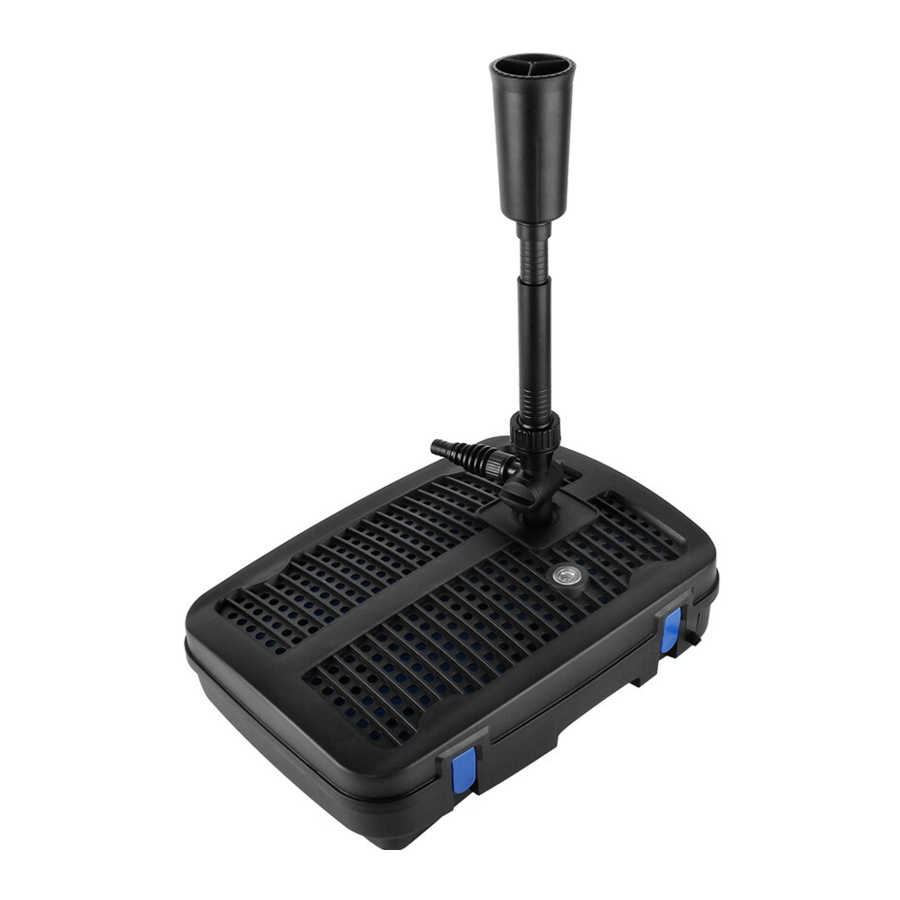
- Page 1 ALL-IN-ONE CUP-311 SMALL POND SYSTEM FOR PONDS UP TO 4000 LITRES BUILT IN 11W UV CLARIFICATION 2500 LITRES PER HOUR PUMP CLEAN AND CLEAR WATER FOR HEALTHY FISH QUICK RELEASE CASING FOR EASY MAINTENANCE INCLUDES COARSE FILTER FOAM AND BIOLOGICAL FILTER MEDIA...
- Page 2 Thank you for purchasing the CUP-311 All Pond Solutions all in one pond system. In this manual you will find details of how to set up your CUP-311 correctly as well as how to install the CUP-311 safely. Important!: Disconnect the mains electricity supply before attempting installation / maintenance of any kind.
-
Page 3: Box Contents
The CUP-311 comes complete with a generous supply of 3 core cable, however, should any additional cable be required then the use of an approved waterproof cable connector is essential. Please Ensure: • The power supply must be earthed and fused at 3amps •... -
Page 4: Parts Diagram
PARTS DIAGRAM 6 UV UV CLARIFIER UV Body UV Helix UV Quartz UV Quartz Nut Quartz O-Ring 1 Quartz Connector Quartz O-Ring 2 UV Bulb UV Ballast Ballast Latch 12 PUMP Pump Casing Impeller Rubber Impeller Impeller O-Ring Shaft Pump Motor Hosetail Outlet Pump Adaptor Hosetail Elbow... -
Page 5: Installation And Use
4) Attach the desired fountain attachments / outlets to the CUP-311 outlet connection point (see parts diagram for fountain assembly). 5) Decide on the position of the CUP-311 in your pond and check that the power cable will reach your power supply. -
Page 6: Maintenance
All parts should be cleaned using pond water clear from your pond. 1) Open the CUP-311 by unfastening the casing clips (parts 4) and removing the filter casing (part 3). 2) Remove the filter baskets (parts 8) from the CUP-311 and clean through the included media and coarse foam (part 5). -
Page 7: Troubleshooting
Please remember UV bulbs for use in ponds should be replaced every 12 months. NO WATER FLOW / REDUCED WATER FLOW If you find that the CUP-311 has reduced or no water flow follow these troubleshooting steps: 1) Perform full maintenance as per the MAINTENANCE section of this manual –... -
Page 8: Specifications
If you require support for operation of your CUP-311, replacement parts or if your CUP-311 develops a fault during the warranty period, please contact the supplier of the CUP-311. Please be aware that parts including bulbs, impellers, shafts, magnets and rubbers are not covered by your warranty and a charge may be required for replacements of these. - Page 9 Merci d’avoir acheté le système de bassin tout-en-un CUP-311 All Pond Solutions. Vous trouverez dans ce manuel des détails sur la façon de régler correctement votre CUP-311 mais également comment installer le CUP-311 en toute sécurité. SÉCURITÉ Important ! Débranchez les alimentations électriques principales avant de procéder à...
-
Page 10: Contenus De L'emballage
ÉLECTRIQUE Le CUP-311 est livré avec suffisamment de câbles de raccordement à 3 conducteurs, cependant, si vous deviez avoir besoin de câble supplémentaire, l’utilisation d’un connecteur de câble étanche homologué est impératif. Merci de vous assurer : • Que l’alimentation électrique soit raccordée à la terre et protégée par des fusibles de 3 ampères. -
Page 11: Diagramme Des Pièces
DIAGRAMME DES PIÈCES 6 Clarificateur UV Corps UV Hélice UV Quartz UV Ecrou de Quartz UV Anneau Quartz 1 Connecteur de Quartz Anneau Quartz 2 Ampoule UV UV à Ballast Loquet du Ballast 12 POMPE Boitier de pompe Caoutchouc de pompe Roue Anneau de roue Tige... -
Page 12: Installation Et Utilisation
INSTALLATION ET UTILISATION 1) Ouvrez le CUP-311 en détachant les clips du boitier (pièce 4) et enlevez le boitier filtrant (pièce 3). 2) Enlevez les paniers filtrants (pièce 8) du CUP-311 et nettoyez le filtre inclus et la mousse rugueuse (pièce 5) avec un peu d’eau du bassin ( en étant éloigné... -
Page 13: Entretien
Toutes les pièces doivent être nettoyées en utilisant de l’eau propre de votre bassin. 1) Ouvrez le CUP-311 en détachant les clips du boitier (pièce 4) et enlevez le boitier filtrant (pièce 3). 2) Enlevez les paniers filtrants (pièce 8) du CUP-311 et nettoyez le filtre inclus et la mousse rugueuse avec l’eau du bassin (pièce 5) -
Page 14: Dépannage
Si le voyant UV au-dessus du boitier filtrant (pièce 3) ne s’allume pas, suivez ces étapes de dépannage : 1) Ouvrez le CUP-311 en détachant les clips du boitier (pièce 4) et enlevez le boitier filtrant (pièce 3). 2) Enlevez complètement la pompe (pièce 12) et le clarificateur UV (pièce 6) clairement du corps de filtre (pièce10). -
Page 15: Spécifications
DÉPANNAGE 2) Si vous trouvez que vous avez toujours un débit d’eau diminué voir plus de débit, Ouvrez le CUP-311 en détachant les clips du boitier (pièce 4) et enlevez le boitier filtrant (pièce 3). 3) Enlevez complètement la pompe (pièce 12) et le clarificateur UV (pièce 6) clairement du corps de filtre (pièce10). -
Page 16: Garantie
GARANTIE Votre système CUP-311 est garanti pendant 24 mois et couvre toutes les pièces électriques. Si vous avez besoin d’aide pour le fonctionnement de votre CUP-311, de pièces de remplacement ou si votre CUP-311 présente un défaut durant la période de garantie, merci de contacter le fournisseur du CUP-311. - Page 17 Grazie per aver acquistato il dispositivo filtrante per laghetti, All in one CUP-311 di All Pond Solutions. In questo manuale troverete tutte le istruzioni su come assemblare il CUP-311 e installarlo in modo sicuro. SICUREZZA IMPORTANTE: Staccare l’alimentazione elettrica prima dell’installazione o di qualsiasi tipo di manutenzione.
-
Page 18: Contenuto Della Confezione
COMPONENTI ELETTRICHE Il CUP-311 è dotato di un cavo 3 x 1 molto lungo, tuttavia, qualora fosse necessario del cavo aggiuntivo è essenziale l’utilizzo di un connettore per cavi impermeabile e omologato. Assicurarsi: • Che l'alimentazione elettrica sia messa a terra utilizzando un fusibile da 3 ampere. -
Page 19: Schema Dei Componenti
SCHEMA DEI COMPONENTI 6 CHIARIFICATORE UV Involucro UV Spirale UV Quarzo UV Dado per quarzo UV Guarnizione quarzo 1 Connettore per quarzo Guarnizione quarzo 2 Lampadina UV Alimentatore UV Fermo alimentatore 12 POMPA Alloggiamento pompa Gommino per girante Girante Guarnizione girante Albero motore Motorino della pompa Uscita portagomma... -
Page 20: Funzionamento
INSTALLAZIONE E UTILIZZO 1) Aprire il CUP-311 sganciando le clip di chiusura (n. 4) e rimuovere il coperchio del filtro (3). 2) Rimuovere i cestelli filtranti (8) dal CUP-311 e pulire i vari elementi inclusi, compresa la spugna (5) con un po' d'acqua di stagno (non direttamente nello stagno). -
Page 21: Manutenzione
Tutte le parti devono essere lavate utilizzando acqua pulita dello stagno. 1) Aprire il CUP-311 sganciando le clip di chiusura (4) e rimuovere il coperchio del filtro (3). 2) Rimuovere i cestelli filtranti (8) dal CUP-311 e pulire le varie parti incluse, compresa la spugna (5). -
Page 22: Risoluzione Dei Problemi
Se la spia luminosa dell’UV posta sulla parte superiore del coperchio del filtro non si accende, seguire le seguenti procedure: 1) Aprire il CUP-311 sganciando le clip di chiusura (4) e rimuovere il coperchio del filtro (3). 2) Rimuovere completamente la pompa (12) e il chiarificatore UV (part 6) dal contenitore del filtro (10). - Page 23 CUP-311 per la fornitura dii pezzi di ricambio. Se nessuna delle procedure di cui sopra risolve il problema, o se si ha bisogno di pezzi di ricambio per il CUP-311, si prega di contattare il venditore. SPECIFICHE...
-
Page 24: Garanzia
GARANZIA Il dispositivo CUP-311 viene fornito con una garanzia di 24 mesi che copre tutte le parti elettriche. Se avete bisogno di supporto per il funzionamento del vostro CUP-311, di pezzi di ricambio o se il vostro CUP-311 manifesta malfunzionamenti durante il periodo di garanzia, si prega di contattare il venditore. - Page 25 • Asegúrese de que el CUP-311 se pone en funcionamiento solamente cuando está totalmente sumergido. • El sistema UV de CUP-311 tiene un apagado automático al abrirse la unidad para el mantenimiento o cambio de la bombilla UV. • En condiciones climáticas adversas, no deje el CUP-311 al aire libre ya que las heladas pueden dañar la unidad.
-
Page 26: Contenido De La Caja
ELECTRICIDAD El CUP-311 viene con un abundante suministro de cable tripolar, sin embargo, si se necesitara un cable adicional es esencial el uso de un conector de cable resistente al agua y aprobado. Por favor asegúrese de lo siguiente: • El suministro eléctrico debe estar conectado a tierra y con fusible de 3 amperios •... -
Page 27: Diagrama De Piezas
DIAGRAMA DE PIEZAS 6 Esterilizador UV UV Body UV Helix UV Quartz UV Quartz Nut Quartz O-Ring 1 Quartz Connector Quartz O-Ring 2 UV Bulb UV Ballast Ballast Latch 12 BOMBA Carcasa de la Bomba Caucho del Impulsor Impulsor Anillo-O del Impulsor Motor de la Bomba Salida del Extremo de Adaptador de Bomba... -
Page 28: Instalación Y Uso
INSTALACIÓN Y USO 1) Abra el CUP-311 aflojando los clips de la carcasa (piezas 4) y quite la carcasa del filtro (pieza 3). 2) Quite las cestas de filtrado (piezas 8) del CUP-311 y limpie los materiales filtrantes incluidos y la espuma gruesa (pieza 5) con agua del estanque (lejos de su estanque). -
Page 29: Mantenimiento
Todas las piezas se deben limpiar utilizando agua limpia de estanque de su estanque. 1) Abra el CUP-311 aflojando los clips de la carcasa (piezas 4) y quite la carcasa del filtro (pieza 3). 2) Quite las cestas de filtrado (piezas 8) del CUP-311 y limpie los materiales filtrantes incluidos y la espuma gruesa (pieza 5). -
Page 30: Solucionar Problemas
Si el indicador UV en la parte superior de la carcasa del filtro (pieza 3) no está iluminando, siga estos pasos para solucionar el problema: 1) Abra el CUP-311 aflojando los clips de la carcasa (piezas 4) y quite la carcasa del filtro (pieza 3). - Page 31 Su sistema CUP-311 viene con una garantía por 24 meses que cubre todas las piezas eléctricas.Si necesita ayuda para la operación de su CUP-311, piezas de recambio o si su CUP-311 tiene una avería durante el período de garantía, por favor póngase en contacto con el proveedor del CUP-311.Por favor, tenga en cuenta que las piezas incluidas bombillas,...
- Page 32 Vielen Dank für den Kauf des CUP-311 All Pond Solutions All In One Teich-Systems. In diesem Handbuch finden Sie Informationen über das korrekte Einrichten, Ihres CUP-311, sowie das sichere Installieren. SICHERHEIT WICHTIG: Trennen Sie die Stromnetzversorgung vor jedem Installations- bzw. Wartungsversuch.
- Page 33 ELEKTRISCHES Der CUP-311 wird komplett mit einem großzügigen Angebot von 3 Hauptkabeln geliefert, falls jedoch etwaige zusätzliche Kabel erforderlich sein sollten, dann ist die Verwendung eines zugelassenen wasserdichten Kabelsteckers unerlässlich. Bitte stellen Sie sicher: • Das Netzteil muss geerdet und mit 3 Ampere gesichert sein.
- Page 34 TEILE DIAGRAMM 6 UV-Klärer UV-Gehäuse UV-Helix UV-Quarz UV-Quartz-Nuss Quarz-O-Ring 1 Quarz-Verbindungsstück Quarz-O-Ring 2 UV-Lampe UV-Vorschaltgerät Vorschaltgerät-Verriegelung 12 PUMPE Pumpengehäuse Laufrad-Gummikappe Laufrad Laufrad-O-Ring Welle Pumpenmotor Schlauch-Outlet Pumpen-Adapter Schlauch-Kupplung Pumpe Filtergehäuse T-Outlet Gehäusebefestigung Brunnen-Adapter Schaumstoff Brunnen-Mutter UV-Klärer Brunnen-Rohr Brunnenkopf- Pumpe > UV-Stutze Verbindungsstück Filterkörbe Brunnenkopf 1...
- Page 35 6) Verkabeln Sie den CUP-311 zu Ihrem Hauptstromanschluss (siehe Abschnitt Elektrisches in diesem Handbuch) – SCHLIESSEN SIE DEN CUP-311 NOCH NICHT AN. 7) Setzten Sie den CUP-311 auf eine flache Oberfläche in Ihrem Teich. 8) Schalten Sie jetzt die Stromversorgung zu dem CUP-311an. GEBRAUCH...
-
Page 36: Wartung
2) Entfernen Sie die Filterkörbe (Teile 8) vom CUP-311 und reinigen Sie mit Hilfe des enthaltenen Media und Schaumstoffes (Teil 5). 3) Entfernen Sie die Pumpe (Teil 12) vom CUP-311 und reinigen Sie sie, einschließlich des Laufrads und der Welle (Teile 12-3, 12-5). -
Page 37: Fehlerbehebung
Bitte denken Sie daran, dass UV Lampen für den Einsatz in Teichen, alle 12 Monate ersetzt werden sollten. KEIN WASSERFLUSS/REDUZIERTER WASSERFLUSS Wenn Sie feststellen, dass der CUP-311 einen reduzierten oder keinen Wasserfluss produziert, befolgen Sie die folgenden Schritte zur Problembehebung:... -
Page 38: Technische Daten
Sie sich dann, zum Erhalt der Ersatzteile, an den Lieferanten Ihres CUP-311. Wenn keiner der obigen Tipps hilft Ihr Problem zu lösen, oder Sie Ersatzteile für Ihren CUP-311 benötigen, kontaktieren Sie bitte den Anbieter Ihres CUP-311. TECHNISCHE DATEN... -
Page 39: Gewährleistung
GEWÄHRLEISTUNG Ihr CUP-311-System wird mit einer 24-Monate-Gewährleistung, die alle elektrischen Teile umfasst geliefert. Falls Sie Unterstützung für den Betrieb Ihres CUP-311 oder Ersatzteile benötigen oder falls Ihr CUP-311einen Defekt während der Gewährleistungsperiode entwickelt, kontaktieren Sie bitte den Lieferanten des CUP-311.
Need help?
Do you have a question about the CUP-311 and is the answer not in the manual?
Questions and answers
how do i accsess impella