Table of Contents
Advertisement
Quick Links
Advertisement
Table of Contents

Related Manuals for Gaggia Milano La Reale


Summary of Contents for Gaggia Milano La Reale
- Page 1 I N S TA L L AT I O N A N D U S E...
- Page 2 First Edition Rev.00 REV. DESCRIPTION DATE SaGa Co f f e e S . p . A . Loc.Casona 1066 40041 Gaggio Montano (BO) Italy Tel +39 0534 7741 Fax +39 0534 774808 www.evocagroup.com...
-
Page 3: Table Of Contents
C O N T E N T S GENERAL INFORMATION EC DECLARATION OF CONFORMITY .....................1 SUBJECT AND PURPOSE OF THE MANUAL................1 USE AND STORAGE OF THE MANUAL ..................1 GRAPHICAL CONVENTIONS......................2 DEFINITIONS ............................3 STAFF QUALIFICATION ........................3 1.6.1 Trained operator ............................3 1.6.2 Qualified installer ............................ - Page 4 C O N T E N T S 3.3.3 Components that can be accessed after removing the front cover ........21 3.3.4 Components that can be accessed after removing the back panel ........21 3.3.5 Components that can be accessed after removing the cup warmer and upper cover ............................22 TECHNICAL CHARACTERISTICS ....................
- Page 5 C O N T E N T S I I I 5.6.3 Counters ..............................52 5.6.4 Setting the clock menu .........................54 5.6.5 Boiler temperature ..........................56 5.6.5.1. Espresso boiler temperature ......................56 5.6.6 Cup-warmer ..............................57 5.6.7 Lighting ...............................57 CLEANING AND MAINTENANCE DAILY MAINTENANCE........................59 6.1.1 Washing with detergent ........................59 6.1.2...
- Page 6 C O N T E N T S...
-
Page 7: General Information
C O N F O R M I T Y O F T H E M A N U A L A facsimile of the “EC Declaration of Conformity” The subject of this manual is the “La Reale” is shown below. professional espresso coffee machine by SaGa Coffee S.p.A. -
Page 8: Graphical Conventions
G E N E R A L I N F O R M AT I O N This Manual reflects the machine's status at the Warning time of its provision: the manufacturer reserves The text refers to warnings the right to update its contents with no obligation concerning operations of to update previous editions as well. -
Page 9: Definitions
G E N E R A L I N F O R M AT I O N 1 . 5 D E F I N I T I O N S 1 . 6 S TA F F Q U A L I F I C AT I O N Pursuant to the Machinery Directive 2006/42/ The personnel in charge of the machine's EC, the meanings of the definitions used in this... -
Page 10: Ec Marking
G E N E R A L I N F O R M AT I O N 1 . 7 E C M A R K I N G The machine has been designed and built in compliance with the following directives: - The Machinery Directive 2006/42/EC - The Low Voltage Directive 2014/35/EU - The Electromagnetic Compatibility Directive... -
Page 11: Warranty
G E N E R A L I N F O R M AT I O N 1 .9 WA R R A N T Y 1 .1 1 G E N E R A L S A F E T Y R E Q U I R E M E N T S With regard to the duration and operability of the warranty covering the machine and its individual... - Page 12 G E N E R A L I N F O R M AT I O N - While using the machine, the operator is - Only use appropriate products to clean the responsible for any third parties in the work machine and its various parts, and avoid any zone.
- Page 13 G E N E R A L I N F O R M AT I O N - The operator assigned to the machine's use must respect the current hygiene standards in the country where the machine is installed, and must make sure that the periodic cleaning and maintenance operations are properly carried out.
- Page 14 G E N E R A L I N F O R M AT I O N...
-
Page 15: Safety
S A F E T Y The machine is not intended for use by people 2 .1 U S E O F T H E M A C H I N E with reduced physical, sensory, or mental capabilities, or who do not have the necessary knowledge or experience, unless they are 2.1.1 Intended use supervised or are provided with appropriate... -
Page 16: Environmental Conditions
G E N E R A L I N F O R M AT I O N Warning 2 . 2 E N V I R O N M E N TA L C O N D I T I O N S The zone defined as the “operator's area”... -
Page 17: Electromagnetic Compatibility
G E N E R A L I N F O R M AT I O N 2 . 5 E L E C T R O M A G N E T I C 2 . 7 P R E S S U R I S E D PA R T S C O M PAT I B I L I T Y The pressurised parts that make up the machine's water/steam circuit and are subject... -
Page 18: Electrical System And Isolation From The Power Source
G E N E R A L I N F O R M AT I O N 2 . 8 E L E C T R I C A L S Y S T E M 2 .9 F O O D S A F E T Y A N D I S O L AT I O N F R O M The machine has been designed and built so as T H E P O W E R S O U R C E... - Page 19 G E N E R A L I N F O R M AT I O N Caution Caution The maintenance technician The operator must be is required to wear protective adequately trained for the gloves when performing machine's proper use, and must maintenance interventions upon always use caution to avoid internal parts if the machine has...
-
Page 20: Safety Symbols
G E N E R A L I N F O R M AT I O N 2 .1 1 S A F E T Y S Y M B O L S 2 .1 2 R E F E R E N C E S TA N D A R D S The parts of the machine that pose residual risks The referenced standards used for the machine's are marked with adhesive safety symbols to... - Page 21 G E N E R A L I N F O R M AT I O N - IEC/EN 60335-1-1: Household and similar electrical appliances – Safety – Part 1: General requirements - IEC/CEI 60335-2-75: Household and similar electrical appliances – Safety – Part 2: Particular requirements for commercial dispensing appliances and vending machines - EN 62233 (CEI 61-251): Measurement...
- Page 22 G E N E R A L I N F O R M AT I O N...
-
Page 23: Description
D E S C R I P T I O N 3 .1 M A C H I N E F U N C T I O N The machine is intended for the preparation of espresso coffee and hot beverages through the dispensing of hot water or steam. -
Page 24: Main Components
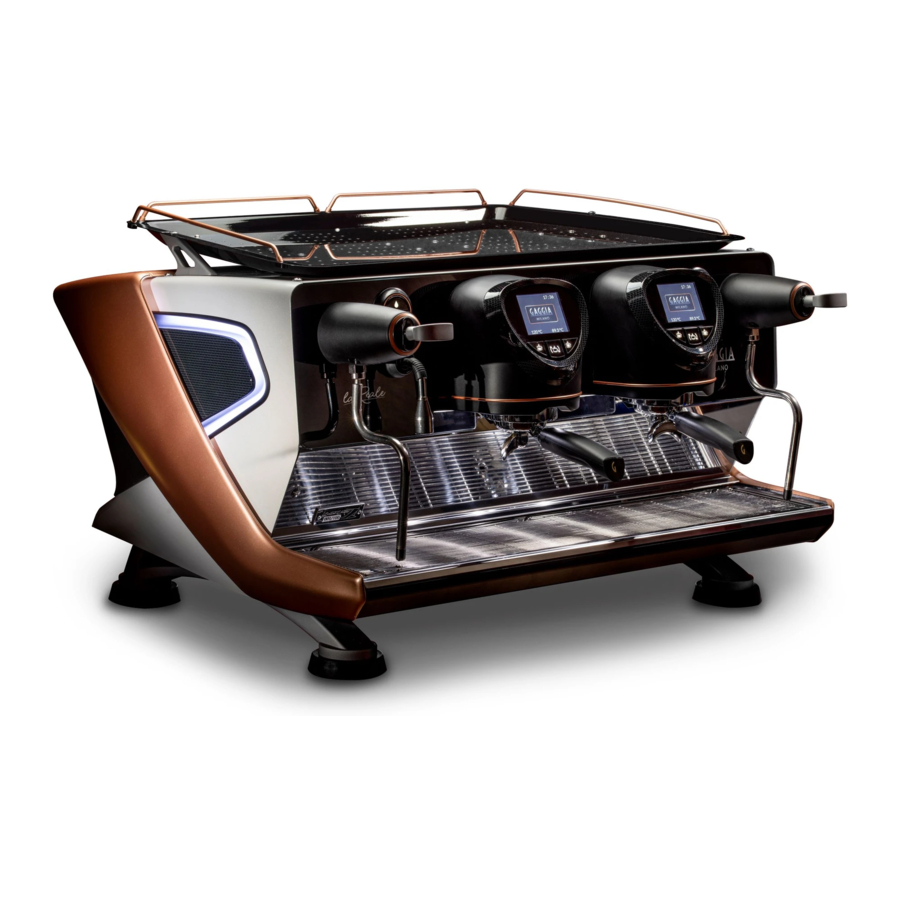
G E N E R A L I N F O R M AT I O N 3 . 2 M A I N C O M P O N E N T S Main switch Left steam nozzle Right steam nozzle Left steam dispensing lever Right steam dispensing lever Filter holder... - Page 25 G E N E R A L I N F O R M AT I O N L A R E A L E...
-
Page 26: Internal Components
G E N E R A L I N F O R M AT I O N 3.3.2 Components that can be accessed 3 . 3 I N T E R N A L C O M P O N E N T S after removing the LH side panel Authorised personnel only 3.3.1 Components that can be accessed... -
Page 27: Components That Can Be Accessed After Removing The
G E N E R A L I N F O R M AT I O N 3.3.3 Components that can be accessed 3.3.4 Components that can be accessed after removing the front cover after removing the back panel Authorised personnel only Authorised personnel only Solenoid valve for steam boiler charging Power supply... -
Page 28: Components That Can Be Accessed After Removing The Cup Warmer And Upper Cover
G E N E R A L I N F O R M AT I O N 3.3.5 Components that can be accessed Note after removing the cup warmer and This paragraph describes a upper cover machine with two espresso dispensing units. - Page 29 G E N E R A L I N F O R M AT I O N L A R E A L E...
-
Page 30: Technical Characteristics
G E N E R A L I N F O R M AT I O N 3 . 4 T E C H N I C A L C H A R A C T E R I S T I C S 2 UNITS 3 UNITS Dimensions (mm) -
Page 31: Handling And Installation
H A N D L I N G A N D I N S TA L L AT I O N 4.1.3 Instructions for disposing of the 4 .1 H A N D L I N G A N D packaging I N S TA L L AT I O N The packaging materials are environmentally... -
Page 32: Installation
G E N E R A L I N F O R M AT I O N - The ambient temperature must be between 4 . 2 I N S TA L L AT I O N 10° and 32°C (50°F and 90°F). - Do not install the machine outdoors. -
Page 33: Water Connection
G E N E R A L I N F O R M AT I O N 4.2.2 Water connection After positioning the machine properly, make the water connection: Authorised personnel only - Using the reinforced flexible hose supplied, connect the machine's water intake connector (1) to the water supply. -
Page 34: Electrical Connection
G E N E R A L I N F O R M AT I O N 4.2.3 Electrical connection Caution Authorised personnel only Connect the power cable to the electricity line using a plug; in The machine's electrical power supply can the case of fixed installation, be either single phase or three-phase. -
Page 35: Commissioning
G E N E R A L I N F O R M AT I O N 4.2.4 Commissioning Authorised personnel only Once installation has been completed, check that the machine is in proper working order: - turn on the water tap - switch on the circuit breaker upstream of the machine - set the main machine switch to (I) and make... - Page 36 G E N E R A L I N F O R M AT I O N Press the indicated button to access the Use the +/- buttons to set the desired espresso boilers' activation screen. temperature and turn the activation selector to its ON position.
-
Page 37: Use
U S E 5.1.2 Touch-screen display 5 .1 D E S C R I P T I O N O F T H E C O N T R O L S Each espresso dispensing unit has a touch screen display; when turned on, the display The operator has various types of controls shows the following: available for using and programming the... - Page 38 G E N E R A L I N F O R M AT I O N Indicates the activation of Button: opens the dose the espresso boiler's heating programming page element Button: opens the unit's espresso boiler on/off and Button: activates the espresso temperature programming unit's purging cycle...
-
Page 39: Espresso Dispensing Unit Buttons
G E N E R A L I N F O R M AT I O N 5.1.3 Espresso dispensing unit buttons Single/double short espresso dispensing Single/double long espresso dispensing Button: opens the screen for Manual espresso dispensing programming the time and ON/OFF day of the week (for automatic activation/shut off) -
Page 40: Steam Dispensing Lever
G E N E R A L I N F O R M AT I O N 5.1.5 Steam dispensing lever 5 . 2 D A I LY A C T I VAT I O N The two steam dispensing nozzles are controlled by the relative lever: 5.2.1 Turning on the machine (with machine off) -
Page 41: Turning On The Machine (With Machine Screensaver Active)
G E N E R A L I N F O R M AT I O N 5.2.2 Turning on the machine (with machine screensaver active) Visualisation of menu 1 with the machine in ECO mode. With the machine in standby, just touch the 5.2.4 Shutting off the machine touch-screen display or press any one of the The machine can be powered off completely or... -
Page 42: Espresso Dispensing
G E N E R A L I N F O R M AT I O N 5 . 3 E S P R E S S O D I S P E N S I N G Press the indicated button to select either the 1 or 2 cup dispensing mode. -
Page 43: Hot Water Dispensing
G E N E R A L I N F O R M AT I O N 5 . 4 H O T WAT E R D I S P E N S I N G The hot water is dispensed from the relative dispenser 3.2. -
Page 44: Steam Dispensing
G E N E R A L I N F O R M AT I O N Wait until the beverage has reached the desired 5 . 5 S T E A M D I S P E N S I N G temperature or emulsion level, then return the steam control lever to its central position to stop The steam nozzles are used to heat up... -
Page 45: Technical Menu
G E N E R A L I N F O R M AT I O N 5.6.1 Technical menu Barista Pro Technical Language Authorised personnel only Number of units Pre-infusion Tea+pump Sensitivity Charge+espresso Time-out for steam boiler filling Maintenance cycles Water filter Press the indicated button to access the Technical menu. - Page 46 G E N E R A L I N F O R M AT I O N Language Number of units For setting the number of coffee units on the The languages that can be set are: machine. The possible values are: •...
- Page 47 G E N E R A L I N F O R M AT I O N With the pre-infusion parameter enabled, pre- Sensitivity infusion programming can be set in seconds on Regulates the sensitivity of the probe that both units for single/double short doses, single/ detects the water level in the steam boiler.
- Page 48 G E N E R A L I N F O R M AT I O N Charge+espresso Set the maximum operating time for the steam The steam boiler of the machine is fitted with a boiler filling pump after the first switch-on. water charge pump activated by the level probe;...
- Page 49 G E N E R A L I N F O R M AT I O N Water filter Dose programming Enables or disables the Dose Programming user Sets the number of litres of water that can flow menu 5.6.2. The possible values are: through the water softener filter before the water filter alarm is activated.
- Page 50 G E N E R A L I N F O R M AT I O N Steam boiler temperature Sequential heating Sets the operating temperature of the steam When this parameter is enabled, the maximum boiler. input current limit below 32 Ampere is managed Confirm with at the supply voltages indicated on the data plate.
- Page 51 G E N E R A L I N F O R M AT I O N Purging cycle Screensaver Enables or disables the purging function key and Used to set how many minutes of machine relative programming 5.6.2.2. inactivity must elapse before the screensaver is enabled.
- Page 52 G E N E R A L I N F O R M AT I O N Actuator test 1 Actuator test 2 By pressing the dispensing buttons, you can By pressing the dispensing buttons, you can make sure the actuators in the machine are make sure the actuators in the machine are working properly.
- Page 53 G E N E R A L I N F O R M AT I O N Change password Change password Used to change the access password Used to change the new access password with Technical level. The possible values are: Enter the new password using the + and - •...
-
Page 54: Dose Programming
G E N E R A L I N F O R M AT I O N 5.6.2 Dose programming Note The Dose Programming menu can only be accessed if it has been enabled on the relative page of the Technical menu 5.6.1. -
Page 55: Purging Water Doses
G E N E R A L I N F O R M AT I O N 5.6.2.2. Purging water doses The purge water programming page will appear: Note The purging water can only be programmed if it has been enabled on the Purging Cycle page of the technical menu 5.6.1. -
Page 56: Espresso Doses
G E N E R A L I N F O R M AT I O N 5.6.2.3. Espresso doses Press button (1) to program short espresso dispensing Press the indicated button to access the dose programming page. The espresso dose programming page will appear: The following programming relates to the dispensing of a single or double dose of... - Page 57 G E N E R A L I N F O R M AT I O N Self-learning Increases the quantity of liquid Espresso dispensing can be programmed with dispensed (ml) self-learning. Undo/Return to the previous menu Enter With the Espresso dose programming page Note open, press button 1 or 2 to begin dispensing, Repeat points A and B,...
-
Page 58: Counters
G E N E R A L I N F O R M AT I O N 5.6.3 Counters Expert operator only The page shows the counters of the doses dispensed by the unit you are working on. Single long espresso Press the indicated button to access the counter dispensing counter menu pages. - Page 59 G E N E R A L I N F O R M AT I O N The page shows the counters of the doses of hot The page shows the general machine counters. water dispensed. Machine cycle counter; when the number of espresso and Note hot water cycles set in the...
-
Page 60: Setting The Clock Menu
G E N E R A L I N F O R M AT I O N 5.6.4 Setting the clock menu Expert operator only Press the indicated button to access the clock menu pages. This menu lets you: • set the hours, minutes and day of the week. •... - Page 61 G E N E R A L I N F O R M AT I O N Setting the hour, minutes and day of the week. Setting automatic switch-on/switch-off. Reduce Reduce Increase Increase Undo Undo Enter/Confirm Enter/Confirm If you do not want to use the automatic switch- on/switch-off function, set “--”...
-
Page 62: Boiler Temperature
G E N E R A L I N F O R M AT I O N 5.6.5 Boiler temperature Expert operator only 5.6.5.1. Espresso boiler temperature This procedure regulates the temperature of the espresso boiler of the unit you are working on. Note The set temperature is the Setting the day of closure... -
Page 63: Cup-Warmer
G E N E R A L I N F O R M AT I O N 5.6.6 Cup-warmer Selection button °C or °F Press the indicated button to activate/deactivate the cup-warmer. Reduces the required The sequence with every pressing of the button temperature of the espresso boiler OFF->ON1->ON2->ON3->OFF... - Page 64 G E N E R A L I N F O R M AT I O N Dispensing area lights ON and ambient lights Switches the dispensing area lights on/off Switches on/off the ambient lights on the sides of the casing and the back Cancel/Return to the previous menu...
-
Page 65: Cleaning And Maintenance
C L E A N I N G A N D M A I N T E N A N C E 6 .1 D A I LY M A I N T E N A N C E Expert operator only The daily maintenance operations must be performed at the end of each workday. -
Page 66: Cleaning The Filter Holder
G E N E R A L I N F O R M AT I O N Note Wash cycles can be run simultaneously on different units. Note A wash cycle cannot be interrupted once it has been initiated. Remove the filter from the filter-holder, levering it out with the aid of a suitable tool. -
Page 67: Cleaning The Steam Nozzle
G E N E R A L I N F O R M AT I O N 6.1.4 Cleaning the steam nozzle Caution Burn hazard. Make sure that the perforated disk is not too hot before performing this operation. Unscrew the steam nozzle. Separate the unit's gasket from the perforated disk, immerse them in the detergent solution for several minutes, and eliminate any residues;... -
Page 68: Weekly Maintenance
G E N E R A L I N F O R M AT I O N 6 . 2 W E E K LY M A I N T E N A N C E 6 . 3 A C C E S S T O I N T E R N A L M A C H I N E C O M P O N E N T S Expert operator only Expert operator only... -
Page 69: Removing The Right And Left Side Panels
G E N E R A L I N F O R M AT I O N 6.3.2 Removing the right and left side • Loosen the two screws underneath the panels tray. - Remove the cup support grille from the tray. - Removing the RH side panel: •... -
Page 70: Removing The Back Panel
G E N E R A L I N F O R M AT I O N 6.3.3 Removing the back panel • Slide the upper cover out to remove it. - Remove the RH and LH side panels 6.3.2. - Remove the upper panel (held in place by two magnets). -
Page 71: Removing The Cup-Warmer Tray
G E N E R A L I N F O R M AT I O N • Loosen the two countersunk hex-head 6.3.4 Removing the cup-warmer tray screws that fix the lower edge of the panel. - Remove the RH and LH side panels (par. 6.3.2). - Page 72 G E N E R A L I N F O R M AT I O N - Lift out the cup-warmer tray. - To remove the cup-warmer plate from the tray, remove the six fixing screws then lift the plate (pay attention to the temperature probe, supply and earth wiring of the cup-warmer):...
-
Page 73: Alarms
G E N E R A L I N F O R M AT I O N 6 . 4 A L A R M S The following table shows the alarms that may be triggered on the machine, the relative causes and possible solutions. - Page 74 G E N E R A L I N F O R M AT I O N ALARM CAUSE SOLUTION During dispensing, if the water To eliminate the alarm, press softener filter litre counter and hold the relative icon; the reaches the value set in the warning triangle will disappear Technical menu, a specific...
- Page 75 G E N E R A L I N F O R M AT I O N ALARM CAUSE SOLUTION When the espresso boiler - Check the connection wiring temperature probe of an between the espresso boiler espresso unit is disconnected temperature probe and the (circuit open), alarm AL1 machine board...
- Page 76 When the board clock has - Make a factory pre-set in the synchronisation or battery Technical menu (contact an problems, the following authorised Gaggia Milano alarm appears on the clock Aftersales Service for the programming button on the relative password) third page.
- Page 77 - Make a factory pre-set in the deactivation alarm appears. Technical menu (contact an authorised Gaggia Milano Aftersales Service for the relative password) - If possible, try to reload the software on the machine...
-
Page 78: Regulating The Water Pump Flow Rate
G E N E R A L I N F O R M AT I O N 6 . 5 R E G U L AT I N G T H E WAT E R 6 . 6 R E G U L AT I N G T H E P R E- P U M P F L O W R AT E I N F U S I O N P R E S S U R E Authorised personnel only... -
Page 79: Resetting The Boiler Safety Thermostats
G E N E R A L I N F O R M AT I O N 6 . 7 R E S E T T I N G T H E B O I L E R 6 . 8 M A S T E R C O N T R O L U N I T S A F E T Y T H E R M O S TAT S B U F F E R B AT T E R Y... - Page 80 G E N E R A L I N F O R M AT I O N...
-
Page 81: Disposal Of The Machine
D I S P O S A L 7 .1 D I S P O S A L O F T H E M A C H I N E When decommissioning the machine, be sure to respect the indications provided below, in accordance with Italian Legislative Decree no. - Page 82 G E N E R A L I N F O R M AT I O N...
- Page 83 E L E C T R I C A N D H Y D R A U L I C D I A G R A M S L A R E A L E...
-
Page 84: Electric Diagrams
D I A G R A M S 8 .1 E L E C T R I C D I A G R A M S 3 CN2 +10V 1 CN40 +12Vdc 2 CN40 +RS485 6 CN2 OUT1 3 CN40 -RS485 2 CN2 4 CN40 GND RS485... - Page 85 D I A G R A M S L A R E A L E...
- Page 86 D I A G R A M S...
-
Page 87: Hydraulic Diagram
D I A G R A M S 8 . 2 H Y D R A U L I C D I A G R A M L A R E A L E... - Page 88 SaGa Co f f e e S . p . A . Registered Offices: Località Casona 1066 40041 Gaggio Montano (BO) Italy Website: www.evocagroup.com info@gaggiaprofessional.com...
Need help?
Do you have a question about the La Reale and is the answer not in the manual?
Questions and answers