Table of Contents
Advertisement
Quick Links
Advertisement
Table of Contents

Subscribe to Our Youtube Channel
Related Manuals for Blaupunkt Bremen CD72


Summary of Contents for Blaupunkt Bremen CD72
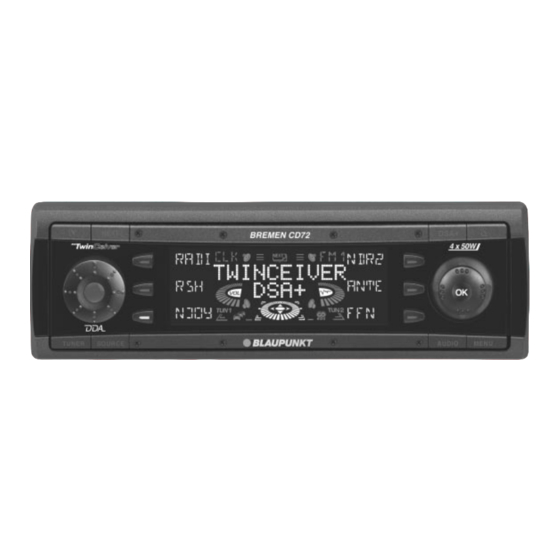
- Page 1 Radio / CD Bremen CD72 Operating instructions http://www.blaupunkt.com...
- Page 2 Open here...
- Page 4 Button, to switch the unit on/off, volume control button, to unlock the removable control panel (release panel) NEXT button, to display the next pages of a menu, to switch memory banks in radio mode Softkeys, the function of the softkeys de- pends on the display content DSA button, to open the equalizer menu...
-
Page 5: Table Of Contents
CONTENTS Notes and accessories ... 52 Road safety ... 52 Safety information ... 52 Installation ... 52 Accessories ... 53 Theft protection ... 54 Removable control panel ... 54 Detaching the control panel ... 54 Safety information ... 54 Attaching the control panel ... 54 KeyCard ... - Page 6 TIM - Traffic Information Memory ... 72 Switching TIM on/off ... 73 Listening to stored traffic messages ... 73 Recording traffic information messages ... 74 Adjusting the timers ... 74 Selecting a timer ... 75 Traffic information ... 76 Switching traffic information priority on/off ...
-
Page 7: Notes And Accessories
Please read these operating instruc- tions before using the equipment for the first time. The Blaupunkt editors are constantly working on making the operating in- structions clearer and easier to under- stand. However, if you still have any... -
Page 8: Accessories
NOTES AND ACCESSORIES Amplifier All Blaupunkt amplifiers can be used. CD changer The following CD changers can be ob- tained from accessory retailers for con- nection with this device: CDC A 02, CDC A 08, CDC A 072 and IDC A 09. -
Page 9: Theft Protection
THEFT PROTECTION Theft protection Removable control panel As a way of protecting your car radio against theft, the unit is equipped with a removable control panel (flip-release panel). Without this control panel, the car radio is worthless to a thief. Protect your equipment against theft by taking the control panel with you every time you leave your vehicle. -
Page 10: Keycard
If the device was still switched on when you removed the control panel, the unit will switch on again with the last set- tings automatically activated (i.e. radio, CD, CD changer/Compact Drive MP3 or AUX) when the panel is replaced. KeyCard In addition to the removable control pan- el, your car radio is equipped with a... -
Page 11: Preparing A Second Keycard
A second KeyCard can be prepared as an additional KeyCard. This means you can create a “spare key”. You can ob- tain KeyCards from your Blaupunkt dealer. If you want to prepare a second Key- Card, please refer to the instructions in the section entitled “Preparing a new... -
Page 12: Looking After The Keycard
THEFT PROTECTION Note: If you entered the master code in- correctly three times, you must wait for one hour. During this waiting period, “WAIT 1H” will appear in the display and the device cannot be operated. Do not switch the unit off during this period. -
Page 13: Adjusting The Volume
ADJUSTING THE VOLUME Adjusting the volume The volume can be adjusted in steps from 0 (off) to 50 (maximum). To increase the volume, turn the volume control 1 to the right. To decrease the volume, turn the volume control 1 to the left. -
Page 14: Navigation Audio
ADJUSTING THE VOLUME You can find out from your Blaupunkt dealer which navigation systems can be used with your car radio. Activating navigation audio... -
Page 15: Sound
ADJUSTING THE VOLUME Press the softkey 4 assigned to the “NAVI” display item to adjust the volume for navigation systems. Set the required volume using the volume control 1. Press the joystick OK 7 to save your settings or the MENU button 8 to close the menu without sav- ing. -
Page 16: X-Bass
SOUND X-BASS The X-BASS feature can be used to boost the bass at low volume levels. Adjusting the X-Bass activation frequency You can select the frequency at which you want X-Bass to be activated. This setting depends on the loudspeakers being used. -
Page 17: Subwoofer And Centre Speaker
SUBWOOFER AND CENTRE SPEAKER Subwoofer and centre speaker Selecting the subwoofer frequency You can select the frequency at which you want to drive a connected subwoof- er. This setting depends on the subwoof- er being used. Press the AUDIO button 9. “AUDIO 1”... -
Page 18: Adjusting The Centre Speaker Settings
SUBWOOFER AND CENTRE SPEAKER Adjusting the centre speaker settings You can select the frequency above which you want a connected centre speaker to be driven. You can also ad- just the level for the centre speaker. Selecting the centre speaker frequency Press the AUDIO button 9. -
Page 19: Setting The Button Illumination Colour
ADJUSTING THE DISPLAY Move the joystick 7 up/right or down/left to adjust the brightness. Press the joystick OK 7 or the MENU button 8 to close the menu. The settings are saved. Night-time display brightness Press the MENU button 8. Press the softkey 4 assigned to the “DISP”... -
Page 20: Radio Mode
Radio mode This unit is equipped with two RDS ra- dio receivers (TwinCeiver). Many of the receivable FM stations transmit a sig- nal that not only carries the programme but also additional information such as the station name and programme type (PTY). -
Page 21: Switching To Radio Mode
RADIO MODE Switching to radio mode If the device is in CD mode, cassette mode (depending on the version of the car radio) or CD changer/Compact Drive MP3 mode, press the TUNER button <. The main radio menu for tuning into a station is displayed. - Page 22 “clean signal” in order to reduce re- ception interference. This process has been developed by Blaupunkt and has a similar effect to using a directional aerial. Reception quality is considerably improved particular-...
-
Page 23: Selecting The Waveband / Memory Bank
RADIO MODE Selecting the waveband / memory bank This unit can receive programmes broadcast over the FM frequency range as well as the MW, LW and SW (short- wave) ranges. There are four memory banks for the FM range and one for each of the MW, LW and SW ranges. -
Page 24: Setting The Sensitivity Of Station Seek Tuning
Setting the sensitivity of station seek tuning You can choose whether the system should only tune into stations with a strong reception or whether it can also tune into those with a weak reception. Press the TUNER button < in ra- dio mode. -
Page 25: Listening To Stored Stations
RADIO MODE The station storing procedure begins. “T-STORE” appears in the display. Af- ter the process is completed, the sta- tion stored in FMT memory location 1 will be played. Note: You can cancel the automatic stor- ing procedure at any time by press- ing any button. -
Page 26: Optimising Radio Reception
Selecting a programme type and starting seek tuning The PTY menu comprises several pag- es on which the known programme types are displayed. To browse through the PTY menu’s pages, repeatedly press the NEXT button 3 until the required programme type appears alongside one of the softkeys. -
Page 27: Setting Stereo/Mono
RADIO MODE Press the NEXT button 3. The “second page” of the radio func- tions menu is displayed. Press the softkey 4 assigned to the “RTXT” display item. “RTXT ON” or “RTXT OFF” appears briefly in the display. Press the TUNER button < or the joystick OK 7. -
Page 28: Switching Tim On/Off
Switching TIM on/off Whilst the car radio is switched on, you can turn the TIM function on/off. Press the TUNER button < in ra- dio mode. Press the softkey 4 assigned to the “TIM” display item. The TIM menu is displayed. The first message is played if traffic in- formation messages have been record- ed. -
Page 29: Recording Traffic Information Messages
“NO TIM” appears briefly in the display if no messages have been recorded. After the last message is heard, the unit returns to the previous mode of opera- tion. If you want to return to radio mode with- out first having to listen to all the mes- sages, press the TUNER button <... -
Page 30: Selecting A Timer
Move the joystick 7 up or down to adjust the minutes. To save the settings, press the TUNER button < or the joystick OK 7. The settings are saved. During TIM standby, a con- nected electric aerial will remain ex- tended. -
Page 31: Traffic Information
TRAFFIC INFORMATION Traffic information Your unit is equipped with an RDS-EON receiver. EON (Enhanced Other Net- work) is a feature that involves the broadcasting of radio station informa- tion within a broadcasting network. Every time a traffic announcement (TA) is transmitted, you will automatically be switched from a station that does not provide traffic information to a station within the broadcasting network that... -
Page 32: Switching To Cd Mode And Nserting A Cd
CD-Rs and CD-RWs (CDs that you have “burned” yourself) can generally also be played. Due to the varying qual- ity of CDs, Blaupunkt cannot guaran- tee that this will work properly. To ensure the system functions proper- ly, only use CDs labelled with the com- pact disc logo. -
Page 33: Removing The Cd
CD MODE You must not hinder or assist the drive as it draws in the CD. The control panel closes automatically. The CD menu appears and CD play- back begins. If a CD is already inserted in the unit, press the SOURCE button ; re- peatedly until CD mode is dis- played. -
Page 34: Displaying Cd Text
Displaying CD text Some CDs include CD texts. The CD text may contain the names of the art- ist, the album and track. You can allow the CD text to be dis- played as scrolling text every time you switch to another track. After the whole CD text has been shown once, the name of the track is displayed. -
Page 35: Cd Changer Mode (Optional)
To find out which CD changers / Com- pact Drive MP3 can be used with this unit, please refer to the “Accessories” chapter in these instructions or contact your Blaupunkt dealer. Note: Information on handling CDs, inserting CDs and operating the CD changer can be found in the operating instructions supplied with your CD changer. -
Page 36: Repeating Individual Tracks Or Whole Cds (Repeat)
Repeating individual tracks or whole CDs (REPEAT) Press the MENU button 8. Press the softkey 4 assigned to the “CDC” display item. The CD changer functions menu ap- pears. Press the softkey 4 assigned to the “RPT” display item. “RPT TRCK” appears briefly in the dis- play. -
Page 37: Cd Changer Mode
CD CHANGER MODE Entering / editing CD names Listen to the CD that you want to name. Press the MENU button 8. Press the softkey 4 assigned to the “CDC” display item. The CD changer functions menu ap- pears. Press the softkey 4 assigned to the “NAME”... -
Page 38: Clock - Time
CLOCK - Time Setting the clock The clock can be set automatically us- ing the RDS signal. You can also set the clock manually if you cannot receive a radio station that supports this feature. Setting the clock automatically To set the clock automatically, press the MENU button 8. -
Page 39: Digital Sound Adjustment
DSA - EQUALIZER DSA digital sound adjustment This unit is equipped with a digital sound calibration feature (DSA – Digital Sound Adjustment). It provides you with three self-calibrat- ing user equalizers (EQ1, EQ2 and EQ3). Each user equalizer consists of a 9-band graphic equalizer and a para- metric 4-band equalizer. -
Page 40: Automatically Calibrating The Equalizer
Automatically calibrating the equalizer You can electronically calibrate and store values for three different situations. EQ 1 for the driver only EQ 2 for the driver and front passenger EQ 3 for the front and rear occupants Hold the microphone in the appropriate position whilst calibration is taking place. -
Page 41: Adjusting The Graphic Equalizer Manually
DSA - EQUALIZER Note: If you have already adjusted the graphic equalizer manually or if you have not yet carried out any cali- bration, “NO RESULT” will appear in the display. Press the softkey 4 assigned to the “FRNT” display item for the front loudspeakers or “REAR”... -
Page 42: Selecting The Equalizer
Selecting the equalizer After calibration has taken place or af- ter you have finished making manual adjustments, press the DSA button 5. Press the softkey 4 assigned to the “USER” display item. Press the softkey 4 assigned to the display item of the equalizer that you want to use. -
Page 43: Setting The Stage Effect
DSA - EQUALIZER Setting the stage effect You can activate a stage effect that “repositions” the music in front of the driver and/or front passenger. This gives you the impression you are standing right in front of a stage. Press the DSA button 5. Press the softkey 4 assigned to the “STGE”... -
Page 44: Dnc - Dynamic Noise Covering
DNC - dynamic noise covering The DNC (Dynamic Noise Covering) feature increases the volume whilst the vehicle is driving. As its starting point it uses a volume level that is considered pleasant whilst the vehicle is stationary. The volume is boosted by a different amount for each frequency band de- pending on how noise develops in the vehicle. -
Page 45: Selecting The Dnc Boost
Your car radio has a TMC output, which you can use for connecting Blaupunkt navigation sys- tems. You can find out from your Blau- punkt dealer which navigation systems can be used with your car radio. -
Page 46: Amplifier/Sub-Out
We recommend you use well-matched products from the Blaupunkt or Velocity product ranges. Switching the internal amplifier on/off If you use external amplifiers, you can switch off the unit’s internal amplifier. -
Page 47: External Audio Sources
If you want to connect an external au- dio source, you will need an adapter cable. You can obtain this cable from a Blaupunkt dealer. Switching the AUX input on/off Press the MENU button 8. Press the softkey 4 assigned to the “SETP”... -
Page 48: Reset
RESET Reset You can reset all the unit’s settings back to their factory defaults. Press the MENU button 8. Press the softkey 4 assigned to the “SETP” display item. Press the softkey 4 assigned to the “NORM” display item. A confirmation request appears in the display. - Page 49 09-435 99236 01-4010 7320 01-89583 8394 01-576 9473 01-4598830 02-369 6464 40 2085 023-565 6331 66-817 157 01-2185 11111 916-467952 08-7501810 01-8471650 02-6130 0514 01-324 8756 022-8771260 0212-3460040 708-6817188 +604-6413 640 Blaupunkt GmbH CM/PSS 8 622 403 263 WWW: http://www.blaupunkt.com...
Need help?
Do you have a question about the Bremen CD72 and is the answer not in the manual?
Questions and answers