
Related Manuals for Blaupunkt 7 644 820 310


Summary of Contents for Blaupunkt 7 644 820 310
- Page 1 Radio / CD / MP3 Bremen MP74 Operating instructions 7 644 820 310 http://www.blaupunkt.com http://www.blaupunkt.com...
- Page 2 Open here...
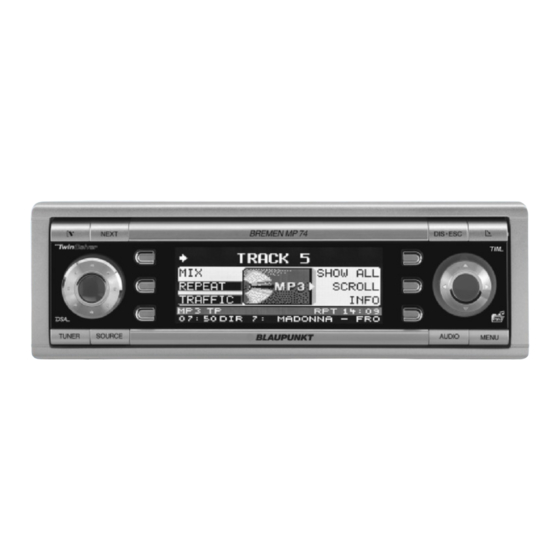
- Page 4 CONTROLS Button, to switch the device on/ off, and mute the device’s volume Volume control button, to unlatch the detach- able control panel NEXT button to display the next pages of a menu, and switch memory banks in ra- dio mode Softkeys, the function of the softkeys depends on what is cur- rently being displayed...
-
Page 5: Table Of Contents
Notes and accessories ... 61 Road safety ... 61 Safety notice ... 61 Installation ... 61 Accessories ... 61 Activating / deactivating demo mode ... 62 Theft protection ... 62 Detachable control panel ... 62 Detaching the control panel ... 62 Attaching the control panel ... - Page 6 CONTENTS MP3 mode ... 86 Preparing an MP3-CD ... 86 Switching to MP3 mode ... 87 Selecting a directory ... 88 Selecting tracks ... 88 Fast searching (audible) ... 89 Scanning tracks (SCAN) ... 89 Random track play (MIX) ... 89 Repeating individual tracks or whole directories (REPEAT) ...
-
Page 7: Notes And Accessories
(available as optional accesso- ries) allow you to access most of the main functions of your car sound sys- tem safely and conveniently. You cannot switch the device on/off us- ing the remote control. Amplifiers You can use all Blaupunkt and Velocity amplifiers. -
Page 8: Activating / Deactivating Demo Mode
NOTES AND ACCESSORIES CD changers You can obtain the following CD chang- ers from accessory retailers for connec- tion to this device: CDC A 03, CDC A 08 and IDC A 09. Compact Drive MP3 You can connect the Compact Drive MP3 instead of a CD-changer in order to play MP3 music tracks. -
Page 9: Attaching The Control Panel
THEFT PROTECTION First, pull the control panel straight off the device and then out towards the left. The device switches off after the control panel is detached. All the current settings are saved. Any CD already inserted in the de- vice remains there. -
Page 10: Adjusting The Volume
ADJUSTING THE VOLUME Adjusting the volume You can adjust the volume in steps from 0 (off) to 50 (maximum). To increase the volume, turn the volume control 2 clockwise. To decrease the volume, turn the volume control 2 anticlockwise. Setting the power-on volume You can set the default volume level at which the device plays when it is switched on. -
Page 11: Navigation Audio
(as described in the installation instructions) and activated in the menu. You can find out from your Blaupunkt dealer which navigation systems can be used with your car sound system. Activating navigation audio... - Page 12 ADJUSTING THE VOLUME Press the joystick OK 8 or the MENU button 9 to close the menu. The settings are saved. Setting the minimum navigation volume You can set the volume level at which the navigation voice output is “mixed in” with the audio source.
-
Page 13: Sound And Volume Distribution Settings
SOUND AND VOLUME DISTRIBUTION SETTINGS Sound and volume distribution settings Note: You can adjust the bass and treble indi- vidually for each audio source. Adjusting the bass Press the AUDIO button :. “AUDIO MENU” appears in the display. Press the softkey 5 assigned to the “BASS”... -
Page 14: X-Bass
X-BASS X-BASS The X-BASS feature can be used to boost the bass at low volume levels. You can set the X-Bass boost for one of the following frequencies: 32 Hz, 40 Hz, 50 Hz, 63 Hz or 80 Hz in steps from 0 - 6. If you select the 0 setting, the X-Bass function will be deactivated. - Page 15 DAY and NIGHT are displayed in the top display line together with the cur- rently set values. Move the flashing selection marker behind DAY or NIGHT by pressing the joystick 8 to the left or right. Set the value that you want. To do so, move the joystick 8 down or Press the joystick OK 8 or the MENU button 9 to close the...
- Page 16 ADJUSTING THE DISPLAY SETTINGS Press the softkey 5 assigned to the “COLOR” display item. Press the softkey 5 assigned to the “USER” display item. In the following menu you can set the red, blue and green colour components yourself. To do so, press the appropriate softkey 5 repeatedly until the displayed col- our suits your tastes.
-
Page 17: Radio Mode
ADJUSTING THE DISPLAY SETTINGS Inverting the appearance of the display content You can invert the appearance of the display content. Press the MENU button 9. Press the softkey 5 assigned to the “DISPLAY” display item. Press the softkey 5 assigned to the “INVERT”... -
Page 18: Setting The Number Of Antennas
RADIO MODE Setting the number of antennas This device is equipped with two RDS radio receivers (TwinCeiver). You can connect one or two antennas to the device. If two antennas are con- nected (strongly recommended - the second antenna is included), you can use directional reception when tuning into stations in DDA radio mode. - Page 19 “clean signal” in order to reduce reception interference. This proc- ess developed by Blaupunkt has a similar effect to using a directional antenna. Reception quality is im- proved considerably, particularly in...
-
Page 20: Convenient Rds Functions (Af, Reg)
RADIO MODE Convenient RDS functions (AF, REG) The convenient RDS functions AF (Al- ternative Frequency) and REG (Region- al) extend your radio’s range of func- tions (only in FM radio mode). AF: If you activate this RDS func- tion, the radio automatically tunes into the best receivable frequency for the station that is currently set. -
Page 21: Tuning Into A Station
Selecting the waveband To select a waveband (FM, MW, LW or SW), press the TUNER button = while in radio mode. The radio functions menu appears in the display. Press the softkey 5 assigned to the “BAND” display item. Press the softkey 5 assigned to the “FM”... -
Page 22: Setting The Sensitivity Of Station Seek Tuning
RADIO MODE Setting the sensitivity of station seek tuning You can choose whether the radio should only tune into stations providing good reception or whether it can also tune into those with a weak reception. Press the TUNER button = while in radio mode. -
Page 23: Storing Stations
Note: The scanning time that you set is also applied by the system to scan- ning carried out in CD/MP3 mode and CD-changer mode. Storing stations Storing stations manually Select the FM memory bank that you want (FM1, FM2, FM3, FMT) or one of the MW, LW or SW wave- bands. - Page 24 RADIO MODE PTY-EON If you specify the programme type and start seek tuning, the radio will switch from the current station to a station of the selected programme type. Note: If the tuner does not find a station that corresponds to the selected programme type, you will hear a beep and “NO PTY”...
-
Page 25: Optimising Radio Reception
Optimising radio reception Treble reduction feature during interference (HiCut) The HiCut function has the effect of re- ducing interference noise during poor radio reception. If interference occurs, the system automatically reduces the treble thus reducing the interference lev- Setting HiCut Press the TUNER button = while in radio mode. -
Page 26: Tim - Traffic Information Memory
TIM - Traffic Information Memory The device is equipped with a digital speech memory, which can automati- cally record up to four traffic messages. The maximum duration for recorded messages is four minutes. If the TIM function is activated, the de- vice records all the traffic information messages that it receives during the two hours after it was last switched off. -
Page 27: Listening To Stored Traffic Messages
Note: If you do not switch on the device within a period of 72 hours, the de- vice will turn off the TIM function automatically. Switching on TIM If you want to switch TIM on again, whilst you are in radio mode, press and hold down the TUNER button = for longer than two seconds. -
Page 28: Setting The Timers
tion is activated, the device will auto- matically search for a traffic information station. Setting the timers If TIM is activated, the traffic informa- tion messages provided by a tuned traf- fic information station will be recorded for 2 hours after the device is switched off. -
Page 29: Traffic Information
Traffic information Your device is equipped with an RDS- EON receiver. EON (Enhanced Other Network) is a feature that involves the broadcasting of radio station informa- tion within a broadcasting network. Whenever a traffic announcement (TA) is broadcast, the system switches au- tomatically from a station that does not provide traffic reports to the appropri- ate traffic information station within the... -
Page 30: Cd Mode
Rs and CD-RWs (CDs that you have “burned” yourself) can generally also be played. Due to the varying quality of CD blanks, Blaupunkt cannot guarantee that this will work properly. To ensure the system functions properly, only use CDs labelled with the compact disc logo. -
Page 31: Random Track Play (Mix)
Random track play (MIX) Press the softkey 5 assigned to the “MIX” display item. “MIX CD” appears briefly in the display. The next track to be played will be picked at random. Cancelling MIX Press the softkey 5 assigned to the “MIX”... -
Page 32: Setting Scrolling Text
CD MODE Setting scrolling text You can allow the CD text to be dis- played as scrolling text in the bottom line of the display. Switching CD scrolling text on/off Repeatedly press the softkey 5 assigned to the “SCROLL” display item until “SCROLL ON”... -
Page 33: Switching To Mp3 Mode
Fig. 1 T001 T001 T002 T002 T003 T003 T004 T004 T005 T005 T006 T007 T008 T009 T001 T010 T002 T011 T003 T004 T005 T006 T007 Since using some burner software can lead to inconsistencies in the way items are numbered, you should ensure that the root directory D01 either contains only subdirectories containing tracks (Fig. -
Page 34: Selecting A Directory
MP3 MODE Selecting a directory Selecting from the directory list You can display a list of all the directo- ries on the inserted CD and then con- veniently select a directory from it. The directories are displayed with the names that you created when burning the CD. -
Page 35: Fast Searching (Audible)
If you press the joystick 8 to the left once, the current track will be played again from the beginning. Fast searching (audible) To fast search backwards or forwards, press and hold down the joystick 8 to the left or right until fast searching backwards/forwards be- gins. -
Page 36: Configuring The Display
MP3 MODE Cancelling REPEAT To stop the current track or current di- rectory from being repeated, repeatedly press the softkey 5 that is assigned to the “REPEAT” display item until “REPEAT OFF” appears briefly in the display. Configuring the display There are various options available for displaying the name of the artist, track and album (ID3 tag) or the directory and... -
Page 37: Cd-Changer Mode (Optional)
To find out which CD changers / Com- pact Drive MP3 can be used with this device, please refer to the “Accessories” chapter in these instructions or contact your Blaupunkt dealer. Note: Information on handling CDs, inserting CDs and operating the CD changer can be found in the operating instructions supplied with your CD changer. -
Page 38: Scanning Tracks (Scan)
CD-CHANGER MODE Scanning tracks (SCAN) You can briefly play (scan) all the tracks on the CD. Press and hold down the joystick OK 8 for longer than two sec- onds. The subsequent tracks on the CD are briefly played in ascending order. Note: You can set the scanning time. -
Page 39: Naming Cds
Naming CDs The car sound system allows you to assign names for up to 99 CDs (not with the Compact Drive MP3) so that you can recognise them more easily. The names can be a maximum of seven charac- ters long. “FULL”... -
Page 40: Clock Time
CLOCK TIME CLOCK time Setting the clock time The clock can be set automatically us- ing the RDS signal. You can also set the clock manually if you cannot receive a radio station that supports this feature. Setting the clock automatically To set the clock automatically, press the MENU button 9. -
Page 41: Dsa Max - Digital Sound Adjustment
CLOCK TIME Displaying the clock time continuously You can make the system display the clock time when the device is off and the vehicle ignition is on. Press the MENU button 9. Press the softkey 5 assigned to the “CLOCK” display item. Press the softkey 5 assigned to the “OFFCLOCK”... -
Page 42: Automatically Calibrating The Equalizer
DSA MAX EQUALIZER Note: You can activate/deactivate each equalizer module individually (user EQ, sound presets, DNC, stage ef- fects and sound effects) in the cor- responding menu. Switching on DSA To switch the equalizer on again, press and hold down the AUDIO button : for longer than two sec- onds. -
Page 43: Viewing The Vehicle Acoustics With/Without Equalization
period. Calibration begins as soon as the countdown is finished. Proceed as described for all the equalizers. When calibration has ended, the menu for the selected equalizer is displayed again. Viewing the vehicle acoustics with/without equalization You can view the ascertained values for the vehicle acoustics. -
Page 44: Selecting An Equalizer
DSA MAX EQUALIZER Press the softkey 5 assigned to the “ADJUST” display item. Press the softkey 5 assigned to the “MANUAL” display item. You can adjust the equalizer for the front and rear loudspeakers separately. Press the softkey 5 assigned to the “FRONT EQ”... -
Page 45: Selecting Sound Presets
Selecting sound presets You can select sound presets for vari- ous music styles. To ensure optimum sound, the presets are “added” to the settings of the active user equalizer, i.e. the user EQs are optimised using the presets for the various music styles. Presets for the following music styles are available: VOCAL... -
Page 46: Dnc - Dynamic Noise Covering
DSA MAX EQUALIZER Turn the volume control 2 or move the joystick 8 to adjust the distance. Proceed in the same way for all the loudspeakers and press the joy- stick OK 8 or the AUDIO button : to close the menu. The settings are saved. -
Page 47: Switching Off Dnc
Starting DNC calibration Press and hold down the AUDIO button : for longer than two sec- onds. Press the softkey 5 assigned to the “DNC” display item. Press the softkey 5 assigned to the “ADJUST” display item. A countdown starts in the display. Cali- bration begins as soon as the count- down is finished. -
Page 48: Subwoofer And Centre Speaker
SUBWOOFER AND CENTRE SPEAKER Subwoofer and centre speaker You can connect a subwoofer and a centre speaker to this device. In order to optimise the sound still fur- ther when using a subwoofer and cen- tre speaker, you can set a low-pass fil- ter for the subwoofer and a high-pass filter for the front and rear channels sep- arately. -
Page 49: Setting Up The Subsonic Filter
SUBWOOFER AND CENTRE SPEAKER Press the AUDIO button :. “AUDIO MENU” appears in the display. Press the softkey 5 assigned to the “SUBOUT” display item. Press the softkey 5 assigned to the “LOWPASS” display item. Move the joystick 8 to switch be- tween the available settings. -
Page 50: Setting Up The High-Pass Filter For The Front/Rear Channels
SUBWOOFER AND CENTRE SPEAKER Press the softkey 5 assigned to the “CENTRE” display item. Press the joystick 8 left or right to set the frequency for the centre speaker. Press the joystick 8 up or down to set the gain for the centre speaker. When you have finished making your changes, press the joystick OK 8 or the... -
Page 51: Tmc For Dynamic Navigation Systems
Your car sound system has a TMC output, which you can use for connecting Blaupunkt nav- igation systems. You can find out from your Blaupunkt dealer which navigation systems can be used with your car sound system. -
Page 52: External Audio Sources
If you want to connect an external au- dio source, you will need an adapter cable. You can obtain this cable from a Blaupunkt dealer. Switching the AUX input on/off Press the MENU button 9. Press the softkey 5 assigned to the “AUX”... -
Page 53: Entering The Power-On Message
After you switch on your device, the system displays a scrolling message in the display. The factory default for this text is “BLAUPUNKT-THE ADVAN- TAGE IN YOUR CAR”. Instead of this you can enter your own text up to 35 characters long. -
Page 54: Displaying The Serial Number
SERIAL NUMBER Displaying the serial number You can display the device’s serial number. Press the MENU button 9. Press the softkey 5 assigned to the “VARIOUS” display item. Press the softkey 5 assigned to the “SER NUM” display item. The device’s serial number will be dis- played in the top line of the display. -
Page 55: Specifications
Specifications Amplifier Output power: 4 x 18 watts sine at 14.4 V and 1% distortion factor at 4 ohms. 4 x 26 watts sine in accordance with DIN 45324 at 14.4 V at 4 ohms. 4 x 50 watts max. power Tuner Wavebands:... - Page 56 09-435 99236 01-4010 7320 01-89583 8394 01-4598830 02-369 62464 40 2085 023-565 6331 66-817 157 01-2185 11111 916-467952 08-7501810 01-8471650 02-6130 0514 01-324 8756 022-8771260 0212-3460040 708-6817188 +55-19 3745 2773 +604-6413 640 Blaupunkt GmbH CM/PSS 8 622 403 905 WWW: http://www.blaupunkt.com...
Need help?
Do you have a question about the 7 644 820 310 and is the answer not in the manual?
Questions and answers