Advertisement
Manual of the MicroStage II
– Baader Clickstop Digital Camera Adapter # 2450330 –
Take the Microstage II out of it's cover.
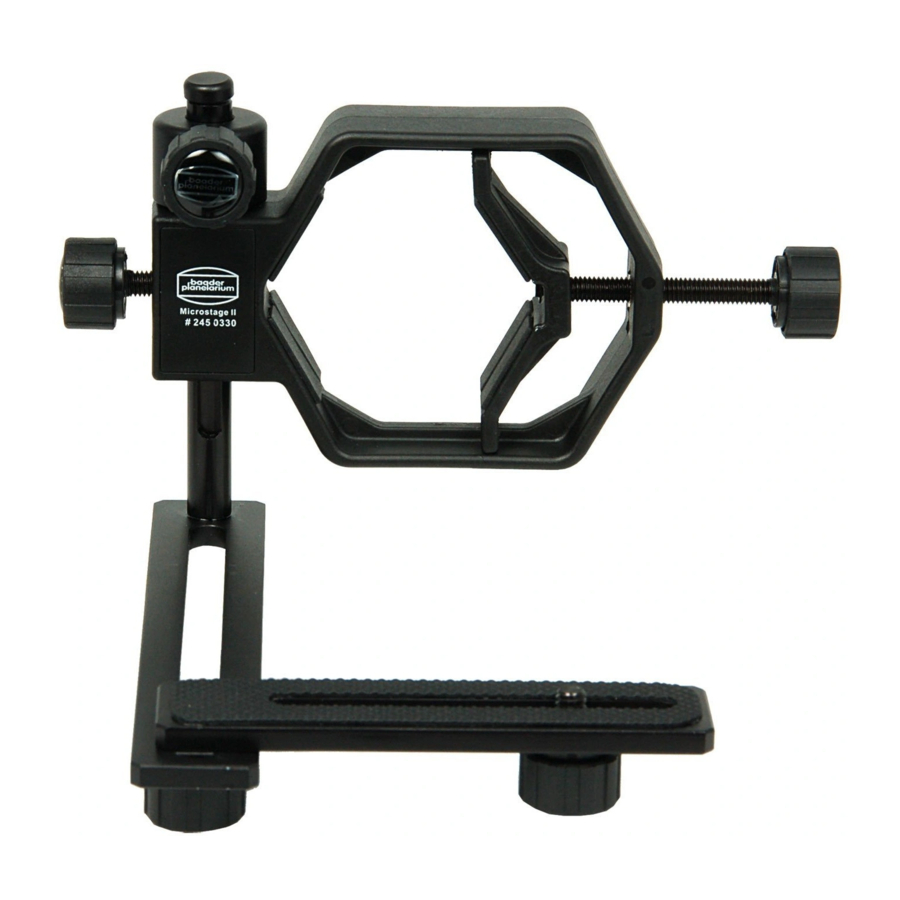
The Microstage II is delivered in its initial state as shown in figure I. This is the most compact
possibility to store it, so you might want to store this way, too.
Follow these instructions to set it up for photographing.
The clamping screws (CS) you need are all labeled in the figures.
CS 1
CS 2
central axis
Fig. I
At first, open the clamping screws 1 and 2 – cf figur I.
DOK: G\Anl\Zub\MicroStage\Microstage-2\Anl-MicroStage2_en.doc
Microstage II in initial state
Eyepiece holder
CS 3
horizontal arm
camera distance arm
CS 5
CS 4
Advertisement
Table of Contents

Related Manuals for Baader Planetarium MicroStage II


Summary of Contents for Baader Planetarium MicroStage II
- Page 1 Take the Microstage II out of it's cover. The Microstage II is delivered in its initial state as shown in figure I. This is the most compact possibility to store it, so you might want to store this way, too.
- Page 2 III – in an angle of 90° towards the figure IV, then lock CS3 again. eyepiece holder. Now lock clamping screw 2. This is the final state of the Microstage II. Now you can attach your camera.
- Page 3 CS 3 Fig. V Connect your camera with the clamping screw 4 to the Microstage II as shown in figure V. Now you can attach your Microstage II to almost every eyepiece. Lock it in position with clamping screw 5. It doesn't matter if you use a large 2“-eyepiece or a small 1 ¼“ eyepiece, as shown in figures VI and VII.
- Page 4 The clickstops help you to bring the camera back to exact the same position in front of the eyepiece. When you've finished you photo-session, bring the Microstage II back to its initial position and store it in its soft leather bag.
Need help?
Do you have a question about the MicroStage II and is the answer not in the manual?
Questions and answers