Bennett Marine AutoTrim Pro Quick Start Installation Manual
Hydraulic trim tabs
Hide thumbs
Also See for AutoTrim Pro:
- Installation & user manual (56 pages) ,
- Installation instructions (2 pages) ,
- Quickstart functionality manual (2 pages)
Table of Contents
Advertisement
Quick Links
Sensor Check
1
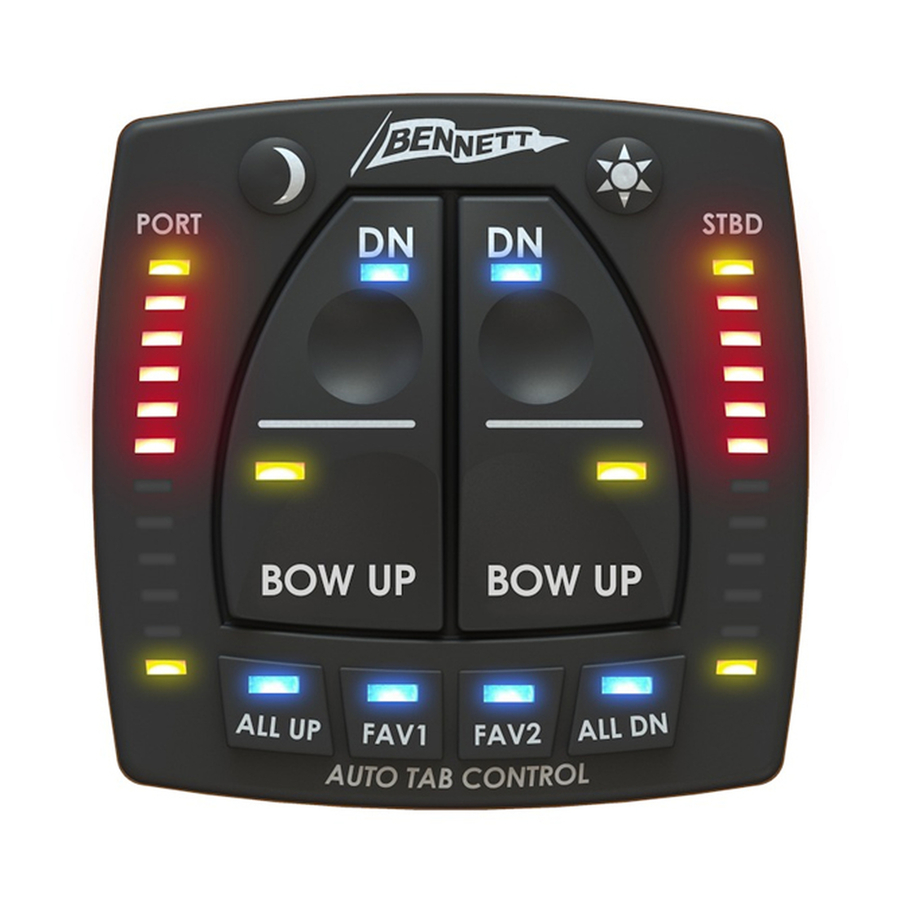
AutoTrim Pro is equipped with trim tab position LED indicators. For this
feature to work, actuator sensors must be present. Once installed, the
presence of sensors will be indicated with the 2 upper yellow LEDs on the
Helm Display, and 2 green LEDs on the Control Unit continuously illuminated.
Component Installation
2
Installing AutoTrim Pro consists of two components–the Helm Display
and the Control Unit. However, operation of the AutoTrim Pro assumes
the presence of a complete trim tab system (Tabs, actuators and a
pump). For help ordering trim tab system components, give us a call.
Connect to NMEA2000
3
Connect the NMEA2000 Cable from the ATP Control Unit to
the NMEA2000 Backbone. The ATP control will use the speed
data to determine the boat's mode of operation. If the vessel
does not have a NEMA2000 network with a GPS, please refer to
the appendix (Manual pg. 53 ) for Angle set-up mode.
One-time Calibration
4
The Red LEDs should be flashing to indicate the system needs calibration.
Press and hold the Sun + Moon buttons for 3 seconds until the lower
yellow LEDs begin to flash. Press both DN buttons, then release when the
tabs are fully down. Wait until the upper yellow LEDs flash. Press and hold
both BOW UP buttons until the tabs are fully up. Release, and the four
yellow LEDs in the corners should be continuously on. You're Calibrated!
One-time Set-up
5
(Rest State Set-up) The FAV1 and FAV2 blue LEDs should be flashing as an
indication that the system is ready to be oriented. With the boat at rest in
the water, press and hold the Sun + All UP buttons for at least 5 seconds.
Once released, all four corner LEDs will flash indicating that a setting has
been made.
(Acceleration State Set-up) Press and hold the Sun + FAV1 buttons for at
least 5 seconds. All four corner LEDs will flash indicating readiness. Quickly
throttle up to speed in a straight line for at least 5 seconds without using the
trim tabs. Once the system has sensed an acceleration, all four corner LEDs
will flash again indicating that a setting has been made, and the FAV1 and
FAV2 LEDs will stop flashing, indicating that orientation is complete.
(954) 427-1400
Mon.-Fri. 8 AM - 5 PM (EST)
Quickstart Installation Guide
Watch the system set-up video
BennettTrimTabs.com/ATPSet-up
Need help? We're here for you.
(Manual pg. 6)
(Manual pg. 20-21)
(Manual pg. 23-24)
Refer to your manual
for detailed information
(Manual starting on pg. 7)
(pg. 9)
ATP
Control
Unit
NMEA 2000
Backbone
("T" not supplied)
ATP80
5010693 ro40720
Trim Tab
Position
Indicators
GPS /
Chartplotter
Advertisement
Table of Contents

Subscribe to Our Youtube Channel
Related Manuals for Bennett Marine AutoTrim Pro


Summary of Contents for Bennett Marine AutoTrim Pro
- Page 1 Refer to your manual Sensor Check for detailed information (Manual pg. 6) AutoTrim Pro is equipped with trim tab position LED indicators. For this Trim Tab feature to work, actuator sensors must be present. Once installed, the Position presence of sensors will be indicated with the 2 upper yellow LEDs on the Indicators Helm Display, and 2 green LEDs on the Control Unit continuously illuminated.
- Page 2 Storing and Activating Favorite Settings (Manual pg. 37) To use AutoTrim Pro in AUTO mode, you first need to set a “Favorite” setting. Manually adjust the trim tabs, throttle, and engine trim to attain your desired pitch and roll attitude. Next, press and hold the FAV1 OR FAV2 button for 5 seconds (or more).
Need help?
Do you have a question about the AutoTrim Pro and is the answer not in the manual?
Questions and answers