Table of Contents
Advertisement
Quick Links
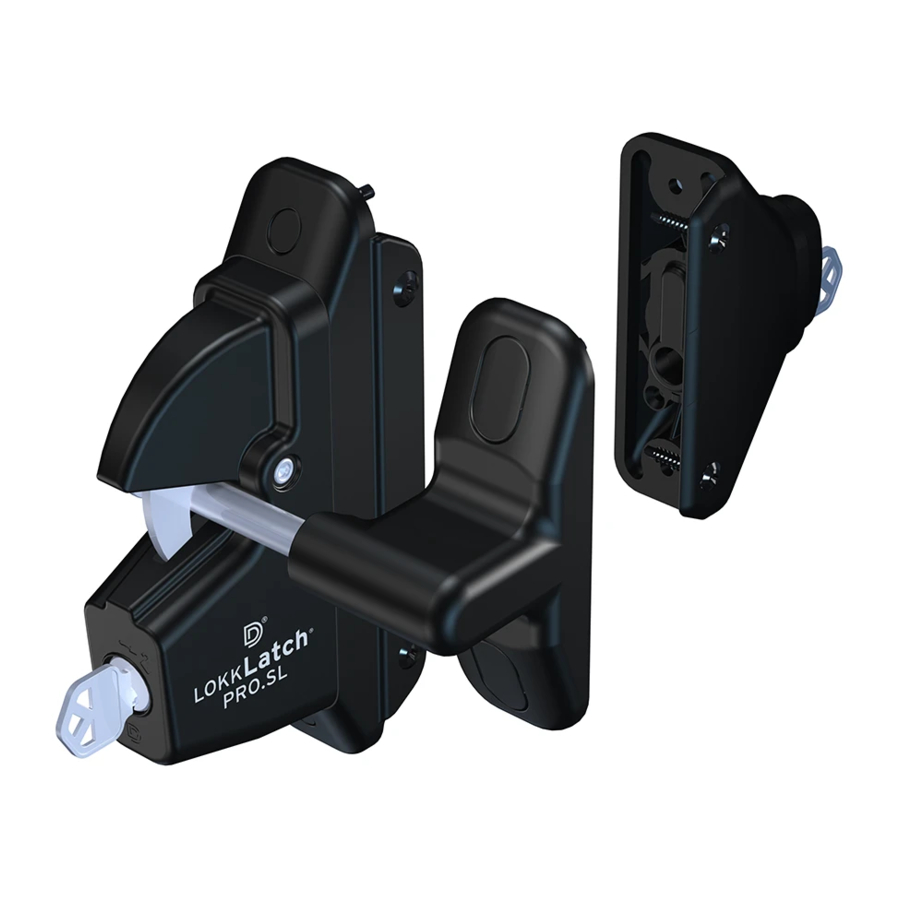
Lokk-Latch LLP SL Re-keying Assembly
External Access Kit (EAK)
TO DISASSEMBLE
Step 1: Unscrew two Philips head screws
and remove Back Plate from Housing.
Step 3:
A. Unscrew three Philips head screws and
remove Spring Base from Button.
B. Remove Lock Cylinder.
Spring BASE
BACK PLATE
HOUSING
A
LOCK CYLINDER
B
Step 2: Remove Button from Housing.
BUTTON
TO ASSEMBLE
Step 1: A. Insert Lock Cylinder into Button.
B. Screw three Philips head screws through
Spring Base and into Button.
SPRING BASE
B
LOCK CYLINDER
A
Advertisement
Table of Contents

Related Manuals for D&D Technologies Lokk-Latch LLP SL


Summary of Contents for D&D Technologies Lokk-Latch LLP SL
- Page 1 Lokk-Latch LLP SL Re-keying Assembly Step 2: Remove Button from Housing. External Access Kit (EAK) TO DISASSEMBLE Step 1: Unscrew two Philips head screws BUTTON and remove Back Plate from Housing. BACK PLATE HOUSING TO ASSEMBLE Step 3: Step 1: A. Insert Lock Cylinder into Button.
- Page 2 Lock Cylinder Face will be at the bottom when mounted on post. BACK PLATE BACK PLATE LOCK CYLINDER FACE Lokk-Latch LLP SL Re-keying Assembly Step 2: A. Remove Cartridge Assembly by Latch (LLP SL) pushing face of Lock Cylinder through Body. TO DISASSEMBLE Step 1: Unscrew four Philips head screws and remove Mounting Plate from Body.
- Page 3 Step 4: A. Un-clip the hook on the Lock Step 3: Remove Disc and Spring from Lock Cartridge and open as shown. Cartridge assembly. B. Remove Lock Cylinder. SPRING DISC TO ASSEMBLE Step 2: Install Spring and Disc into Step 1: A. Insert Lock Cylinder back into Lock cartridge.
- Page 4 Step 4: Step 3: Insert Lock Cartridge assembly A. Align the Disc with the left side of the partly into Body until position as shown (!) Body. B. Bend the Spring end down and into slot, whilst holding the Disc in its position. EDGE OF BODY BODY Step 6: A.
- Page 5 Step 8: Screw Mounting Plate to Body with Step 7: Check that the face of the Lock four Philips head screws through holes as Cylinder is flush with outer Body and not at shown. an angle. MOUNTING PLATE BODY...
Need help?
Do you have a question about the Lokk-Latch LLP SL and is the answer not in the manual?
Questions and answers