Advertisement
Assembly Instructions for Model Number 158XL
IMPORTANT INFORMATION
Unwrap and remove all parts from the box. Keep the box and packing material until the product is assembled. In case of
return or exchange, failure to return product in similar condition as received could result in limited reimbursement. Please
save sales receipt as proof of purchase for warranty purposes. Check to ensure you have all the parts below. If you discover
any parts are missing, immediately call our toll-free service helpline at 1-800-428-8560 (Monday - Friday 9 a.m.
to 4 p.m. EST) or at info@midwesthomes4pets.com.
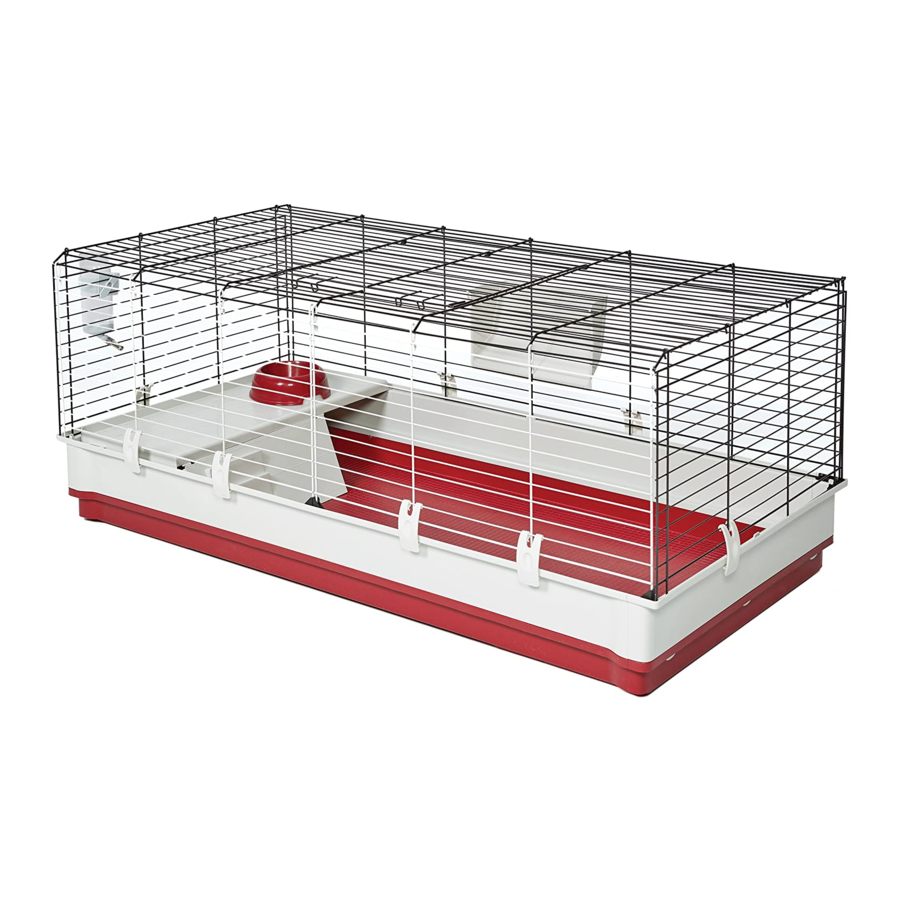
PARTS IDENTIFICATION
A - Plastic Bottom
B - Plastic Sides - 2
C - Plastic Ends - 2
D - Wire Top with Door
E - Side Panel/Door - 2
F - Corner Stabilizer - 2
G - Corner Cap - 4
H - Clip - 8
I - Water Bottle
J - Hay Feeder
K - Elevated Feeding Platform
L - Food Bowl
A
C
F
J
I
800-428-8560
midwesthomes4pets.com
P .O. Box 1031
Muncie, Indiana 47308
B
D
G
K
H
L
1
Advertisement
Table of Contents

Related Manuals for Midwest Wabbitat 158XL


Summary of Contents for Midwest Wabbitat 158XL
- Page 1 800-428-8560 midwesthomes4pets.com P .O. Box 1031 Muncie, Indiana 47308 Assembly Instructions for Model Number 158XL IMPORTANT INFORMATION Unwrap and remove all parts from the box. Keep the box and packing material until the product is assembled. In case of return or exchange, failure to return product in similar condition as received could result in limited reimbursement. Please save sales receipt as proof of purchase for warranty purposes.
- Page 2 ASSEMBLY INSTRUCTIONS Assemble the plastic base. Connect the two Plastic Sides (B) to the Plastic Bottom (A). Each side piece has L- shaped tabs that align with the holes in the lip of the Plastic Bottom. Once inserted, slide the entire side piece until it clicks into place.
- Page 3 Attach the Side Panels/Doors (E) to the Wire Top. Place a Corner Cap (G) on each corner of the panels as shown. Place the eight Clips (H) around the outside of the Wire Top as shown. The hooks of each clip will hang on the third horizontal wire from the bottom.
- Page 4 7. Place the Elevated Feeding Platform and Wire Top on the Plastic Bottom. The Corner Stabilizers (F) will click into the corners of the base, while the Clips (H) will secure the Wire Top to the Plastic Bottom on all sides. 8.
- Page 5 LIMITED MANUFACTURER’S WARRANTY For one (1) year from the date of original purchase, MIDWEST Homes For Pets (“MIDWEST”) warrants to the purchaser of this pet home that, should it prove defective by reason of improper workmanship and/or material, MIDWEST will repair or replace, at its option, any defective part of the pet home, without charge for the part or for shipping.
Need help?
Do you have a question about the Wabbitat 158XL and is the answer not in the manual?
Questions and answers