Table of Contents
Advertisement
Quick Links
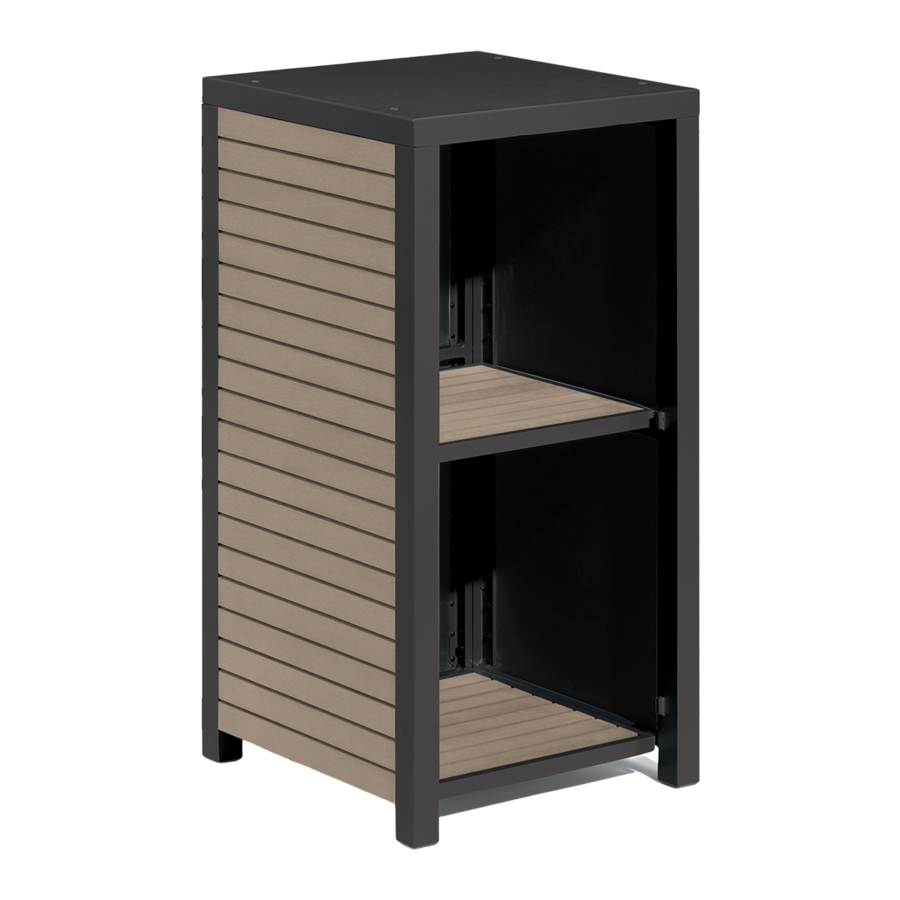
TRAVIRA MODULAR BASE
ASSEMBLY INSTRUCTIONS
COMPONENTS
HARDWARE
A
Machine Bolts
Quantity: 14
B
Metal Washers
Quantity: 14
C
Allen Wrench
Quantity: 1
NOTE
To protect the finish surface of your unit from scratches, always assemble on top of provided cardboard box or a clean blanket.
15 Kingbrook Parkway, Suite 100 Simpsonville, KY 40067 p. 877.866.3331
CONNECTING HARDWARE
D
Connector Bolt
Quantity: 1
E
Metal Washer
Quantity: 1
Lock Nut
F
Quantity: 1
G
Allen Wrench
Quantity: 1
CONNECTING BRACKETS
Each base unit is equipped with built mounting brackets
attached to the bottom of the side panels. When connecting
2 or more units together, remove one bolt from bracket and
loosen the other bolt to rotate bracket 90 degrees.
See reverse for Travira Modular Base Assembly Instructions.
f. 502.719.8888 oxfordgarden.com
Ver. 06.30.20
Advertisement
Table of Contents

Related Manuals for Oxford Garden TRAVIRA MODULAR BASE


Summary of Contents for Oxford Garden TRAVIRA MODULAR BASE
- Page 1 2 or more units together, remove one bolt from bracket and loosen the other bolt to rotate bracket 90 degrees. See reverse for Travira Modular Base Assembly Instructions. NOTE To protect the finish surface of your unit from scratches, always assemble on top of provided cardboard box or a clean blanket.
- Page 2 INSTRUCTIONS INSTALL BOTTOM PANEL CONNECT LEFT SIDE TO BACK PANEL Carefully turn unit upside down, being careful not to scratch Attach LEFT SIDE PANEL to BACK PANEL using 3 washers the top finish. Install either OPEN FLOOR GRATE (Option 1) &...
- Page 3 APPLY OPTIONAL DOOR PANEL LETTERING Place a small mark to indicate the center line of the DOOR PANEL and the center of the LETTERING. Carefully peel the backing from the adhesive lettering, leaving the protective strip on top of the letters. Door Panel Center Line Lettering Center Line Backing Protective Strip...
- Page 4 SUGGESTED CONFIGURATIONS Receptacle Base + Shelf Base + Receptacle Base + Receptacle Base + Shelf Base + Shelf Base Shelf Base Receptacle Base Hutch, Single Stack Hutch, Single Stack Receptacle Base + 2 Shelf Bases + Receptacle Base + Shelf 2 Shelf Bases + 2 Receptacle Bases + Shelf Base +...
Need help?
Do you have a question about the TRAVIRA MODULAR BASE and is the answer not in the manual?
Questions and answers