Advertisement
Quick Links
WELCOME TO THE WORLD OF BARBEQUES GALORE OUTDOOR COOKING
INSTRUCTIONS FOR ASSEMBLY AND USE OF
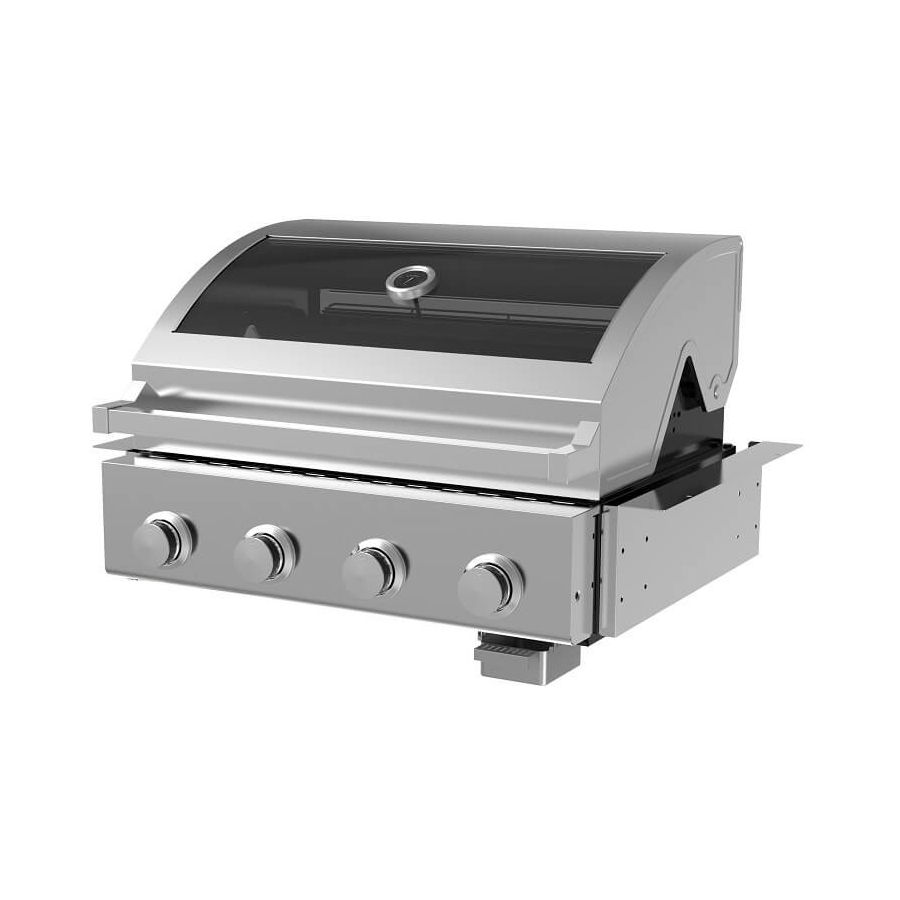
ALFRESCO BUILD-IN BARBEQUES
Code: G4ALF2BI, G6ALF2BI
For the safe use and enjoyment of your new barbeque.
These instructions contain important information that needs to be followed for the safe assembly and use of your
new barbeque. Please read through carefully and completely prior to assembly.
Take care to remove all packaging materials and protective coatings from the barbeque
before first use.
For Model Codes: G4ALF2BI, G6ALF2BI
Tools required:
1 x Phillips head screwdriver
IMPORTANT: READ ALL OPERATING INSTRUCTION BEFORE LIGHTING.
By following these instructions for safe and easy operation, you will enjoy years of
satisfying, trouble free outdoor cooking. And when you're fully up and running, you can
visit your retailer for some great accessories and cooking tips to make your experience
even more rewarding. But first things first....
Page 1
Advertisement

Related Manuals for Alfresco G4ALF2BI


Summary of Contents for Alfresco G4ALF2BI
- Page 1 Please read through carefully and completely prior to assembly. Take care to remove all packaging materials and protective coatings from the barbeque before first use. For Model Codes: G4ALF2BI, G6ALF2BI Tools required: 1 x Phillips head screwdriver IMPORTANT: READ ALL OPERATING INSTRUCTION BEFORE LIGHTING.
-
Page 2: Safety Warnings
Safety warnings HAZARDOUS FIRE OR EXPLOSION MAY RESULT IF THESE INSTRUCTIONS ARE IGNORED It is the consumer’s responsibility to see that the barbeque is properly assembled, installed, and taken care of. Failure to follow instructions in this manual could result in bodily injury and/or property damage. FOR YOUR SAFETY IF YOU SMELL GAS: 1. - Page 3 Safety warnings (continued) Do not perform any servicing on the barbeque yourself. This includes internal adjustment of the regulator and gas valves. Servicing can only be carried out by authorised technicians. It is important that you install your barbeque exactly as described in these instructions. In particular: you should keep the barbeque clear of combustible material, and you should check for leaks whenever a new connection is made.
- Page 4 Where to put your barbeque This barbeque must only be used in an above ground, open air situation with natural ventilation, without stagnant areas, where gas leakage and products of combustion are rapidly dispersed by wind and natural convection. Any enclosure in which the appliance is used must comply with one of the following: (1) Any enclosure with walls on all sides, but at least one permanent opening at ground level,...
- Page 5 Outdoor Use Only! Support structure must be only non-combustible material. Clearances of barbeque from combustibles: 600mm from sides and rear; 1200mm vertically above; 10mm below. ≥688mm(for hood to open) G4ALF2BI width 690mm ≥155mm G6ALF2BI width 840mm (for hood to open)
- Page 6 Where to put your barbeque (continued) Ventilation of cylinder compartments for cylinders exceeding 1.25KG gas capacity: Cylinder compartments shall have permanent openings ventilating directly to the outside of the appliance, and consisting of either- (a) Perforations, uniformly distributed over the height of the enclosure and with a total free area of not less than 25% of the sidewall area;...
- Page 7 Contents list. Carefully unpack the carton and check all the parts: 1. One Firebox & 2. Two Mounting 3. Two Drip Tray 4. One Warming 5. One Cooking Hood Assembly Brackets Rails Rack Grill 6. One Hot Plate 7. Two/ Three 8.
-
Page 8: What You Need
Assembly instructions STEP 1: Attach the Firebox. Rating label should be at front left. WHAT YOU NEED: Eight x M6*35mm screws (A) Eight x Bakelite Insulators (C) Two x Mounting Brackets (2) Use Eight M6*35mm screws (A), Eight Insulators (C) to attach the Two Mounting Brackets (2) onto the left and right side of the Firebox &... - Page 9 Assembly instructions (continued) STEP 4: Attach Grease Channelling Tray and Grease Cup. WHAT YOU NEED: One x Grease Channelling Tray (8) One x Grease Cup (9) Insert the One Grease Channelling Tray (8) onto the Drip Tray Rails, then put the Grease Cup (9) onto the brackets which are under the Grease Channelling Tray.
- Page 10 Checking the gas type and supply Before assembling your barbeque, you should ensure your barbeque is suited to the type of gas which you are going to use. This is a low pressure barbeque and must only be used with propane gas only using the hose and regulator supplied.
- Page 11 Checking the gas type and supply (continued) (2 ) Bayonet Point: Alternatively, you can have the gas fitter terminate the gas line using a “bayonet point”. This allows you to connect and disconnect the barbeque using a special hose and bayonet termination. For LPG installations, an appropriate hose is available from most barbeque retailers.
- Page 12 Connecting to gas and Checking for gas leaks Always keep the gas cylinder in an upright position. Always close the gas cylinder valve when the barbeque is not in use. Do not subject the cylinder to excessive heat. NEVER STORE YOUR GAS CYLINDER INDOORS. If you store your barbeque indoors, ALWAYS disconnect the gas supply first and store it safely outside.
-
Page 13: Lighting Instructions
Lighting the bbq LIGHTING INSTRUCTIONS After confirming there are no leaks: 1. Open the hood of the barbeque while lighting the main burners. 2. Turn all the control knobs clockwise to “OFF” position. 3. Connect the regulator to the gas bottle. Turn the gas supply “ON” at the gas cylinder. 4. - Page 14 Controlling the Flames CONTROLLING THE FLAMES The knobs have three basic positions “OFF”, “LOW” & “HIGH”. You can achieve any flame height between “LOW” and “HIGH” by rotating the knob between these two positions. Checking the Flames: Look underneath the barbeque so that you can see the flames. They should be a soft blue colour with yellow tips.
- Page 15 First time use The main cooking surfaces: The grill and optional hotplate are cast iron with a fused on matt vitreous enamel finish. No “curing” is required, but you should give these and the warming rack a thorough wash with regular dishwashing detergent and rinse well with fresh water before first use.
- Page 16 Cooking hints It’s easy to keep your food moist and succulent on a barbeque by following these guidelines: Use tongs instead of a fork when turning meat and poultry. A fork pierces the flesh and causes the juice to seep out. ...
- Page 17 Covered cooking (continued) Preheat the barbeque with all burners on HIGH and the hood closed for 5 to 10 minutes. Once the barbeque is pre-heated and the hood is closed, heat is trapped around the food, so the burners may only need to be on LOW and in some cases, some of the burners OFF. Heat from the lit burners will circulate all through the hood cooking quite evenly.
- Page 18 Covered cooking (continued) For roasting most foods, aim to keep the thermometer around 180ºC to avoid burning. Note that the temperature at the roasting rack maybe higher than the temperature measured at the hood thermometer and most foods will quickly burn over 180ºC. For smoking, lower temperatures and longer cooking times will result in more intense smoke flavour and more tender meats.
- Page 19 Internal meat temperatures To obtain correct temperature use an instant-read meat thermometer in the thickest part of the flesh, careful not to touch any bone. Beef Veal Preference Meat Probe Temperature Preference Meat Probe Temperature Rare not advised Rare 140ºF / 60ºC Medium 155ºF / 70ºC minimum safe temperature Medium 150ºF / 66ºC Well Done 165ºF / 75ºC...
- Page 20 Cooking times (continued) Poultry Weight or Barbecuing Cut of Meat Approx. Cooking Time Thickness Method Chicken (whole) 2 kg Indirect 70-80 min Chicken (halved or quartered) 2 kg total Indirect 55-65 min Direct or 12-15 min (Direct) Chicken (breasts, boneless) 150 g ea Indirect 23-25 min (Indirect)
- Page 21 Care and maintenance Cleaning your barbeque: Your barbeque will look better and last longer if you keep it clean. Follow these simple steps. The cooking surfaces: While the cooking surfaces are still hot, take a long handled brush and a scraper and remove remaining oil and food scraps. Use an oven mitt to avoid burning yourself.
- Page 22 Care and maintenance (continued) If you use a portable LPG gas cylinder, you will need to have the gas cylinder serviced or replaced every ten years. The date of the last service should be stamped on the neck of the gas cylinder.
-
Page 23: Troubleshooting Guide
Troubleshooting guide Problem Possible Cause Prevention / Solution No gas flow Check cylinder contents- refill Obstructed gas flow Check burners and hose Burner will not light Burner not over the valve Engage burner over the valve Spider webs in the burner Clean the burners Burner ports blocked Clean the burner ports... - Page 24 Exploded Drawing - Part List for G4ALF2BI Page 24 ...
- Page 25 Exploded Drawing - Part List for G6ALF2BI Page 25 ...
- Page 26 Exploded Drawing - Part List for G4ALF2BI/ G6ALF2BI QTY PER PART PART CODE PART CODE QTY PER QTY PER DESCRIPTION SPARE PART NUMBER for G4ALF2BI for G6ALF2BI G4ALF2BI G6ALF2BI PACK CP9153117 CP9153149 Hood assembly CP9153110 CP9153144 Hood outer panel CP9153122...
-
Page 27: Need More Information
Phone 1 800 978 555 Or visit us online at: www.barbequesgalore.com.au Barbeques Galore G.L.G. Australia Pty Ltd (ACN 001 185 002). Building A2, Campus Business Park, 350-374 Parramatta Road. Homebush NSW 2140 AUSTRALIA Ph. 02 9735 4111 G4ALF2BI, G6ALF2BI -SERIES 0520 Page 27 ...
Need help?
Do you have a question about the G4ALF2BI and is the answer not in the manual?
Questions and answers