Advertisement
Quick Links
Advertisement

Related Manuals for MSI GAMING MOUSE 2017


Summary of Contents for MSI GAMING MOUSE 2017
- Page 1 MSI GAMING MOUSE 2017 User's Guide...
-
Page 2: Federal Communication Commission Interference Statement
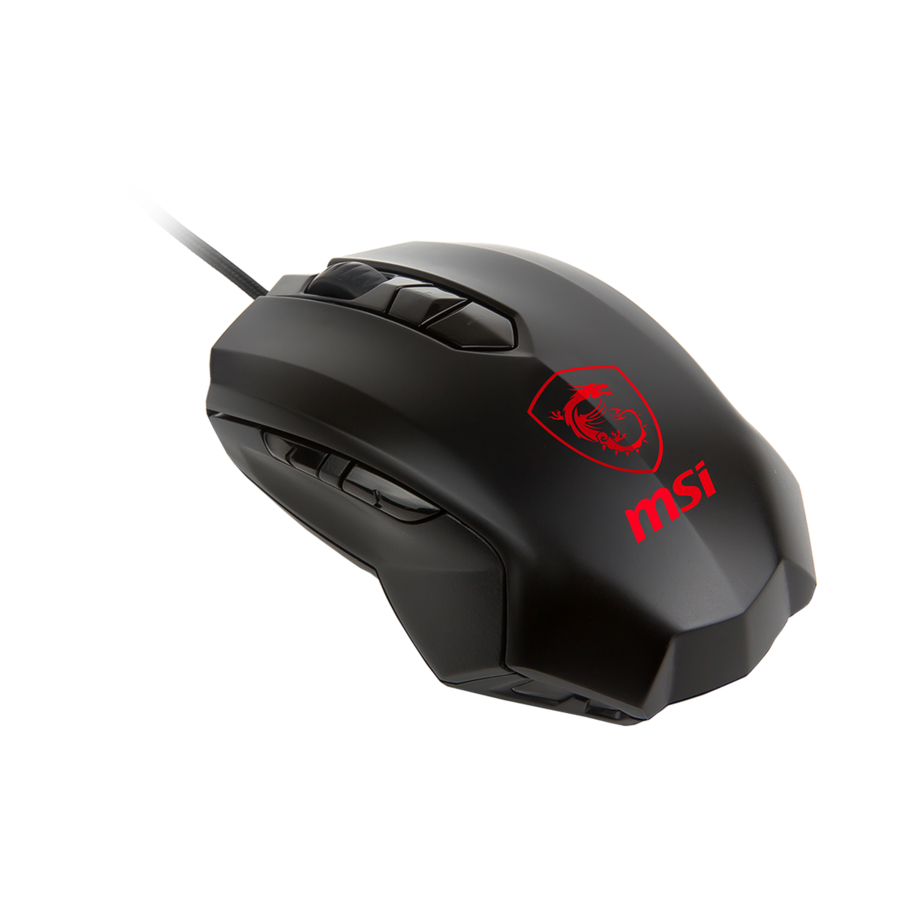
Federal Communication Commission Interference Statement This equipment has been tested and found to comply with the limits for a Class B digital device, pursuant to Part 15 of the FCC Rules. These limits are designed to provide reasonable protection against harmful interference in a residential installation. This equipment generates, uses and can radiate radio frequency energy and, if not installed and used in accordance with the instructions, may cause harmful interference to radio communications. - Page 3 MSI GAMING MOUSE 2017 Overview 1. Left button (Click) 6. DPI up 2. Right button (Menu) 7. DPI down 3. Scrolling Wheel 8. Scroll up 4. Forward 9. Scroll down Press this button to view the previous page of the Internet browser.
-
Page 4: Usb Connection
USB Connection 1. Plug the USB connector to the USB port of your computer 2. The computer will detect and install the mouse automatically 3. When the installation completes, the mouse is ready to use System Requirements 1. Windows XP/Vista/7/8/8.1/10 ®... - Page 5 MSI GAMING MOUSE 2017 4. Windows will prompt you if installation should continue despite not passing Windows logo ® testing; install the driver despite this. Note: The driver will automatically uninstall previous driver versions. For that reason it may take a little while until the driver is installed and ready to use then repeat step3.
- Page 7 MSI GAMING MOUSE 2017 7. The symbol will now appear in the right-hand side of the Taskbar. You access the gaming mouse configuration menu by right clicking it.
-
Page 8: Mode Switch
GAMING MOUSE Main Window Switch Orientation ▶ Right-handed: The right hand is suitable ▶ Left-handed: The left hand is suitable Mode Switch Advanced setting allows setting two button setting and use mode switch button to switch between Mode1 & Mode2. -
Page 9: Programmable Keys
MSI GAMING MOUSE 2017 Programmable Keys Click Menu Universal Scrolling Double Click Assign a shortcut Button off IE Forward IE Backward Scroll up Scroll down Assign a launch Fire button Smart key Windows Key Open Driver Mode Switch Note: Along with the left and right mouse buttons the mouse has 7 additional buttons which can be freely assigned with the functions available in the driver menu. - Page 10 ▶ Create/Save Profile Create one of five profiles. For instance, you can save all button assignments, macros, color settings or sensitivity settings to a profile here. As each different mouse assignment is best suited to different programs you can assign each program/game a special preset. Once you’ve assigned all desired macros using the macro manager to different buttons, and perhaps made different color setting changes, save these.
- Page 11 MSI GAMING MOUSE 2017 Marco Manager Click on MARCO MANAGER to access the MARCO setting menu. ▶ Function List Assign Macro Macro Manager Multimedia Open player Pre Track Next Track Play/Pause Stop Mute Volume Up Volume Down Select Player Profile switch...
- Page 12 3. Now you can enter a macro. To do that, Click the ‘Start Record’ button in the right- hand window. Enter the key Combination which you need for a special action in the game. The option ‘Record delays between key commands’ is located under the record button.
- Page 13 MSI GAMING MOUSE 2017 5. Assign the function to the mouse by clicking the ‘Apply’ Button without exiting the ACROX menu .It may take a few seconds until the information is transferred to the mouse. You can now store and save these settings under one of the five profiles that can be stored on the mouse.
- Page 14 4. Insert Mouse Event: Specify which mouse event should be executed. The following options are available: • Left Button: Left mouse button • Right Button: Right mouse button • Wheel: Centre mouse wheel button Note: The mouse scroll function of the mouse wheel is not possible to be program. Here too, only three Options are available;...
- Page 15 MSI GAMING MOUSE 2017 Multimedia ▶ • Open player: Start media player • Pre Track: Switch to the previous media track • Next Track: Switch to the next media track • Play/Pause: Switch between playing and pausing media • Stop: Stop playing the media in the media player •...
- Page 16 SENSITIVITY ▶ Sensitivity options Adjust the overall moving sensitivity of the mouse sensor. Select a moving sensitivity level on a scale of -90%~+100%. ▶ DPI Switcher Select the desired resolution(s) of the mouse sensor here. The arrow beneath the number bar shows which dpi value is currently active. We recommend using the mouse with a resolution of 400dpi at first then increasing the dpi resolution in steps as soon as you become accustomed to the speed.
-
Page 17: Advanced Setting
MSI GAMING MOUSE 2017 ADVANCED SETTING ▶ Polling Rate The term ‘polling rate’ describes the number of times the computer prompts the mouse for information. A high polling rate in conjunction with a high dpi setting ensures smooth pointer movement. We recommend that you start off with a resolution of 400dpi and a polling rate of 1000Hz. -
Page 18: System Setting
Set the speed of the mouse pointer on a scale of 1 to 11 here. This is the same as the value that has been set in the Windows Control Panel. Note: MSI to keep the default settings. ▶ Mouse wheel Here you can select how quickly your mouse wheel should scroll a document. -
Page 19: Osd Setting
MSI GAMING MOUSE 2017 OSD SETTING A vary of information can be displayed with On Screen Display function bases on user selection. The contents which is selected in the AP software are shown in the OSD a minimum set of modules for the OSD is provided as part of the AP software: Profile status, Macro execute status, Skype. - Page 21 MSI GAMING MOUSE 2017 使用手冊...
- Page 22 產品檢視 1. 滑鼠左鍵(點擊) 6. CPI 調升 2. 滑鼠右鍵(選單) 7. CPI 調降 3. 滾輪 8. 向上滑動 4. 上一頁 9. 向下滑動 在網路瀏覽器中使用此鍵可以回 到上一個瀏覽頁面 5. 下一頁 在網路瀏覽器中使用此鍵可以跳 至下一個瀏覽頁面...
- Page 23 MSI GAMING MOUSE 2017 USB 連接 1. 將滑鼠USB 連接至電腦USB 插槽 2. 電腦將會自動偵測新硬體並自動安裝驅動程式 3. 當驅動安裝完畢您可以在您的電腦上使用此滑鼠 系統需求 1. Windows XP/Vista/7/8/8.1/10 ® 2. Free USB 連接埠 3. CD-ROM 驅動程式 4. 25MB 以上硬碟空間 安裝驅動程式 1. 將滑鼠連接到電腦USB插槽 2. 作業系統將會自動偵測已連接的滑鼠裝置 3. 點擊驅動程式光碟中「Setup.exe」進行驅動程式安裝...
- Page 24 4. 當安裝驅動程式時,Windows 作業系統將會提示您此驅動程式尚未通過認證,您可以忽略此 ® 提示點選下一步繼續完成安裝。 注意事項: 驅動程式於安裝時會自動返安裝舊版本驅動程式,當反安裝完畢後請重複步驟3 進行驅動安裝。 5. 選擇使用語言(內含五國語言) 6. 當驅動程式完成安裝後請點選OK按鈕完成安裝...
- Page 25 MSI GAMING MOUSE 2017...
- Page 26 7. 驅動程式將會長駐於作業系統工具列,當您右鍵點擊他將可啟動設定...
- Page 27 MSI GAMING MOUSE 2017 GAMING MOUSE 主選單 方向切換 ▶ 右手:適用於右手使用者 ▶ 左手:適用於左手使用者 模式切換 模式切換設定可以讓您設定二組按鍵設定,且使用切換按鈕切換設定值。...
- Page 28 可自定義按鍵指定功能 點擊 功能 通用滾動 滑鼠雙擊 設定捷徑 按鍵關閉 瀏覽器上一頁 瀏覽器下一頁 滾輪向上 滾輪向下 指定開啟軟體 射擊鍵 智能按鍵 Windows 功能鍵 開啟滑鼠設定頁面 模式切換鈕 注意:滑鼠本體上共有七組按鈕可以透過驅動程式內設定的選項自由訂義分配功能.或是使用下 拉式選單定義功能。 ▶ 點擊: 滑鼠左按鍵 ▶ 功能: 滑鼠右鍵點擊.當選取目標後點擊右鍵開啟目錄 ▶ 通用滾動: 透過滑鼠移動滾動畫面 ▶ 滑鼠雙擊: 滑鼠左鍵雙點擊 ▶ 設定捷徑: 設定鍵盤指令到滑鼠按鍵 ▶ 按鍵關閉 : 關閉功能鍵 ▶ 瀏覽器上一頁: 網頁瀏覽器上一頁面...
- Page 29 MSI GAMING MOUSE 2017 ▶ 新增/儲存設定檔 新增一個設定檔(內建五個設定檔儲存),可以全部的自定義按鍵功能,巨集顏色設定&滑鼠 敏感度調整到設定檔中,可以根據不同軟體或是遊戲的按鍵需求定義最佳的按鍵配置。 一旦設定完成所需要的巨集按鍵定義或是不同的顏色變化選項,你可針對此設定給予對應 的命名,這樣有助於您管理自定義檔案,你也可以透過軟體將配置輸出,成為.exe file .到 對應的目錄,當您透過連接到軟體滑鼠會自動切換到你預先設定的定義檔案。 ▶ 讀取設定檔 可以將設定好的定義檔儲存,或是下載別人已經儲存好的定義檔案,這是個簡單的方式去 分享自己的滑鼠設定給好友。 ▶ 修改設定檔案 透過軟體可以編輯設定檔名稱&連結,使用連結功能滑鼠會自動偵測你正在啟動的軟體並 切換到對應的設定檔。...
- Page 30 巨集管理 按下巨集管理鍵可進入巨集設定選單 ▶ 功能清單 設定巨集 巨集管理 多媒體 開啟媒體播放棄 上一段 下一段 播放/暫停 停止 靜音 音量增加 音量降低 選定播放器 設定檔切換 設定檔切換 上一個設定檔 下一個設定檔 DPI切換 DPI 切換 DPI 增加 DPI 降低 作業系統功能 行事曆 電子郵件 瀏覽器我的最愛 瀏覽器下一頁 瀏覽器上一頁 瀏覽器更新停止 我的電腦 瀏覽器更新 瀏覽器首頁 瀏覽器搜尋 ▶ 錄製巨集(基本編修):滑鼠左鍵 1.
- Page 31 MSI GAMING MOUSE 2017 3. 現在可以輸入新的巨集,按下開始記錄之後可以開始輸入組合鍵去對應您所需的遊戲 動作,選項中紀錄鍵值延遲功能可以允許您指定某些關鍵組合的時間設定,因此可以 創造一個巨集指定遊戲中的動作並設定對應時間後的動作。 4. 點擊結束錄製當您已經完成組合鍵輸入。現在巨集已經紀錄完成,當你點擊OK後巨集 紀錄已經完成。現在您可以將巨集指定到六個可以自定義按鈕,你可以將巨集指定到 任何一個按鈕透過點擊旁邊的箭頭來指定。在下方的下拉式選單中選擇指定巨集可以 顯示目前所有巨集設定。 注意:如果您設定的巨集已經指定給特定按鈕,需要將巨集指定到特定的按鈕...
- Page 32 5. 當指定巨集完成後,點擊應用鈕後將會需要時間將設定訊息傳送至滑鼠,現在可以將 設定保存在滑鼠的記憶體內,這樣可以更輕鬆管理各個針對不同需求的滑鼠按鍵配置 並針對不同的軟體或是遊戲獲得最佳的按鍵配置。 注意:正在使用的巨集可以透過按鍵隨時切換 ▶ 整合滑鼠點擊 另一個特殊的功能設定為可以透過巨集設定滑鼠按鍵跟鍵盤指令,您可以設定一個滑鼠動 作接續在鍵盤指令之前或之後。為了要達成這樣的目的,您必須在鍵盤命令巨集管理員選 定之前或是之後建立一個新的指令,點擊滑鼠右鍵即可打開軟體選單,其中包含了各式選 項。 1. 在紀錄之前:開始紀錄巨集指令在選定事件之前。 2. 在紀錄之後:開始紀錄巨集指令在選定事件之後。 3. 插入延遲訊號:手動修正二個命令之間的延遲時間。...
- Page 33 MSI GAMING MOUSE 2017 4. 插入滑鼠事件:指定哪些滑鼠事件被執行。 • 滑鼠左鍵:滑鼠左按鍵 • 滑鼠右鍵:滑鼠右按鍵 • 滑鼠滾輪:滑鼠滾輪中鍵 注意:滑鼠的鼠標滾輪是不可程式化內定的設定選項只有「按下」及「釋放」。 • 下一動作:下一個按鈕 • 上一動作:上一個按鈕 所有的選項都有內定的三個選項: • Down:保持按鍵 • UP:釋放按鍵 • 點擊:執行命令”按下”及”釋放”功能 5. 編輯延遲:可以手動增加或是減少按鍵延遲時間。所需要的只是簡單的輸入所需要的 毫秒。 注意:部分遊戲無法正確的偵測到短延遲。 6. 刪除:刪除在巨集中選定的按鍵步驟。...
- Page 34 Multimedia多媒體 ▶ • 打開軟體:開啟媒體播放軟體 • 上一段:上一段 • 下一段:下一段 • 播放/暫停:播放媒體&暫停播放 • 停止:停止播放媒體 • 靜音:關閉媒體音量 • 音量上升:增加電腦播放音量. • 音量降低:降低電腦播放音量. • 選擇軟體:設定預設播放媒體軟體. ▶ Profile switch設定檔切換 • 設定檔切換:循環切換 • 上一個設定檔:上一個設定檔 • 下一個設定檔:下一個設定檔 注意:滑鼠內建記憶體可以儲存五組自定義設定(不包含巨集設定)。使用切換鍵可以在設 定檔間切換。設定檔切換燈號:當切換設定檔LED會閃爍5秒然後啟動設定. DPI切換 ▶ • 上一個DPI:反向循環(Default 800→1600→6400) • 下一個DPI:正向循環(Default 6400→1600→800) Windows 功能 ▶...
- Page 35 MSI GAMING MOUSE 2017 靈敏度選項 ▶ 靈敏度選項 此選項可調整滑鼠感應器的靈敏度。調整設定值切換滑鼠感應靈敏度(-90%~+100%) ▶ DPI 切換 此選項可以選擇滑鼠DPI設定。箭頭指標下方顯示目前DPI設定,我們建議使用預設的 800dpi 作為初始設定當您熟悉了移動速度再逐步增加DPI。 ▶ DPI 設定 • 預設DPI 設定值為DPI 800 初始的切換為800/3200/6400 • DPI設定畫面讓您輕鬆的改變設定值,設定為個人化設定(設定可調整值為 400~6400DPI)。 • 自定義DPI設定,使用DPI切換鈕在不同DPI之間切換。 ▶ DPI顯示 • 設定一(初始值 800DPI)上方LED 閃爍5秒後關閉,下方LED為關閉狀態。 • 設定二(初始值 3200 DPI)上方LED 關閉,下方LED 閃爍5秒後關閉。 • 設定三(初始值6400DPI)上下LED 閃爍5秒後關閉。...
- Page 36 進階設定 ▶ 滾輪滾動速度 「輪詢速率」描述數字的計算機提示鼠標的時間信息。高輪詢率結合具有高dpi設置確保平 滑指針運動。我們建議您開始分辨率設定為800dpi,輪詢率為1000Hz。 注意:一般狀況下提高滾輪滾動率會使指標移動速度緩慢. ▶ 燈光選擇 1600萬色供您選擇 ▶ 燈光效果開關 設定LED燈光系統開關 ▶ 燈光效果設定 設定滑鼠燈光效果(可以設定為全亮或呼吸燈效果) ▶ 還原設定值 當選擇此選項將會將滑鼠設定值還原至出廠的狀態,所有的自定義按鍵將會失 ▶ 智能按鍵 SPEED 透過軟體可以設定滑鼠點擊延遲率(2~255MS)
- Page 37 MSI GAMING MOUSE 2017 系統設定 ▶ 滑鼠雙點擊 雙鼠雙按速度設定,當設定值趨近於1時,表示雙擊時間越長;當設定值趨近於11時,示雙 擊時間越短。 注意:所有的設定值必須按下APPLY後方生效 ▶ Windows 游標速度設定 設定滑鼠游標速度。設定值區間為1~11,這與作業系統內建的設定值相同。。 注意:此部分設定建議使用預設設定值...
- Page 38 OSD設定 桌面即時顯示設定 不同的即時狀態都會透過OSD桌面即時顯示軟體通知使用者,這取決於使用者的通知設定. 透過軟體的設定可以顯示軟體內建相關訊息的通知:軟體顯示訊息包含了CPU & RAM、Profile status、Macro execute status、New email、Skype ▶ 桌面即時顯示 • CPU使用率:CPU使用狀況 • 記憶體使用率:記憶體使用狀況 • 設定檔狀態:當設定檔變更設定軟體將會即時顯示設定檔狀態 • 巨集執行狀態:當任何巨集按鍵或是設定被按下,軟體將會即時顯示巨集執行狀態 • 新郵件:新郵件送達通知 • Skype:Skype 訊息通知 • DPI 狀態:DPI 狀態 ▶ 顏色選擇 桌面即時顯示顏色設定: 這裡有紅、橙、黃、綠、藍、青、紫,七種顏色供您選擇。 桌面即時顯示設定 ▶ 桌面即時顯示透明度設定(設定值10%~100%) 注意:當遊戲被最小化時,請把OSD勾選提示解除 ▶ 郵件 / POP3 設定 •...
- Page 39 MSI GAMING MOUSE 2017...
Need help?
Do you have a question about the GAMING MOUSE 2017 and is the answer not in the manual?
Questions and answers