Table of Contents
Advertisement
Quick Links
Advertisement
Table of Contents

Subscribe to Our Youtube Channel
Related Manuals for Gantner Mifare Gat ECO.Lock 7 F/ISO Series


Summary of Contents for Gantner Mifare Gat ECO.Lock 7 F/ISO Series
- Page 1 GAT ECO.Lock 7xxx F/ISO ® Battery-Powered Electronic Lock MIFARE and ISO 15693 Installation, Configuration, Operation Document Version 1.2 www.gantner.com HB_GAT-ECOLock-7xxxFISO--EN_12 Installation, Configuration, Operation Document Version 1.1...
- Page 2 Copyright 2017-2018 by GANTNER Electronic GmbH, Schruns (Austria). Operating instructions, manuals and software are protected by copyright. All rights are reserved. Copying, duplication, translation, installation in any electronic medium or machine-readable form in whole or in part is prohibited. The sole exception is represented by creation of a back-up copy of software for own use as a safeguard, so far as this is technically possible and recommended by us.
- Page 3 Dear Customer, We congratulate you on selecting a product (appliance or software) from GANTNER Electronic GmbH. Our aim is to ensure our product operates with safety and to your complete satisfaction. To achieve this aim, please take this opportunity to familiarize yourself with the following guidelines: 1.
- Page 4 The complete text of the CE Declaration of Conformity is available on the following internet link: http://www.gantner.com/en/downloads-gat-ecolock7xxx_hh74dol985 GANTNER is committed to meeting or exceeding the requirements of the RoHS directive (2011/65/EU). The RoHS directive requires that manufacturers eliminate or minimize the use of lead, mercury, hexavalent chromium, cadmium, polybrominated biphenyls and polybrominated diphenyl ethers in electrical and electronic equipment sold in the EU after July 1, 2006.
-
Page 5: Table Of Contents
5.2.4 Personal Locker Programming Card Mode ..................34 5.2.5 Personal Locker Expiry Date Mode ..................... 35 GAT ECO.Basic Set F/ISO ........................37 Summary of System Data Carriers ......................37 5.4.1 Master Data Carrier ..........................37 5.4.2 Program Data Carrier ........................... 38 www.gantner.com HB_GAT-ECOLock-7xxxFISO--EN_12... - Page 6 6.5.8 Configuration Settings Table ....................... 47 7 TECHNICAL DATA ............49 Power Supply ............................49 Reading Field ............................49 Memory and Time Management ......................49 Control and Display Elements ........................ 49 Interface ..............................50 Housing ..............................50 Environmental Conditions ........................50 www.gantner.com HB_GAT-ECOLock-7xxxFISO--EN_12...
-
Page 7: Introduction
FID and the read and write keys. The site key is used in MIFARE and ISO 15693 systems and is encoded in every data carrier and device used in the facility thereby ensuring that data carriers from one installation cannot be used in other installations. www.gantner.com HB_GAT-ECOLock-7xxxFISO--EN_12... -
Page 8: Formatting
General term for the GAT ECO.Lock 7xxx F/ISO. Locker The term "locker" is used to describe all possible locker applications that can be fitted with a GANTNER electronic lock. Typical applications include a changing room locker, a deposit box, or a private box. -
Page 9: General Information
Recording of the last 150 bookings Secure data transmission between RFID reader and data carrier NFC ready Mechanical locking and unlocking with motorized locking catch for highest reliability Existing lockers easily retrofitted (compatible with GAT Lock 6010 locks) www.gantner.com HB_GAT-ECOLock-7xxxFISO--EN_12... -
Page 10: Rfid Technology
Emergency power supply when the batteries become empty 2.3 RFID Technology Identification of users by GANTNER devices within a facility is achieved via RFID (radio-frequency identification) technology using a frequency of 13.56 MHz. Various types of RFID technologies are available with a letter(s) added to the GANTNER model identifier to indicate the type of technology the device supports: "B":... -
Page 11: System Components
6. GAT ECO.Basic Set F/ISO 7. GAT ECO.Lock 7000 - Battery Key GEA 11. GAT Lock 6010 BED Front Label 10. GAT Lock 6010 GANTNER Front Label 9. 1.5V Alkaline Battery Alkaline Figure 2.1 – Components of the GAT ECO.Lock 7xxx F/ISO system www.gantner.com... - Page 12 Optional door handle for the GAT ECO.Lock 7xxx F/ISO with placeholder for an additional label, anthracite gray. Batterie 1.5V Alkali (Part No. 308819) GANTNER-approved battery for the GAT ECO.Lock 7xxx F/ISO. Three batteries required for operation. Batteries supplied per battery.
-
Page 13: Gat Eco.lock 7Xxx F/Iso Dimensions And Components
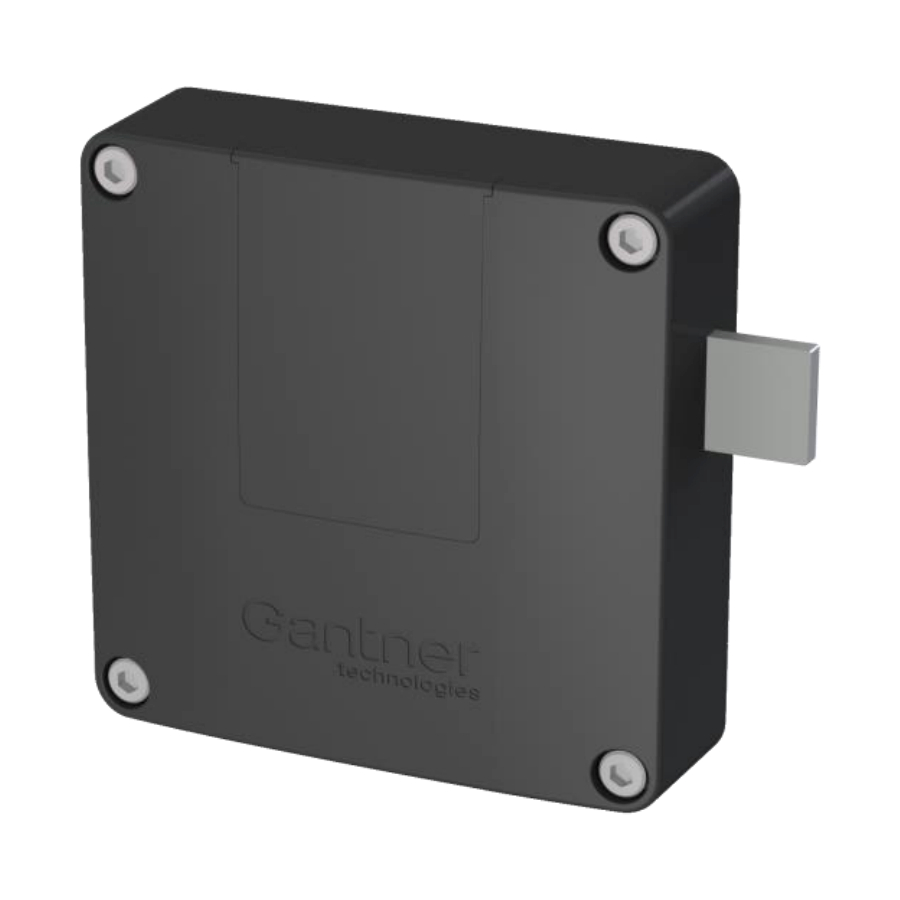
Non-metallic door Metallic door 1. Battery cover 4. LED ring 2. Locking bolt 5. Lock electronics 3. Button 6. Booster Figure 2.2 – GAT ECO.Lock 7xxx F/ISO dimensions and components (dimensions in mm – inches shown in brackets) www.gantner.com HB_GAT-ECOLock-7xxxFISO--EN_12... -
Page 14: Installation
The GAT ECO.Lock 7xxx F/ISO is suitable for locker doors made of metal and non-metallic materials, and is also suitable for indoor and outdoor installations. GANTNER provides six different models to suit these varying installation applications. See section “2.4 System Components” for more information. -
Page 15: Door Width And Thickness
When installing the GAT ECO.Lock 7xxx F/ISO into lockers with narrow doors, ensure that the lock housing does not contact the locker body when opening and closing the door (see below). Figure 3.1 – Width and thickness of the locker door www.gantner.com HB_GAT-ECOLock-7xxxFISO--EN_12... -
Page 16: Definition Of The Door Hinge (Right Of Left-Hinged Door)
You can make this change yourself (see next section). The installation for right-hinged doors is described in the following pages. The installation process for left-hinged doors is the same as for right-hinged doors, only with the GAT ECO.Lock 7xxx F/ISO and locker door rotated180°. www.gantner.com HB_GAT-ECOLock-7xxxFISO--EN_12... -
Page 17: Conversion For Right Or Left-Hinged Door
► Lift the lock electronics out of the lock housing. ► Rotate the lock electronics 180°. ► Reinsert the lock electronics into the lock housing. o The GAT ECO.Lock 7xxx F/ISO is now converted to the opposing locker hinge type. www.gantner.com HB_GAT-ECOLock-7xxxFISO--EN_12... -
Page 18: Installation In Lockers With Non-Metallic Doors
Figure 3.3 – Diameter of the button drill hole for non-metallic doors The following diagram shows the position of the button drill hole in relation to the housing mounting holes. Right-hinged door Left-hinged door Figure 3.4 - Position of the button drill hole for non-metallic doors www.gantner.com HB_GAT-ECOLock-7xxxFISO--EN_12... -
Page 19: Measurements For The Button Drill Hole
Use the following measurements to position the button drill hole depending on whether the locker door is left or right-hinged. Figure 3.5 – Installation measurements for right-hinged doors Figure 3.6 – Installation measurements for left-hinged doors www.gantner.com HB_GAT-ECOLock-7xxxFISO--EN_12... -
Page 20: Installation Instructions For Non-Metallic Doors
► Ensure that the battery cover can open and is not hindered by other components. See section “4 START-UP” for instructions on inserting the batteries and putting the GAT ECO.Lock 7xxx F/ISO into operation. www.gantner.com HB_GAT-ECOLock-7xxxFISO--EN_12... -
Page 21: Installation In Lockers With Metallic Doors
Figure 3.7 – Diameter of the button drill hole for metallic doors The following diagrams show the position of the button drill hole in relation to the housing mounting holes. Right-hinged door Left-hinged door Figure 3.8 - Position of the button drill hole for metallic doors www.gantner.com HB_GAT-ECOLock-7xxxFISO--EN_12... -
Page 22: Measurements For Installation
3.9 . This installation method allows the lock to be mounted on the inside of the locker wall without the need to drill through the outside of the locker door. Figure 3.9 – Installation of the GAT ECO.Lock 7xxx F/ISO on a single-wall metallic door www.gantner.com HB_GAT-ECOLock-7xxxFISO--EN_12... -
Page 23: Installation Instructions For Metallic Doors
► Ensure that the battery cover can open and is not hindered by other components. See section “4 START-UP” for instructions on inserting the batteries and putting the GAT ECO.Lock 7xxx F/ISO into operation. www.gantner.com HB_GAT-ECOLock-7xxxFISO--EN_12... -
Page 24: Attaching The Door Labels
Frontfolie GAT Lock 6010 GANTNER m.Nr (Part No. 666329) Front label with numbering. Frontfolie GAT Lock 6010 BED (Part No. 666430) Self-adhesive locker door label with graphical operating instructions. GANTNER can also design and print customer-specific labels. Contact your GANTNER representative for more information. www.gantner.com HB_GAT-ECOLock-7xxxFISO--EN_12... -
Page 25: Door Handle Installation (Optional)
Handle (see example). The label can be printed with a customer-specific number, font, and color. The dimensions of the label are 37.7 x 15.7 mm, corner radius 1 mm (1.48´´ x 0.62´´, corner radius 0.04´´). Please contact GANTNER Electronic GmbH or your sales partner to organize label printing. www.gantner.com... - Page 26 1. GAT Lock Door Handle 2. GAT ECO.Lock 7xxx F/ISO 3. GAT ECO.Lock 7xxx F/ISO button shaft 4. GAT ECO.Lock 7xxx F/ISO button Figure 3.13 – Installed GAT Lock Door Handle and GAT ECO.Lock 7xxx F/ISO www.gantner.com HB_GAT-ECOLock-7xxxFISO--EN_12...
-
Page 27: Start-Up
NOTE! To avoid unnecessary battery usage, insert the batteries directly before the GAT ECO.Lock 7xxx F/ISO is installed. ► Insert the battery cover key into the slot on the underside of the GAT ECO.Lock 7xxx F/ISO. Figure 4.1 - GAT ECO.Lock 7xxx F/ISO battery compartment www.gantner.com HB_GAT-ECOLock-7xxxFISO--EN_12... -
Page 28: Replacing The Batteries
Always dispose of used batteries in an environmentally friendly way, e.g., at an electronic waste recycling facility. Following battery replacement, the time and date must be reset using a computer and GAT Config Manager (see section "6. CONFIGURATION"). The GAT ECO.Lock 7xxx F/ISO may not be operated while replacing the batteries. www.gantner.com HB_GAT-ECOLock-7xxxFISO--EN_12... -
Page 29: Usb Connection
Manager configuration software are included in the GAT ECO.Basic Set F/ISO (Part No. 812528). See section “5.3. GAT ECO.Basic Set F/ISO”. To configure the GAT ECO.Lock 7xxx F/ISO via PC/laptop: ► Start GAT Config Manager on the PC/laptop. ► Plug the USB cable (type-A end) into a spare USB port on the PC/laptop. www.gantner.com HB_GAT-ECOLock-7xxxFISO--EN_12... - Page 30 The GAT ECO.Lock 7xxx F/ISO enters into configuration mode. The LED ring slowly pulses green to indicate this state. ► Click on “Configure” in GAT Config Manager to open the configuration settings. Further information regarding configuring the GAT ECO.Lock 7xxx F/ISO is available in "6. CONFIGURATION". www.gantner.com HB_GAT-ECOLock-7xxxFISO--EN_12...
-
Page 31: Operation
All MIFARE and ISO 15693 data carriers are possible Personal locker programming card All MIFARE and ISO 15693 data carriers are possible Personal locker expiry date Data carrier must be coded accordingly Figure 5.1 – Requirements for data carriers www.gantner.com HB_GAT-ECOLock-7xxxFISO--EN_12... -
Page 32: Free Locker Mode (With Or Without Duration Of Use Function)
If the locker is locked, e.g., at 01:00, it can be unlocked until 02:00 of the following day. If the locker remains locked past this time, the data carrier can no longer unlock the locker. In this case, the user must recode the data carrier at a central station. www.gantner.com HB_GAT-ECOLock-7xxxFISO--EN_12... -
Page 33: Free Locker Universal Mode
Valid data carriers: The LED flashes green briefly and the locking action is carried out. b) Invalid data carriers: The LED flashes red briefly and the GAT ECO.Lock 7xxx F/ISO does not complete the locking action. ► Release the locker door. www.gantner.com HB_GAT-ECOLock-7xxxFISO--EN_12... -
Page 34: Free Locker Unique Number Mode
All MIFARE and ISO 15693 data carriers can operate with the lock. The data carrier can have a GANTNER locker segment, however the segment is not used for this mode. When a locker is locked with a data carrier, the locker number is not written onto the data carrier. -
Page 35: Personal Locker Expiry Date Mode
5.2.5 Personal Locker Expiry Date Mode During check-in, the user receives a data carrier encoded with GANTNER data blocks. The FID is written onto the “general” data block and the guest’s personal locker number together with the expiry date ("valid from" and "valid to") are written onto the “locker”... - Page 36 "LastOpenAtExpiredDate" option is set (see "6.5.8. Configuration Settings Table"). With this option set, the locker can be opened one more time using the data carrier. www.gantner.com HB_GAT-ECOLock-7xxxFISO--EN_12...
-
Page 37: Gat Eco.basic Set F/Iso
NOTE! The system operator must ensure that the master data carriers are stored in a safe and secure location. If a master data carrier is lost, a new master data carrier can be ordered from GANTNER Electronic GmbH. Before the new master data carrier is used, the original master data carriers must be deleted from the GAT ECO.Lock 7xxx F/ISO (the number of a master data carrier is stored in the lock the first time the master data carrier is used). -
Page 38: Program Data Carrier
The locker is then unlocked if it was locked before the calibration. NOTE! The service data carrier must be available for service employees who are required to configure the locker system. Without the service data carrier, system configuration is not possible! www.gantner.com HB_GAT-ECOLock-7xxxFISO--EN_12... -
Page 39: Summary Of Led Signals
Battery replacement successfully completed and lock again in the normal operating mode signal tone Flashing red/green Only in configuration mode: lock waiting to read a data carrier 5 x red flashes and Battery change required 5 x signal tones Figure 5.2 - Summary of the LED signals www.gantner.com HB_GAT-ECOLock-7xxxFISO--EN_12... - Page 40 GAT ECO.Lock 7xxx F/ISO Operation www.gantner.com HB_GAT-ECOLock-7xxxFISO--EN_12...
-
Page 41: Configuration
GAT Config Manager. There is a separate manual with detailed information on each function available in GAT Config Manager. To access the manual while the software is open, click on the “Help” drop-down menu and select “How Do I”. www.gantner.com HB_GAT-ECOLock-7xxxFISO--EN_12... - Page 42 Complete the following steps to setup the GAT ECO.Lock 7xxx F/ISO for configuration in GAT Config Manager. ► After installing the software, open GAT Configuration Manager via "Start" -> "All Programs" -> "GANTNER Electronic GmbH" -> "GAT Config Manager" -> "GAT Config Manager".
-
Page 43: View And Edit The Gat Eco.lock 7Xxx F/Iso Configuration Settings
► Select the GAT ECO.Lock 7xxx F/ISO from the “Devices” list (1 in Figure 6.4), which is displayed here as "GAT ECO.Side Lock 7000". o The GAT ECO.Lock 7xxx F/ISO is highlighted in blue. Figure 6.4 – GAT Config Manager – View configuration settings www.gantner.com HB_GAT-ECOLock-7xxxFISO--EN_12... -
Page 44: Upload Configuration Settings To The Gat Eco.lock 7Xxx F/Iso
► Click on “OK” in the GAT Configurator Window (Figure 6.5 ). o The confirm upload window opens. ► Click “Yes” to apply the configuration to the lock. o The configuration settings are uploaded to the GAT ECO.Lock 7xxx F/ISO. www.gantner.com HB_GAT-ECOLock-7xxxFISO--EN_12... -
Page 45: Configuration Settings Of The Gat Eco.lock 7Xxx F/Iso
► Enter a value representing the number of minutes into the field. The countdown time for unlocking begins at 00:00 (24 h). For example, a value of “300” means that the lock will unlock at 05:00 am. A value of “0” means that the function is inactive. The time must be set correctly once via software. www.gantner.com HB_GAT-ECOLock-7xxxFISO--EN_12... -
Page 46: Duration Of Use
GAT ECO.Lock 7xxx F/ISO, which is done here: Configuration > Application > Master cards > Master Card 1 - 10 ► Enter the number of each master card (data carrier) into the respective fields. NOTE! The master card numbers must be entered in hexadecimal format. www.gantner.com HB_GAT-ECOLock-7xxxFISO--EN_12... -
Page 47: Configuration Settings Table
When set to “True”, ISO 15693 data carriers can be ISO 15693 Boolean False read by the lock. When set to “True”, ISO 14443 (MIFARE) data carriers ISO 14443A Boolean True can be read by the lock. This setting is not configurable www.gantner.com HB_GAT-ECOLock-7xxxFISO--EN_12... - Page 48 The segment where certificate data is stored Integer Locker Block Num The segment where locker data is stored Integer Gantner.Connect FileId ID number for Gantner.Connect. Integer Application Master cards Master Card 1 - 10 Fields to enter number for master card 1 to 10 Integer...
-
Page 49: Technical Data
Power supply: 3 x 1.5 V alkaline* batteries, type AA *lithium batteries can also be used GANTNER approved battery: Batterie 1.5V Alkali AA (Part No. 308819) Battery lifetime: Up to 5 years* or 30,000 cycles with alkaline batteries at room... -
Page 50: Interface
II (conditions in indoor areas) - Outdoor model: III (conditions in outdoor areas) Compliance: Note: This manual is valid from June 4 , 2018. It is subject to change. Amendments can be made without prior notice at any time. www.gantner.com HB_GAT-ECOLock-7xxxFISO--EN_12... - Page 52 Schruns, Österreich Houten, Niederlande Sydney, Australien T +43 5556 73784-0 T+31 33 43 284 16 T +61 29011 8114 info@gantner.com info@syx.nl info-aus@gantner.com London, UK Bochum, Deutschland Los Angeles, USA T +44 178 249 9195 T +49 234 58896-0 T +1 844 703 1139 info@syxautomations.co.uk...
Need help?
Do you have a question about the Mifare Gat ECO.Lock 7 F/ISO Series and is the answer not in the manual?
Questions and answers