Table of Contents
Advertisement
Advertisement
Table of Contents

Related Manuals for Dover HYDRO DM-500


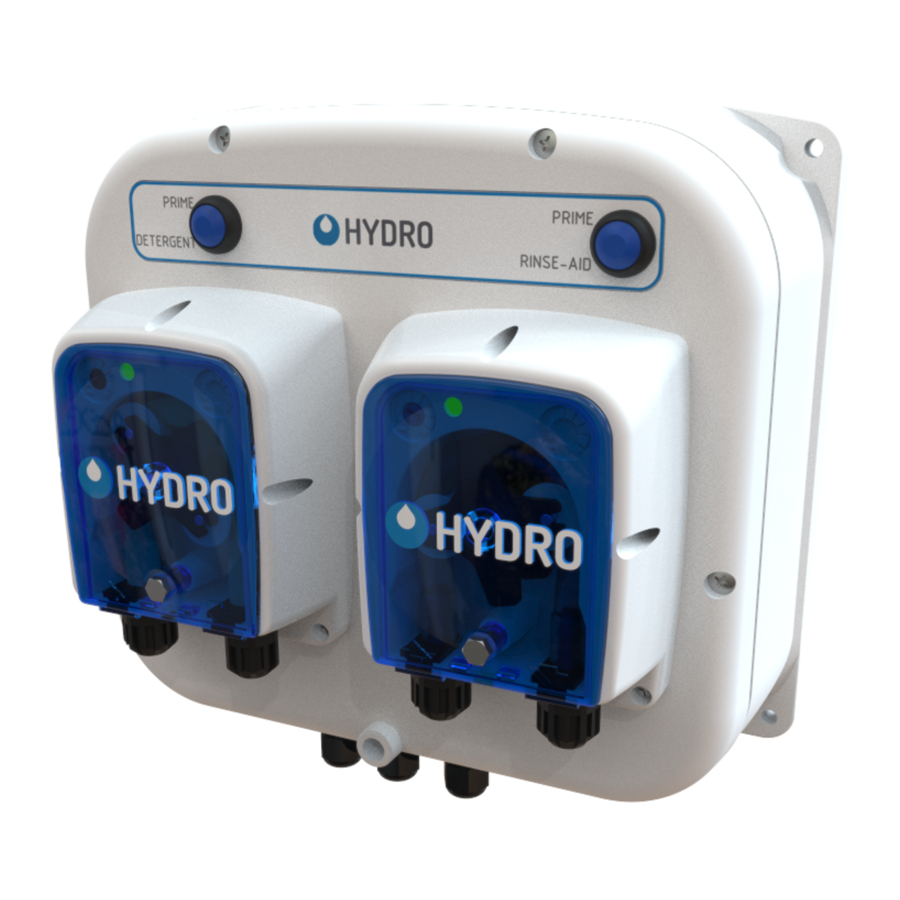
Summary of Contents for Dover HYDRO DM-500
- Page 1 user manual DM-5OO warewash dispenser...
- Page 2 (This page was intentionally left blank.)
-
Page 3: Table Of Contents
index 1.OO overview page 1.01 Package Contents 1.02 Operation 1.03 General Specifications 1.04 Model Numbers and Features 2.OO installation 2.01 Site Survey & Installation Requirements 2.02 Wall Mount 2.03 Mechanical Installation 2.04 Electrical Installation and Programming 2.05 Setting Dosing Parameters 3.OO operation 3.01 Description of Controls... -
Page 4: Package Contents
1.OO overview Safety Precautions WARNING! Please read precautions thoroughly before operation. Meet all applicable local codes and regulations. THANK YOU FOR YOUR INTEREST IN OUR PRODUCTS Please use this equipment carefully and observe all warnings and cautions. protective clothing and eyewear when dispensing chemicals or other materials or when working in the WEAR vicinity of all chemicals, filling or emptying equipment, or changing metering tips. -
Page 5: Model Numbers And Features
1.OO overview (continued) 1.O4 Model Numbers and Features Pump Pressure: 1 = 1 bar (14.5 psi) Pump Build Options: 3 = 3 bar (43.5 psi) Adjustment: 2TV = 2 Adjustments: Time + Speed Tube Material: SA = Santoprene Combos 2TT = 2 Adjustments: Time + Time ®... -
Page 6: Oo Installation
2.OO installation 2.O1 Site Survey & Installation Requirements WARNING! This product is intended to be installed by experienced installers, in accordance with all applicable electrical and plumbing codes. • Unit must not be installed near areas that suffer excess temperature changes, direct sunlight, frost or moisture of any kind. •... -
Page 7: Mechanical Installation
2.OO installation (continued) 2.O3 Mechanical Installation (continued) Wash Tank Wall Installing the Detergent Injection Fitting Outside Inside 1) When choosing a mounting locating, make sure that the detergent infection fitting will be: • Above the water level of the filled wash tank. •... -
Page 8: Electrical Installation And Programming
2.OO installation (continued) 2.O4 Electrical Installation Installing the Detergent and Rinse Supply Signal Wiring WARNING! Before performing any work on the DM-500, you must disconnect the power supply voltage of the dish machine. CAUTION! Verify that electrical grounding is functional and complies with local regulations. Verify that the rated values of the pump are compatible with those of the power supply. - Page 9 2.OO installation (continued) 2.O5 Setting Dosing Parameters (continued) Standard UL Model HYDDM500MP2TV1001SA2TV0173SIUL This model is primarily used in North America. The initial charge and rinse signals are not pre-wired on this model and must be routed through housing via the ½’’ female conduit fitting in the base of the unit to comply with local regulations.
-
Page 10: Oo Operation
2.OO installation (continued) 2.O5 Setting Dosing Parameters (continued) Standard CE Model (continued) Detergent Pump Connect the initial charge signal cable to the main power supply for the dish machine. When the signal is activated Initial Charge Pump Speed by powering the machine on, the pump will run for the Potentiometer Potentiometer time programmed (0 to 240 seconds) on the upper left... -
Page 11: Oo Service Parts
3.OO operation (continued) 3.O2 LED Pump Status Indicators All DM-500 models have two LED indicators (one each for the Detergent and Rinse Aid pump). The color and states for each condition are described below. LED Color Fixed or Flashing Indication Green Fixed You should not see the LED display as fixed green. -
Page 12: Oo Maintenance
5.OO maintenance 5.O1 Maintenance (Required} The DM-500 is designed to require minimal setup and ongoing maintenance. The routine maintenance tasks include: • Check the pump tube’s condition and replace as needed to maintain delivery performance • Clean the unit cabinet with a damp cloth •... -
Page 13: Oo Troubleshooting
6.OO troubleshooting 6.O1 Troubleshooting Table Problem Cause Solution • Check wiring from dish machine. 1. Dead unit - No LEDs illuminated a. No incoming main electrical power • Check for power at dish machine connection. b. Bad PC board • If board has failed, replace the DM-500 unit. •... -
Page 14: Oo Warranty
8.OO warranty 8.O1 Limited Warranty Seller warrants solely to Buyer the Products will be free from defects in material and workmanship under normal use and service for a period of one year from the date of completion of manufacture. This limited warranty does not apply to (a) hoses; (b) and products that have a normal life shorter than one year;...
Need help?
Do you have a question about the HYDRO DM-500 and is the answer not in the manual?
Questions and answers