Table of Contents
Advertisement
Quick Links
Safety Precautions
WARNING!
Please read precautions thoroughly before operation. Meet all applicable local codes and regulations.
Please use this equipment carefully and observe all warnings and cautions.
protective clothing and eyewear when dispensing chemicals or other materials or when working in the
WEAR
vicinity of all chemicals, filling or emptying equipment, or changing metering tips.
observe safety and handling instructions of the chemical manufacturer.
direct discharge away from you or other persons or into approved containers.
dispense cleaners and chemicals in accordance with manufacturer's instructions. Exercise CAUTION when
ALWAYS
maintaining your equipment.
reassemble equipment according to instruction procedures. Be sure all components are firmly screwed or
latched into position.
equipment clean to maintain proper operation.
KEEP
only to water tap outlets with 30 to 90 PSI (2 to 6 bar), water temperature 40°F to 140°F (5°C to 60°C).
ATTACH
if the unit is used to fill a sink, or the discharge hose can be placed into a sink. The unit must be mounted so
that the bottom of the cabinet is above the overflow rim of the sink
NOTE
if the supply cord is damaged, it must be replaced by the manufacturer, its service agent or similarly qualified
persons in order to avoid a hazard.
introduction
Package Contents
1) EvoWash Dispenser (P/N varies by model)
2) Mounting Kit (P/N HYD90097975)
(Wall Anchors, Screws, Wire Ties and Washers)
3) Accessory Kit (NA P/N
HYD10099378, Global P/N
(Pickup Tubing, Detergent Injection Fitting, Conductivity Probe)
4) Rinse Pump Accessory Kit (only w/Rinse Pump) (P/N
(Pickup Tubing, Wire Ties, Rinse Injection Fitting, Foot Valve & Weight)
Description (North America vs. Global]
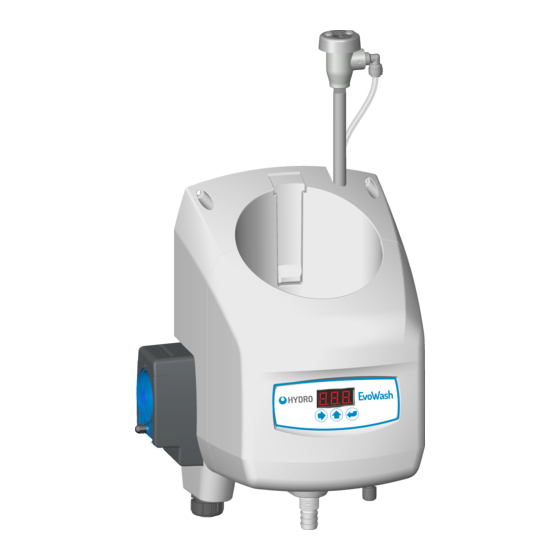
The EvoWash is a powder or solid detergent dissolver for use with warewash machines, with an optional, integrated rinse
pump. The built-in programmable control unit promotes safe and economical use of warewash supplies, ensuring accurate,
automatic chemical dosage, only as needed. The North America models include a backflow prevention vacuum-breaker to
meet ASSE 1055 and a conduit connector for the power, detergent and rinse signal wires to meet UL requirements.
General Specifications
Category
Feature
Electrical
Input Voltage
Signal Input
Operating Environment Ambient
Regulatory Approvals
Global
North America
quick start guide
THANK YOU FOR YOUR INTEREST IN OUR PRODUCTS
HYD10099406)
HYD90098478)
Specification
100-240 VAC at 50/60 Hz up to 0.75 Amps maximum (Class II) Power Usage: 12W maximum
24-249VAC at 50/60Hz up to 20mA or 24VDC up to 20mA
Temperature: 10°C min to 50°C maxi (50°F to 120°F)
IEC 60335-1:2010, COR1:2010, COR2:2011, AMD1:2013, COR1:2014, AMD2:2016, COR1:2016 / EN61000 6-1
Residential immunity / EN61000 6-3 Residential emissions / EN1717 Certified with Category 4 Chemical
ASSE 1055 / Safety Of Household And Similar Electrical Appliances, Part 1: General Requirements [UL 60335-1:2016
Ed.6 ] / Safety Of Household And Similar Appliances - Part 1: General Requirements [CSA C22.2#60335-1:2016 Ed.2]
EvoWash North
EvoWash
America with
Global with
Rinse Pump
Rinse Pump
Humidity: 95% relative humidity max
EvoWash
Mounting Kit
x4
x4
x2
x4
Accessory Kit
x1
x1
x1
Rinse Pump Accessory Kit
x1
x5
x1
x1
x1
1
Advertisement
Table of Contents

Related Manuals for Dover HYDRO EvoWash


Summary of Contents for Dover HYDRO EvoWash
- Page 1 quick start guide EvoWash Safety Precautions WARNING! Please read precautions thoroughly before operation. Meet all applicable local codes and regulations. THANK YOU FOR YOUR INTEREST IN OUR PRODUCTS Please use this equipment carefully and observe all warnings and cautions. protective clothing and eyewear when dispensing chemicals or other materials or when working in the WEAR vicinity of all chemicals, filling or emptying equipment, or changing metering tips.
-
Page 2: Safety Precautions
installation Safety Precautions CAUTION! Before an installation takes place it is advisable to complete a site survey to ensure the EvoWash can be installed in a position that meets all the requirements below. CAUTION! Do not install unit in potentially explosive environment (ATEX) where flammable gas, steam, fog or dust can form an explosive combination with air. -
Page 3: Installation Diagram
installation (continued) Installation Diagram NOTE: North America Model Shown front view Water Inlet side view Power Wires (with fused isolation switch). Detergent and (Optional) Rinse Signal Wires Detergent Feed Hose Conductivity Probe Wires Dish Machine Rinse Feed Inlet Hose Rinse Feed Outlet Hose From Rinse product container Wall Mounting the Enclosure NOTE: Ensure the wall anchors are suitable for the wall being mounted to. -
Page 4: Conductivity Probe
installation (continued) Conductivity Probe The probe senses the detergent concentration. Correct probe placement is critical for accurate detergent concentration control. Always use the new probe provided with the dispenser. When choosing a mounting location, make sure that the probe will be completely immersed in wash tank solution, in an area that has a good flow of solution and close to the product entry point. - Page 5 installation (continued) Optional Rinse Pump Tubing Connections NOTE: North America Model Shown NOTE! Cable ties are provided in the fittings kit so Rinse Pump Inlet that tubing can be tied together or to the wall, to create a neat and safe installation. Inlet Tubing 1) Using the ¼”...
-
Page 6: Water Connection
installation (continued) Water Connection CAUTION! Water supply temperature must be between 5°C and 40°C (40°F and 140°F). Maximum static water pressure is 0.6MPa (6 bar or 90 PSI). Ensure a pressure regulator is used before the water inlet if static water pressure will fluctuate above this level. CAUTION! An isolation valve can be fitted between the water supply and the unit to ensure the water supply can be shut off if required. - Page 7 installation (continued) WARNING! Electrical installation should be completed by a qualified electrician. All local and national electrical regulations are to be observed. Conductivity Probe Wiring Probe Wire Although the conductivity probe wiring is pre-wired to the controller, you must make the connection to the probe installed on the washer. 1) Route the probe wires to the conductivity probe location and cut to fit if required.
-
Page 8: Operation
operation Controls There are three control keys below the EvoWash display: • Next: the “right arrow” that moves to the next item. • Scroll: the “up arrow” that changes a value. • Enter: the “down and over arrow” to make a selection. Next Scroll Enter... - Page 9 operation (continued) User Mode Menus (continued) Menu 11: Rack Count Menu • At the Idle Home Screen press the Next key to move to Menu 11. • Press the Enter key to display the number of racks washed (divided by ten). For example, 7,324 racks will display as 732. •...
- Page 10 programming Program Mode Program Mode is password protected (factory set to “123”) with two sets of menus for installers and maintenance technicians to adjust the unit settings to meet their wash requirements. Follow the steps below to access the Program Mode Menus. 1) Press and hold the Enter key for 2 seconds.
- Page 11 programming (continued) Program Mode Menus Entering the Program Mode password and pressing the Enter key will always move first to Program Mode Menu 2. Program Menu 2 Program Mode To “Adjustments Menu” Menu 2: Menu 3 for Probe Mode Configuration Menu 4 for Probless Mode Detergent Control 1 = Factory Default...
- Page 12 programming (continued) Program Mode Menus (continued) At the top of Menu 2 (with a blinking middle digit 2), press the Scroll key to move to the “Adjustments” menu appropriate for the Detergent Control Mode defined in Menu 21. That will be either Menu 3 for Probe Mode, or Menu 4 for Probeless Mode. Idle Home Screen 0 0 0 —...
- Page 13 programming (continued) Program Mode Menus (continued) At the top of Menu 2 (with a blinking middle digit 2), press the Scroll key to move to the “Adjustments” menu appropriate for the Detergent Control Mode defined in Menu 21. That will be either Menu 3 for Probe Mode, or Menu 4 for Probeless Mode. Idle Home Screen 0 0 0 —...
- Page 14 programming (continued) Configuration Menu Settings (Program Menu 2) Menu 21: Detergent Control (default) 1 = Probe Mode 2 = Probeless Mode In Probe Mode the EvoWash dispenser relies on the Conductivity probe to detect detergent concentration and therefore when to dose and how much. In Probeless Mode the dosage is set in seconds and the dosing follows the Detergent Dose Interval. Menu 22: Machine Type (default) 1 = Door Machine...
- Page 15 programming (continued) Probe Mode Adjustment Menu Settings (Program Menu 3) Program Menu 3 is considered the Adjustment Menu for Probe Mode. It is accessible by entering the proper Program Mode password and pressing the Scroll key at the blinking “2” of the Program Menu 2 to move to Menu 3. NOTE: Which adjustment menu appears, when pressing the Scroll key at the blinking “2”...
- Page 16 programming (continued) Probe Mode Adjustment Menu Settings (continued) Menu 34: Low Detergent Alarm Delay (in Racks) 0 to 99 racks (default = O racks) A setting that delays the Low Detergent Alarm by the defined number of racks. Although the range is 0 to 99 racks, there is always a delay of at least 1 rack.
- Page 17 programming (continued) Menu 42: Detergent Dose (default = 2 seconds) 0 to 19 seconds This setting defines how long the detergent pump runs (in seconds) for each dose. Any value from 0 to 19 seconds may be used. Press the Scroll key to change the value of the blinking digit. Press the Next key to move to the next digit. Press the Enter key at any time to accept the number displayed as the new setting for the Detergent Initial Charge.
-
Page 18: Limited Warranty
programming (continued) Menu 45: Rinse Feed Option (Door Machine Only) 1 = Rinse Feed on Rinse Signal or 2 = Rinse Feed on Detergent Signal (default = 1 = Rinse Feed on Rinse Signal) NOTE: This setting is only for dishwashers whose Machine Type is designated as a Door Machine in Menu 22. This setting is ignored if the Machine Type is set to Conveyor.
Need help?
Do you have a question about the HYDRO EvoWash and is the answer not in the manual?
Questions and answers