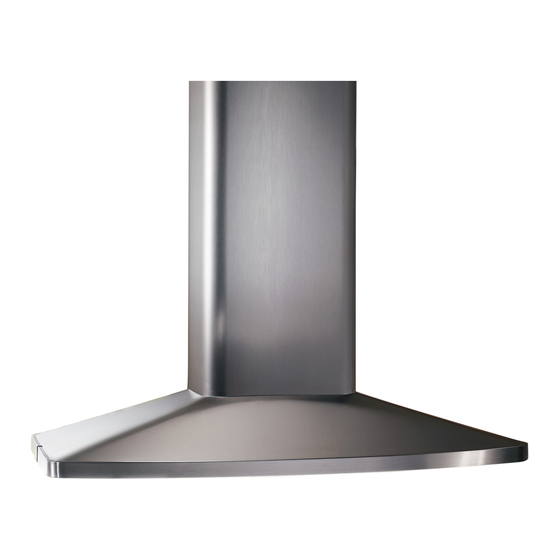
Broan ELITE E54000 User Manual
Broan flat panel television user manual
Hide thumbs
Also See for ELITE E54000:
- Manual (45 pages) ,
- Instructions manual (15 pages) ,
- Specification sheet (2 pages)
Table of Contents
Advertisement
Available languages
Available languages
Quick Links
Download this manual
See also:
Instruction Manual
Model E54000
In USA - BROAN Hartford, Wisconsin
In CANADA - BROAN Drummondville, QC, Canada
REGISTER YOUR PRODUCT ONLINE AT : www.Broan.com/register
For additional Information visit www.Broan.com
ENGLISH....................................2
FRANÇAIS...............................15
ESPAÑOL.................................28
99043938E
Advertisement
Table of Contents

Related Manuals for Broan ELITE E54000


Summary of Contents for Broan ELITE E54000
- Page 1 Model E54000 In USA - BROAN Hartford, Wisconsin In CANADA - BROAN Drummondville, QC, Canada REGISTER YOUR PRODUCT ONLINE AT : www.Broan.com/register For additional Information visit www.Broan.com ENGLISH...2 FRANÇAIS...15 ESPAÑOL...28 99043938E...
- Page 2 READ AND SAVE THESE INSTRUCTIONS INTENDED FOR DOMESTIC COOKING ONLY WARNING TO REDUCE THE RISK OF FIRE, ELECTRIC SHOCK, OR INJURY TO PERSONS, OBSERVE THE FOLLOWING: 1. Use this unit only in the manner intended by the manufacturer. If you have questions, contact the manufacturer at the address or telephone number listed in the warranty.
- Page 3 CAUTION 1. For indoor use only. 2. To reduce risk of fire and to properly exhaust air, be sure to duct air outside. Do not vent exhaust air into spaces within walls or ceilings or into attics, crawl spaces, or garages. 3.
-
Page 4: Operation
OPERATION Controls The hood is operated using the slide controls under the bottom of the hood. The light switch turns the lamps on and off. The blower switch turn the blower on to three speed settings: 0 - OFF 1 - LOW SPEED 2 - MEDIUM SPEED 3 - HIGH SPEED The pilot lamp lights up whenever the blower is on. -
Page 5: Fuse Replacement
FUSE REPLACEMENT LIGHTS FAIL DISCONNECT THE POWER AT THE SERVICE ENTRANCE. CHECK THE FUSE AND REPLACE IF NECESSARY. 1. Remove the grease filters. 2. Remove the cover of the fuse box. 3. Locate the fuse holder. Unscrew its cap and remove the fuse. 4. -
Page 6: Maintenance
MAINTENANCE Proper maintenance of the Range Hood will assure proper performance of the unit. Grease Filter The grease filter should be cleaned frequently. Use a warm detergent solution. Grease filter is dishwasher safe. See “INSTALL FILTERS” section for removal and installation instructions. Non-ducted Recirculation Filter The non-ducted recirculation filter should be changed every 6 months. -
Page 7: Prepare The Hood
PREPARE THE HOOD Unpack hood and check contents. You should receive: 1 - Hood 1 - Decorative Flue Assembly 1 - Support Frame 1 - Parts Bag containing: 1 - Support Frame Bracket 1 - Discharge Collar 4 - Lag Bolts (6 x 70mm) 14 - Mounting Screws (3.9 x 9.5mm Pan Head) 2 - Mounting Screws (2.9 x 9.5mm Pan Head) 4 - Washers 6.4mm Diameter... -
Page 8: Install The Ductwork
INSTALL THE DUCTWORK DUCTED HOODS ONLY CAUTION: To reduce the risk of fire, use only metal ductwork. 1. Decide where the ductwork will run between the hood and the outside. 2. A straight, short duct run will allow the hood to perform most efficiently. 3. - Page 9 PREPARE SUPPORT FRAME 8 AND 9-FOOT CEILINGS 1. Measure the ceiling height and determine distance between the cook top and bottom of hood. 2. Remove (4) screws and washers in the height adjustment slots. Figure 8. 3. Per the chart, adjust overall lenght of the support frame.
- Page 10 PREPARE SUPPORT FRAME, cont’d. 7. Hang the support frame from the support frame bracket (located on ceiling). Securely fasten with (4) 3.9x9.5mm mounting screws. Fig. 9. PREPARE THE HOOD DUCTED AND NON-DUCTED HOODS 1. Assemble the Electrical Mounting Plate to the hood with (2) 3.9x9.5mm mounting screws and (2) serrated washers.
- Page 11 PREPARE THE HOOD, cont’d. NON-DUCTED HOODS ONLY 3. Install the non-ducted recirculation plenum through the upper rectangular openings in the support frame. Fig. 13 4. Install the 5” diameter duct connector to plenum. Twist and lock to secure. Fig. 14. 5.
-
Page 12: Install The Hood
INSTALL THE UPPER DECORATIVE FLUE, cont’d. NON-DUCTED HOODS ONLY (8-FOOT AND 9-FOOT CEILINGS) 4. Install the upper flue with air vent “up”. Secure to the support frame with (2) 2.9x9.5mm mounting screws. Fig. 16. (10-FOOT CEILINGS) 5. Discard the upper flue supplied with the hood. -
Page 13: Install Electrical
CONNECT THE DUCTWORK Duct tape all connecton’s to make them secure and air tight. DUCTED HOODS ONLY 1. Connect 6” diameter metal duct to ducting that discharges to the outside. NON-DUCTED HOODS ONLY 2. Connect 5” diameter expandable metal duct from the non-ducted plenum to the adapter on the blower discharge. -
Page 14: Install Filters
NO OTHER WARRANTIES, EXPRESS OR IMPLIED, INCLUDING, BUT NOT LIMITED TO, IMPLIED WARRANTIES OR MERCHANT ABILITY OR FITNESS FOR A PARTICULAR PURPOSE. During this one-year period, Broan-NuTone will, at its option, repair or replace, without charge, any product or part which is found to be defective under normal use and service. - Page 15 LISEZ ET CONSERVEZ CES INSTRUCTIONS POUR UTILISATION DOMESTIQUE SEULEMENT AVERTISSEMENT POUR RÉDUIRE LES RISQUES D’INCENDIE, D’ÉLECTROCUTION OU DE BLESSURES CORPORELLES, OBSERVEZ LES INSTRUCTIONS SUIVANTES : 1. N’utilisez cet appareil que de la façon prévue par le manufacturier. Si vous avez des questions, contactez le manufacturier à...
- Page 16 4. Utilisez un extincteur SEULEMENT LORSQUE : A. Vous savez qu’il s’agit d’un extincteur de classe ABC et que vous en connaissez le fonctionnement. B. L’incendie est petit et limité à l’endroit où il a débuté. C. Les pompiers ont été avisés. D.
- Page 17 FONCTIONNEMENT Commandes La hotte fonctionne à l’aide des boutons coulissants situés sous la partie inférieure de la hotte. L’interrupteur d’éclairage allume et éteint les lampes. L’interrupteur du ventilateur active le ventilateur à trois régimes différents : 0 - ARRÊT 1 - BASSE VITESSE 2 - MOYENNE VITESSE 3 - HAUTE VITESSE Le voyant lumineux s’allume quand le...
-
Page 18: Remplacement Du Fusible
REMPLACEMENT DU FUSIBLE SI LES LAMPES NE FONCTIONNENT PAS, DÉCONNECTER L’ALIMENTATION ÉLECTRIQUE AU POINT D’ORIGINE DE L’INSTALLATION ÉLECTRIQUE. VÉRIFIER QUE LE FUSIBLE SOIT EN BON ÉTAT, PUIS LE REMPLACER AU BESOIN. 1. Retirer les filtres à graisses. 2. Retirer le couvercle de la boîte du fusible. 3. -
Page 19: Entretien
ENTRETIEN Un bon entretien de votre hotte garantira une excellente performance. Filtres à graisses Les filtres à graisses doivent être nettoyés fréquemment. Utiliser une solution d’eau chaude additionnée de détergent. Les filtres à graisses peuvent être lavés au lave- vaisselle. Voir la section «... -
Page 20: Préparation De La Hotte
PRÉPARATION DE LA HOTTE Retirer la hotte de l’emballage, puis vérifier le contenu. Vous devez recevoir : 1 - Hotte 1 - Conduit décoratif 1 - Structure de support 1 - Sachet avec : 1 - Bride de la structure de support 1 - Collier d’évacuation 4 - Tire-fond (6 x 70 mm) 14 -Vis de montage (3,9 x 9,5 mm, tête ronde) - Page 21 INSTALLATION DU SYSTÈME DE CONDUITS HOTTES À ÉVACUATION EXTÉRIEURE SEULEMENT ATTENTION : Pour réduire les risques d’incendie, n’utilisez que des conduits en métal. 1. Déterminer par où passera le conduit, entre votre hotte et l’extérieur. 2. Un conduit droit et court permettra à votre hotte de fonctionner plus efficacement.
- Page 22 PRÉPARATION DE LA STRUCTURE DE SUPPORT PLAFONDS DE 8 PI ET DE 9 PI 1. Mesurer la hauteur de plafond et établir la distance entre la surface de cuisson et le bas de la hotte. 2. Enlever les (4) vis et rondelles des fentes de réglage de hauteur.
- Page 23 PRÉPARATION DE LA STRUCTURE DE SUPPORT (suite) 7. Suspendre la structure de support à la bride de la structure (au plafond). Bien serrer avec les (4) vis de montage de 3,9 mm x 9,5 mm. Fig. 9. PRÉPARATION DE LA HOTTE HOTTES À...
- Page 24 PRÉPARATION DE LA HOTTE (suite) HOTTES À RECIRCULATION SEULEMENT 3. Installer le déflecteur à travers les ouvertures rectangulaires dans la structure de support. Fig. 13 4. Monter le raccord de conduit d’un diamètre de 5 po sur le déflecteur. Tourner et verrouiller en place.
-
Page 25: Installation De La Hotte
MONTAGE DU CONDUIT DÉCORATIF SUPÉRIEUR (suite) HOTTES À RECIRCULATION SEULEMENT (PLAFONDS DE 8 PI ET DE 9 PI) 4. Installer le conduit décoratif supérieur avec la grille d’aération en haut. Fixer sur la structure de support avec les (2) vis de montage de 2,9 x 9,5 mm. Fig. (PLAFONDS DE 10 PI) 5. -
Page 26: Installation Électrique
RACCORD DES CONDUITS Sceller hermétiquement tous les joints à l’aide de ruban à conduits. HOTTES À ÉVACUATION SEULEMENT 1. Raccorder le conduit métallique de 6 po de diamètre aux conduits d’évacuation vers l’air libre. HOTTES À RECIRCULATION SEULEMENT 2. Raccorder le conduit métallique extensible de 5 po de diamètre allant du déflecteur de recirculation à... -
Page 27: Installation Des Filtres
GARANTIE NE COMPORTE AUCUNE AUTRE GARANTIE, EXPRESSE OU TACITE, Y COMPRIS, MAIS SANS S'Y LIMITER, LES GARANTIES TACITES DE VALEUR MARCHANDE OU D'ADAPTATION À UN USAGE PARTICULIER. Durant cette période de un an, Broan-NuTone réparera ou remplacera gratuitement, à sa discrétion, tout produit ou toute pièce jugés défectueux dans des conditions normales d'utilisation. - Page 28 LEA Y CONSERVE ESTAS INSTRUCCIONES INDICADO PARA EL USO EN COCINAS DOMESTICAS ADVERTENCIA PARA EVITAR EL RIESGO DE INCENDIO, CORTOCIRCUITO O DAÑO PARA LAS PERSONAS, OBSERVE ATENTAMENTE LAS SIGUIENTES NORMAS: 1. Use esta unidad solamente de la manera indicada por el fabricante; si tiene dudas, póngase en contacto con éste a la dirección o teléfono indicados en la garantía.
- Page 29 ADVERTENCIA 1. Para uso en interiores. 2. Para reducir el riesgo de incendios y para evacuar correctamente los humos, asegurarse de haber realizado una conducción del aire hasta el exterior. No expulsar los humos en espacios cerrados por paredes o techos, áticos, espacios angostos o garajes. 3.
- Page 30 FUNCIONAMIENTO Mandos La campana se controla mediante los mandos corrrederos situados en la parte inferior de la misma. El interruptor da luz enciende y apaga las lámparas. El interruptor del aspirador enciende el ventilator en uno de los siguientes ajustes de velocidad: 0 - APAGADO 1 - VELOCIDAD BAJA...
-
Page 31: Sustitución Del Fusible
SUSTITUCIÓN DEL FUSIBLE SI LAS LUCES NO FUNCIONAN, DESCONECTE LA ELECTRICIDAD EN LA ENTRADA DE SERVICIO. COMPRUEBE EL FUSIBLE Y, SI FUESE NECESARIO, SUSITITÚYALO. 1. Retire los filtros antigrasa. 2. Retire la cubierta de la caja fusible. 3. Localice el soporte del fusible. Desatornille su tapa y retire el fusible. -
Page 32: Mantenimiento
MANTENIMIENTO Un mantenimiento adecuado de la campana asegura el funcionamiento correcto del aparato. Filtro antigrasa El filtro antigrasa debe limpiarse con frecuencia. Use un detergente que no sea fuerte.Use un detergente que no sea fuerte. El filtro antigrasa se puede meter en el lavavajillas. -
Page 33: Prepare La Campana
PREPARE LA CAMPANA Sacar la campana de l’embalaje y controlar el contenido. Recivireis: 1 - Campana 1 - Chimenea decorativa 1 - Armazón de soporte 1 - Bolsita con: 1 - Placa armazón de soporte 1 - Casquillo 4 - Tirafonds (6 x 70mm) 14 - Tornillos de montaje (3.9 x 9.5mm cabeza redonda) 2 - Tornillos de montaje (2.9 x 9.5mm cabeza... - Page 34 INSTALACION DEL TUBO DE EXTRACCION CAMPANAS CON CONDUCTO NOTA: para evitar el riesgo de incendio, use solamente material de metal. 1. Decida donde va a colocar el tubo de extracción entre la campana y la parte exterior. 2. Un recorrido de tubo corto y recto permitirá a la campana funcionar de manera más eficaz.
- Page 35 PREPARACIÓN ARMAZÓN DE SOPORTE TECHOS DE 8 O 9 PIES 1. Mida la altura del techo y determine la distancia entre la encimera y la parte inferior de la campana. 2. Retire los cuatro tornillos y arandelas de las ranuras de ajuste de la altura. Figura 3.
-
Page 36: Preparación De La Campana
PREPARACIÓN ARMAZÓN DE SOPORTE, cont. 7. Cuelgue el armazón de soporte de la brida para armazón de soporte (situada en el techo). Fije firmemente con cuatro tornillos de montaje de 3,9 x 9,5 mm. Fig. 9. PREPARACIÓN CAMPANA CAMPANAS CON O SIN CONDUCTO 1. - Page 37 PREPARACIÓN DE LA CAMPANA, cont. SÓLO PARA CAMPANAS SIN CONDUCTO 3. Monte el pleno a través de la abertura rectangular superior del armazón de soporte. Fig. 13 4. Monte el conector de conductos de 5" de diámetro al pleno. Gire y bloquee para fijar.
-
Page 38: Instalación De La Campana
MONTAJE DE LA CHIMENEA DECORATIVA SUPERIOR, Cont. SÓLO PARA CAMPANAS CONDUCTO (TECHOS DE 8 O 9 PIES) 4. Monte la chimenea superior con los respiraderos arriba. Fíjela al armazón de soporte con dos tornillos de montaje de 3.9 x 9.5 mm. Fig. -
Page 39: Conexión De La Tubería
CONEXIÓN DE LA TUBERÍA Encinte todas las conexiones para fijarlas y estanqueizarlas. SÓLO PARA CAMPANAS CONDUCTO 1. Conecte el conducto metálico de 6" de diámetro a la tubería que descarga al exterior. SÓLO PARA CAMPANAS CONDUCTO 2. Conecte conducto expansible de 5" entre el pleno y el adaptador de la descarga del soplador. - Page 40 OTRO TIPO DE GARANTIAS QUE INCLUYAN O SE LIMITEN EXCLUSIVAMENTE A GARANTIAS IMPLICITAS O DE CAPACIDAD COMERCIAL O CONVENIENCIA PARA UN PROPOSITO ESPECIFICO. Durante el periodo de un año, Broan-NuTone, si lo estima conveniente, reparará o reemplazará sin gastos para el usuario cualquier producto o parte de éste que sea defectuosos habiéndose usado correctamente.
-
Page 41: Service Parts
SERVICE PARTS MODEL E54000 KEY NO. PART NO. B08087294 B02300233 BE3348527 B03295005 B02300891 B02300804 B03294033 BW0000019 B02310260 B03295071 B03204177 B08091400 BE3348620 B08088378 B03202179 B02011314 BE3334250 BE3334252 BE3402102 BE3402103 B08092083 B08092233 B032920200 B03294781 B08086668 BE3344096 BE3404365 B02300729 B08086279 B03295072 B03295074 B03201014 B03295075 B03295073 B03295035... -
Page 42: Liste Des Pièces De Rechange
LISTE DES PIÈCES DE RECHANGE MODELE E54000 DE PIÈCE B08087294 B02300233 BE3348527 B03295005 B02300891 B02300804 B03294033 BW0000019 B02310260 B03295071 B03204177 B08091400 BE3348620 B08088378 B03202179 B02011314 BE3334250 BE3334252 BE3402102 BE3402103 B08092083 B08092233 B032920200 B03294781 B08086668 BE3344096 BE3404365 B02300729 B08086279 B03295072 B03295074 B03201014 B03295075 B03295073... -
Page 43: Lista De Piezas De Recambio
LISTA DE PIEZAS DE RECAMBIO MODELO E54000 CÓD. N. PIEZA N. B08087294 B02300233 BE3348527 B03295005 B02300891 B02300804 B03294033 BW0000019 B02310260 B03295071 B03204177 B08091400 BE3348620 B08088378 B03202179 B02011314 BE3334250 BE3334252 BE3402102 BE3402103 B08092083 B08092233 B032920200 B03294781 B08086668 BE3344096 BE3404365 B02300729 B08086279 B03295072 B03295074 B03201014... - Page 44 SERVICE PARTS - LISTE DES PIÈCES DE RECHANGE - LISTA DE PIEZAS DE RECAMBIO MODEL E54000 04307632/7...
Need help?
Do you have a question about the ELITE E54000 and is the answer not in the manual?
Questions and answers