Advertisement
Available languages
Available languages
Quick Links
RK4000ek INSTRUCTIONS
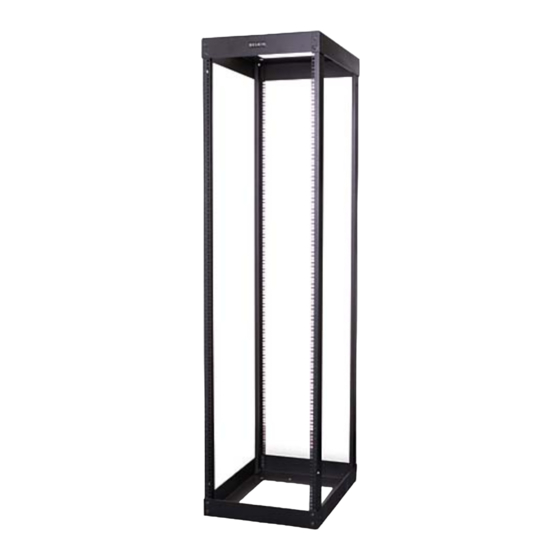
RK4000ek Product Inventory
Corner Post (4)
3/8"(10mm)-16 x 1 Hex Head Bolt (16)
3/8"(10mm) Split Lock Washer (16)
Nut Plate (8)
Top/Bottom Panel (2)
1/4"(6mm)-20 Hex Nut (8)
M6 Screws (50)
M6 Cage Nuts (50)
Instructions
1. Take two of the U-Shaped mounting rails and place them on the floor, such that the RMU markings are
facing in opposite directions.
2. Make sure that the RMU markings start with "1" at the same end.
3. Take the bottom panel (the one without the Belkin logo) and then insert the side of the two mounting rails
onto the bottom panel. Repeat with top panel.
4. Align the bolt holes and place nut plate on inside of mounting rail, start 3/8"(10mm) bolt with lock washer
(2-times). Repeat with top panel. (Hand tighten). See Detail A.
5. Turn the rack over and repeat step 4. Make sure your U markings match on all uprights.
A
3/8"(10mm)-16 x 1
Hex Head Bolt
3/8"(10mm) Split
Lock Washer
Belkin Tech Support
Europe: 00 800 223 55 460
For other languages: www.belkin.com/support
Belkin Ltd.
Express Business Park
Shipton Way, Rushden
NN10 6GL, United Kingdom
+44 (0) 1933 35 2000
+44 (0) 1933 31 2000 fax
© 2005 Belkin Corporation. All rights reserved.
All trade names are registered trademarks of respective manufacturers listed.
RK4000ek Instructions
Nut Plate
Detail A
Belkin B.V.
Boeing Avenue 333
1119 PH Schiphol-Rijk,
The Netherlands
+31 (0) 20 654 7300
+31 (0) 20 654 7349 fax
Belkin GmbH
Hanebergstrasse 2
80637 Munich,
Germany
+49 (0) 89 143405 0
+49 (0) 89 143405 100 fax
Belkin SAS
130 rue de Silly
92100 Boulogne Billancourt,
France
+33 (0) 1 41 03 14 40
+33 (0) 1 41 31 01 72 fax
P35779ec
EN
DE
FR
Advertisement

Summary of Contents for Belkin RK4000ek
- Page 1 2. Make sure that the RMU markings start with “1” at the same end. 3. Take the bottom panel (the one without the Belkin logo) and then insert the side of the two mounting rails onto the bottom panel. Repeat with top panel.
- Page 2 6. Stand the frame upright. This should be done with at least two people. 7. Square rack using a level or carpenter square and tighten the assembly bolts. 8. Take the 1/4” (6mm) -20 hex nut and place and tighten them over the studs inside each mounting rail. (Do not over tighten).
- Page 3 2. Assurez-vous que les marques RMU commencent avec « 1 » au même bout. 3. Prenez le panneau du bas (celui sans le logo Belkin) et insérez le côté des deux longerons de montage sur le panneau du bas. Répétez pour le panneau du haut.
- Page 4 (Ne serrez pas trop). Voyez le détail B. Le cadre de létagère doit être boulonné au plancher avant que léquipement soit monté. Assistance technique Belkin Europe : 00 800 223 55 460 Pour toutes les autres langues : www.belkin.com/support Belkin Ltd. Express Business Park Shipton Way, Rushden...
- Page 5 2. Stellen Sie sicher, dass die HE-Markierungen am gleichen Ende mit „1“ beginnen. 3. Platzieren Sie den Gestellboden (ohne Belkin-Logo) wie abgebildet auf dem Boden, und legen Sie die Seite der beiden Montageschienen auf den Gestellboden. Verfahren Sie ebenso mit dem Gestelldach.
- Page 6 Anleitung (Forts.) 6. Stellen Sie den Rahmen aufrecht hin. Dieser Schritt sollte mit mindestens zwei Personen ausgeführt werden. 7. Richten Sie das Rack mit einer Wasserwaage oder einem Flachwinkel rechtwinklig aus, und ziehen Sie die Befestigungsschrauben fest. 8. Schrauben Sie je eine Sechskantmutter 1/4” (6mm) -20 auf die Stiftschrauben an der Innenseite der Montageschienen auf, und ziehen Sie sie fest.


Need help?
Do you have a question about the RK4000ek and is the answer not in the manual?
Questions and answers