
Related Manuals for Nordbo Robotics AUBO


Summary of Contents for Nordbo Robotics AUBO
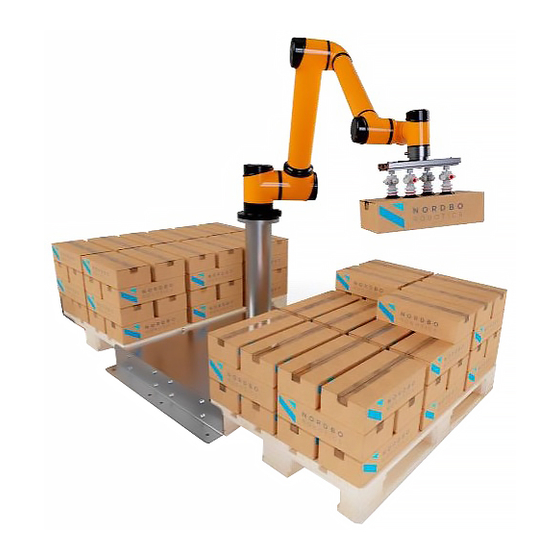
- Page 1 Palletizer for AUBO Robots Installation Manual Ver. 1.7 Nordbo Robotics A/S info@nordbo-robotics.com Agerhatten 27A Entrance 4 +45 81 81 98 81 5220 Odense Denmark Copyright © 2020, Nordbo Robotics A/S. All Rights Reserved.
- Page 2 Copyright Copyright © 2020 Nordbo Robotics A/S. All Rights Reserved. No part of this manual may be reproduced or transmitted in any form or by any means, electronic or mechanical, including photocopying and recording, for any purpose without the express written permission of Nordbo Robotics A/S.
- Page 3 EXPLANATION AUBO Robot manipulator brand used when referring to the robot Glossary Extension Additional software that adds new capabilities to the AUBO robot Manipulator Robot consisting of several joints and motors capable of performing programmed movements Pallet Pattern Generator An online tool used to develop stacking patterns for palletizers...
-
Page 4: Table Of Contents
Setting up the pallet 7.4. (Optional) Setup tool I/O in extension 7.5. Setup tool I/O in the AUBO settings 7.6. (Optional) Setting up the lift How to activate the license Palletizer for AUBO Robots - Installation Manual – Ver. 1.7 3 of 36... -
Page 5: Introduction
This document serves as a guide for the installation of Nordbo Robotics’ palletizer software extension made for AUBO manipulators. The physical construction of the palletizer setup must comply with the software, and therefore general guidelines on how to build a compatible palletizing setup are 1. -
Page 6: Product Information
& grippers, Pallet Pattern Generator, and AUBO Software Extension 2. Product Information 2.1. AUBO robot Information about the installation of the AUBO robot can be found in the manuals provided by your supplier when purchasing the robot. Alternatively, the manuals can be found at www.nordbo- robotics.com/downloads. -
Page 7: Aubo Extension
The Palletizing extension is used to read files generated by the online pattern generator. Using these files, the AUBO robot can pick objects from a conveyor and place these in a user-specified pattern. The use of the AUBO extension is elaborated in the document “User Manual - AUBO Palletizer Extension”. -
Page 8: Palletizer Base Specifications
3.1. Robot orientation The rotation of joint 1 to joint 6 of the AUBO robot is from -175° to +175°. This limited rotation must be taken into consideration when installing the robot. If mounting the robot base in a wrong position, the robot will be unable to reach all necessary positions when palletizing. -
Page 9: Example Specifications
Pickup distance, C 300+ mm 355+ mm Max stacking height, H 815 mm 715 mm *See figure 4, 5 and 6 Figure 4: AUBO Palletizer dimensions, side view Palletizer for AUBO Robots - Installation Manual – Ver. 1.7 8 of 36... - Page 10 Figure 5: AUBO Palletizer dimensions, top view Figure 6: AUBO Palletizer dimensions, back view Palletizer for AUBO Robots - Installation Manual – Ver. 1.7 9 of 36...
-
Page 11: Installing The Robot Accessories
Use the following instructions to connect grippers and sensors to the AUBO robot. The inputs and outputs can be found in the lower right corner of the cabinet and are highlighted in figure 7. 4. Installing the robot accessories Figure 7: AUBO Control box I/O ports Palletizer for AUBO Robots - Installation Manual –... -
Page 12: Wiring The Tool
4.1. Wiring the tool Robot controlled tools must be wired to the AUBO control cabinet using the ports named DI_XX and DO_XX, highlighted in figure 7. Vacuum gripper If using a vacuum gripper, it must be equipped with a vacuum switch as illustrated in figure 8. -
Page 13: Wiring The Photoelectric Sensors
For single/double conveyors sensor placement, see figure 10 and 11 on the following page. Sensor example: SICK GL6-P4211 + reflector Figure 9: Placement of photoelectric sensors Palletizer for AUBO Robots - Installation Manual – Ver. 1.7 12 of 36... - Page 14 Case 1: Single Conveyor Figure 10: Sensor placement if using a single conveyor setup Case 2: Double Conveyor Figure 11: Sensor placement if double conveyor setup Palletizer for AUBO Robots - Installation Manual – Ver. 1.7 13 of 36...
- Page 15 DI_012: Photoelectric sensor for sheet detection, on sheet station 2, low signal = sheet ready. Note: Is only used when the robot performs a double pick. Both photocells at the conveyor must be active before a double pick can be performed. Palletizer for AUBO Robots - Installation Manual – Ver. 1.7 14 of 36...
-
Page 16: Optional) Wiring The Lift
DI_07: Sensor detecting when the lift is at its highest point, high signal = lift is at its highest point. DI_11: Sensor detecting when the lift is at its lowest point, high signal = lift is at its lowest point. Palletizer for AUBO Robots - Installation Manual – Ver. 1.7 15 of 36... -
Page 17: Software And Firmware Update
Before installing the palletizer software, make sure you have the latest AUBO software installed on your robot. The program is developed and tested on “Version 4.5 Foreign” and firmware version 3.2.9. 5. Software and Firmware Update 5.1. Update Process Contact your AUBO distributor for the latest software and firmware updates. Transfer the update files to a USB and insert the USB containing the files into the robot control box. -
Page 18: Installing Palletizing Software
8. To update the firmware, go to the “Update Firmware” tab and repeat steps 5, 6 and 7. The following section describes the installation process of the AUBO extension. The software is located on the USB provided by Nordbo Robotics. - Page 19 2. Activate the emergency stop on the teach pendant. A pop-up window will appear as illustrated in figure 14. Click “OK” to close the window. Figure 14: AUBO Interface Notification Form Palletizer for AUBO Robots - Installation Manual – Ver. 1.7 18 of 36...
- Page 20 3. After closing the window, the desktop will be visible. Click the “Files” icon on the desktop and navigate to the USB directory. Figure 15: AUBO Teach pendent desktop Palletizer for AUBO Robots - Installation Manual – Ver. 1.7 19 of 36...
- Page 21 4. In the USB directory, double click on the “.deb” file, wait for Ubuntu Software centre to load the install package. Figure 16: AUBO post-installation pop-up Palletizer for AUBO Robots - Installation Manual – Ver. 1.7 20 of 36...
- Page 22 5. Click Install in the right side of the screen. Figure 17: Ubuntu Software Center 6. A popup will appear warning that: “The package is of bad quality”. This is because AUBO does not follow the standard Linux directory structure. Click “Ignore and install”.
- Page 23 8. Reboot the AUBO robot. The installation is now completed, and the palletizer extension can be accessed from the top menu bar in the AUBO interface as illustrated in figure 18. Palletizer for AUBO Robots - Installation Manual – Ver. 1.7...
- Page 24 Figure 20: AUBO Palletizing Extension Palletizer for AUBO Robots - Installation Manual – Ver. 1.7 23 of 36...
-
Page 25: Setting Up The System
Note: The default password is “1234” and should be changed by the operator responsible for the setup after installing the palletizer setup. Figure 21 AUBO Extension Login tab Palletizer for AUBO Robots - Installation Manual – Ver. 1.7 24 of 36... -
Page 26: Setting Up The Tool
7.2. Setting up the tool The following instructions are used when performing the first-time setup or changing the tool. Figure 22: AUBO Extension Setup tab Palletizer for AUBO Robots - Installation Manual – Ver. 1.7 25 of 36... - Page 27 Obs.! Be careful when changing the gripper settings and pallet settings. If these values are wrong, it might result in the robot colliding with the products or pallets. Palletizer for AUBO Robots - Installation Manual – Ver. 1.7 26 of 36...
-
Page 28: Setting Up The Pallet
“2 Corners” and “Legacy” assume that the robot is mounted in an upright position and the pallet is lying flat on the floor. In more technical terms they assume that the pallet XY-plane is parallel to the robot base XY-plane. Palletizer for AUBO Robots - Installation Manual – Ver. 1.7 27 of 36... - Page 29 Alternatively, the 3-dimensional vectors from the robot base to the corners can be measured and inserted/edited in manually. Figure 25: 2 corners calibration method Palletizer for AUBO Robots - Installation Manual – Ver. 1.7 28 of 36...
- Page 30 Alternatively, the 3-dimensional vectors from the robot base to the corners can be measured and inserted/edited in manually. Figure 26: 3 corners calibration method Palletizer for AUBO Robots - Installation Manual – Ver. 1.7 29 of 36...
- Page 31 Alternatively, the 3-dimensional vectors from the robot base to the corners can be measured and typed in manually. Figure 27: xOxy calibration method Palletizer for AUBO Robots - Installation Manual – Ver. 1.7 30 of 36...
- Page 32 (see figure 28). Height: The height of the pallet measured from the floor to the top of the pallet (see figure • 28). Figure 28: Legacy calibration method Palletizer for AUBO Robots - Installation Manual – Ver. 1.7 31 of 36...
-
Page 33: Optional) Setup Tool I/O In Extension
4. Under Tool I/O check “Enable” and assign each of the signals “Gripper ON”, “Gripper OFF” and “Product sensor” to the desired I/O, using the dropdown menus (see figure 30). Figure 29: Setup tool I/O Palletizer for AUBO Robots - Installation Manual – Ver. 1.7 32 of 36... -
Page 34: Setup Tool I/O In The Aubo Settings
T_DI/O_00 (Gripper ON) = Digital Output b. T_DI/O_01 (Gripper OFF) = Digital Output c. T_DI/O_02 (Product sensor) = Digital Input Figure 30: AUBO Tool IO setup Palletizer for AUBO Robots - Installation Manual – Ver. 1.7 33 of 36... -
Page 35: Optional) Setting Up The Lift
The height offset is the distance that the lift moves, from its lowest position, to its highest position. Figure 31: Setup lift Palletizer for AUBO Robots - Installation Manual – Ver. 1.7 34 of 36... -
Page 36: How To Activate The License
For a step-by-step how-to guide on license activation, go to activate.nordbo- robotics.dk/howto or scan the QR-code in the right corner. 8. How to activate the license Figure 32: AUBO Extension license tab Palletizer for AUBO Robots - Installation Manual – Ver. 1.7 35 of 36... - Page 37 Nordbo Robotics A/S info@nordbo-robotics.com Agerhatten 27A Entrance 4 +45 81 81 98 81 5220 Odense Denmark Copyright © 2020, Nordbo Robotics A/S. All Rights Reserved.
Need help?
Do you have a question about the AUBO and is the answer not in the manual?
Questions and answers