Epson SureColor P-Series Setup Manual
Hide thumbs
Also See for SureColor P-Series:
- Setup and maintenance (33 pages) ,
- Quick reference (46 pages)
Table of Contents
Advertisement
Quick Links
Advertisement
Table of Contents

Related Manuals for Epson SureColor P-Series


Summary of Contents for Epson SureColor P-Series
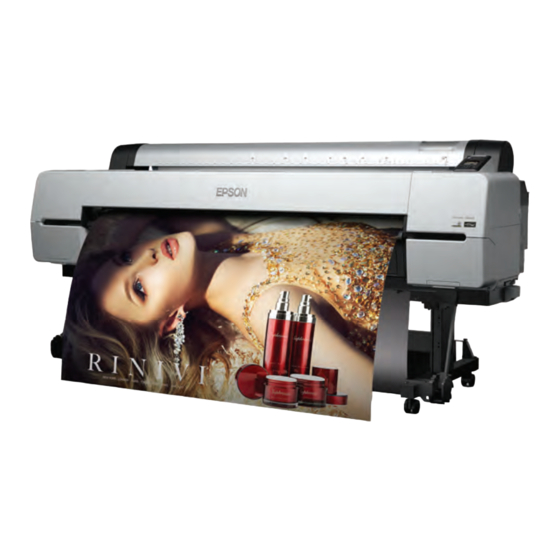
- Page 1 Epson SureColor P-Series ® P10000/P20000 Setup...
-
Page 2: Table Of Contents
Contents Unpacking and assembling the printer ....................2 Assembling the stand ........................3 Mounting the printer on the stand ..................... 6 Attaching the support bar ......................9 Attaching the paper basket ....................... 12 Completing setup and connecting the power cord ................16 Installing ink ........................... -
Page 3: Unpacking And Assembling The Printer
Unpacking and assembling the printer Unpacking and assembling the printer Unless otherwise indicated, the illustrations in this guide show the SureColor ® P20000, but the instructions apply to all models. Follow these steps to assemble your printer and its stand. Before you begin, make sure you have enough space to set up and use the printer—the space shown in the image below in addition to the dimensions of the printer and stand: •... -
Page 4: Assembling The Stand
Assembling the stand When choosing a place for the printer, choose a flat, stable location with adequate room for easy access and ventilation. Avoid locations subject to direct sunlight, excessive heat, moisture, or dust. Also avoid locations near potential sources of electromagnetic interference, such as loudspeakers, cordless phones, TVs, or air conditioners. - Page 5 Assembling the stand Slide the horizontal strut into the sides of the stand. Align the L and R stickers on each side of the stand with the stickers on each side of the horizontal strut. Use the hex wrench ( ) to tighten the two fasteners on each side of the stand.
- Page 6 Assembling the stand Use the hex wrench ( ) to attach a mounting bracket to each side of the stand with 4 bolts ( Note: Make sure you match the left and right bracket with the correct side of the stand. The brackets are labeled L and R.
-
Page 7: Mounting The Printer On The Stand
Mounting the printer on the stand Mounting the printer on the stand Make sure you have these items: Hex wrench ( Printer Stand 3 bolts ( ) and washers For the SureColor P20000, make sure you also have these items: Thumbscrew Alignment bracket Remove the cardboard panels and other printer packing materials. - Page 8 Mounting the printer on the stand For the SureColor P20000, attach the alignment bracket to the back of the printer with the thumbscrew. Lift the printer using the handholds shown below. WARNING: Four or more people are required to lift the printer.
- Page 9 Mounting the printer on the stand Mount the printer on the stand, aligning the arrows on the back of the stand and on the back of the printer. Secure the printer to the stand with the bolts ( ) and washers using the hex wrench (...
-
Page 10: Attaching The Support Bar
Attaching the support bar Attaching the support bar Keep the support bar in the stored position unless you are using the paper basket or the optional auto take-up reel. Make sure you have all the included support bar parts. Left support arm Support bar 2 bolts ( Hex wrench (... - Page 11 Attaching the support bar Attach the left and right support arms to the base of the printer stand. Use the hex wrench ( ) to fasten each support arm with 4 bolts (...
- Page 12 Attaching the support bar Attach the support bar to the ends of the arms. Use the hex wrench ( ) to fasten each side of the bar with a bolt (...
-
Page 13: Attaching The Paper Basket
Attaching the paper basket Attaching the paper basket The paper basket is a cloth sheet that attaches to the printer stand and support bar and catches your prints without damaging them. You must attach the support bar to use the paper basket. Make sure you have all the included paper basket parts. - Page 14 Attaching the paper basket Fasten the plastic connectors onto both ends of the paper basket pole. Note: Make sure the shiny side of the cloth is facing down. Place the basket under the printer with the longer loop on the right (when you face the back of the printer).
- Page 15 Attaching the paper basket Use a hex wrench ( ) to fasten each plastic connector with two bolts ( ) and two washers. Hook the loop on either side of the basket around each plastic connector.
- Page 16 Attaching the paper basket On the front of the product, wrap the end of the basket around the support bar. Hook the plastic connectors at the end of the paper basket onto the metal pegs on the support bar.
-
Page 17: Completing Setup And Connecting The Power Cord
Completing setup and connecting the power cord Completing setup and connecting the power cord Unlock the casters and move the printer to its final location. Lock the casters after moving the printer. The casters are only meant for moving the printer a short distance over smooth surfaces. Note: Remove any packing tape and plastic film. - Page 18 Completing setup and connecting the power cord Connect the power cord to the AC inlet on the side of the printer. Attach a cable guide to the side of the printer stand and route the power cord as shown. Plug the power cord into a properly grounded electrical outlet. Caution: Do not use an outlet that is controlled by an automatic timer or wall switch.
-
Page 19: Installing Ink
Installing ink Installing ink Use the ink cartridges that came with your printer for initial ink charging. During the initial installation process, it is normal for most of the ink in each cartridge to be used. The cartridges shipped with your printer are provided mainly to charge the ink system. Make sure you order a new set of cartridges as soon as possible. - Page 20 Installing ink Open the ink covers. Remove the ink cartridges from their packages, then gently shake each cartridge for about 10 seconds.
- Page 21 Installing ink Install each ink cartridges in the slot that corresponds to the cartridge. Left ink bay Right ink bay Slot no. Cartridge Slot no. Cartridge Vivid Light Magenta (VLM) Photo Black (PK) Cyan (C) Matte Black (MK) Gray (GY) Dark Gray (DGY) Light Gray (LGY) Yellow (Y)
-
Page 22: Installing The Internal Print Server
Installing the internal print server After installing all of the cartridges, close the ink covers. The printer begins charging the ink delivery system and the P power light flashes. Caution: Do not open the front cover or the ink covers, or turn off the printer while it is priming. After ink charging is complete, you need to load paper before the product is ready to print. - Page 23 Installing the internal print server Remove the two screws securing the option slot cover to the back of the printer, then remove the cover. Note: Make sure you save the option slot cover. Remove the internal print server and re-attach the cover if you ever need to ship the printer.
-
Page 24: Loading Roll Paper
Loading roll paper Secure the internal print server using the screws you removed. Turn on the printer and press to initialize the drive. Loading roll paper You can use roll paper with a 2- or 3-inch core and a width of up to 44 inches (112 cm) for the SureColor P10000 and 64 inches (162 cm) for the SureColor P20000. - Page 25 Loading roll paper in the printer Lift the lock lever. Note: Make sure you lift the lock lever completely. If the lever is not completely raised, the lock is still on. Adjust the paper guides to the width of the roll paper.
- Page 26 Loading roll paper in the printer Place the roll on top of the paper guides. If necessary, adjust the roll media adapters to fit the core size of the roll paper. 2-inch core: 3-inch core:...
- Page 27 Loading roll paper in the printer Release the tension lever on both adapters. Push the adapters into the paper core at both ends of the roll. Lock the tension levers.
- Page 28 Loading roll paper in the printer Lift the roll off of the roll stand. Slide the roll to the right until it hits the roll paper guide, then slide it forward into position. Press the button on the control panel. Make sure is selected, and press Roll Paper Insert the paper into the slot until the printer beeps.
- Page 29 Loading roll paper in the printer Pull down on the lock lever to lock the paper in place. Close the roll paper cover. On the screen that appears on the LCD, select if the paper settings are correct, Keep Settings Above or select , then adjust the settings.
-
Page 30: Aligning The Print Head
Aligning the print head Aligning the print head Properly aligning the print head ensures the best print quality. If banding appears on your prints, if they look grainy or blurry, or if you see misregistration or “ghosting,” you need to align the print head. Although you can align the print head using the printer utility software, aligning the printer from the control panel will quickly and automatically perform the most thorough alignment. - Page 31 Connecting to your system Ethernet connection: USB connection: Note: Route the communication cable (USB or Ethernet) through the cable guide he power cord. Plug the other end of the cable into the appropriate port on your computer, network switch, or hub.
-
Page 32: Installing The Software
Updating your printer firmware To keep your printer features and functionality up to date, you should periodically check for a new version of firmware on the Epson support site and update your printer, if necessary. Checking the current firmware version Press the button. -
Page 33: Configuring The Printer For Your Network
If necessary, contact your network administrator for instructions on assigning an appropriate IP address. A static IP address is recommended. EPSON and SureColor are registered trademarks, and EPSON Exceed Your Vision is a registered logomark of Seiko Epson Corporation. General Notice: Other product names used herein are for identification purposes only and may be trademarks of their respective owners. - Page 34 CPD-51060 Printed in USA...
Need help?
Do you have a question about the SureColor P-Series and is the answer not in the manual?
Questions and answers