Table of Contents
Advertisement
Quick Links
True to the Music
JX42 V2
Guitar & Amp Switcher
O
'
M
wner
s
anual
Radial Engineering Ltd.
1165-1845 Kingsway Ave, Port Coquitlam BC V3C 1S9
Tel: 604-942-1001 • www.radialeng.com
www.radialeng.com
Email: info@radialeng.com
Specifications and appearance are subject to change without notice.
Copyright © 2021 Radial Engineering Ltd.
Advertisement
Table of Contents

Summary of Contents for Radial Engineering X42 V2
- Page 1 Guitar & Amp Switcher ’ wner anual Radial Engineering Ltd. 1165-1845 Kingsway Ave, Port Coquitlam BC V3C 1S9 Tel: 604-942-1001 • www.radialeng.com www.radialeng.com Email: info@radialeng.com Specifications and appearance are subject to change without notice. Copyright © 2021 Radial Engineering Ltd.
-
Page 2: Table Of Contents
Radial JX44 V2 Owner’s Manual Table of Contents Overview....................2 Features ....................3-4 The Instrument Inputs................5 The Amplifier Outputs ................5-6 The Tuner Outputs...................6 Using the JR-5 Remote for Guitars ............7 Using the JR-2 Remote for Amps ............8 The MIDI Input ..................8-10 Specifications ..................11 Warranty .................... -
Page 3: Overview
JR-2 footswitch. A pristine Class-A signal path and Jensen transformer isolation on both outputs offer studio quality sound while eliminating hum and buzz caused by ground loops. Radial Engineering Ltd. JX42 V2™ Owner’s Manual... -
Page 4: Features
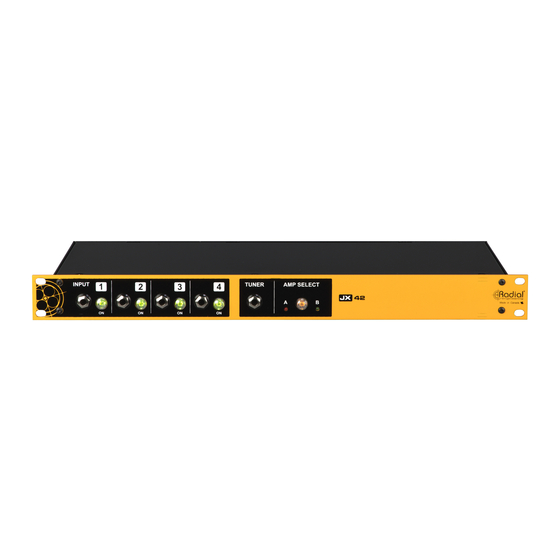
AMP SELECT: Illuminated switch toggles between amp outputs A & B. The light for the amp select switch turns off when the Mute function is engaged on the optional JR-2 remote footswitch or via MIDI commands. Each amp output also features a corresponding LED which turns on to indicate which amp output is currently active. Radial Engineering Ltd. JX42 V2™ Owner’s Manual... - Page 5 GTR 1 GTR 2 GTR 3 GTR 4 ON/OFF ON/OFF ON/OFF ON/OFF MUTE ALL GUITARS JR-2 Remote: Optional accessory to select or mute the amplifier outputs. MUTE SELECT Radial Engineering Ltd. JX42 V2™ Owner’s Manual...
-
Page 6: The Instrument Inputs
Each output also includes a The amp outputs and lift switches LIFT switch that can further reduce ground loop noise should you encounter any during setup or soundcheck. JX42 V2™ Owner’s Manual Radial Engineering Ltd. -
Page 7: The Tuner Outputs
Both of the tuner outputs can be used simultaneously if needed, and they will always be active, even when remote footswitches or MIDI controllers are used to mute the JX42 amp outputs. The tuner outputs, mirrored on the front and rear panels of the JX42 Radial Engineering Ltd. JX42 V2™ Owner’s Manual... -
Page 8: Using The Jr-5 Remote For Guitars
• Use the footswitches 1 thru 4 to recall the four banks from the JR-5’s internal memory. • You can exit BANK mode at any time by holding the MUTE footswitch for 3 seconds, until the STATUS LED turns off. JX42 V2™ Owner’s Manual Radial Engineering Ltd. -
Page 9: Using The Jr-2 Remote For Amps
The JX42 ships with Dip switches 1-4: DOWN, 5-7: UP, and 8: DOWN. This configuration means the JX42 will respond to MIDI messages on all MIDI Channels, and the JX42 will respond to Control Change messages only. The default MIDI dip switch settings Radial Engineering Ltd. JX42 V2™ Owner’s Manual... - Page 10 Enable Control Changes DOWN these switches needs to be in the UP position for the JX42 to Enable Program Changes respond to MIDI commands. and Control Changes DIP switch 8: No current function JX42 V2™ Owner’s Manual Radial Engineering Ltd.
- Page 11 Program C2 (Amp B On) Program C17 (Mute) ALL MUTE ON Program C18 (unmute) ALL MUTE OFF Reminder: when using the JR-2 remote with the JX42, amplifier switching and muting via MIDI is disabled Radial Engineering Ltd. JX42 V2™ Owner’s Manual...
-
Page 12: Specifications
GENERAL Conditions:....................For use in dry locations only between 5°C and 40°C Power: ....................100V to 240V, 50/60Hz with IEC connection Conformity: ...................CE, FCC Warranty: ....................Radial 3-year, transferable *Specifications are subject to change without notice. JX42 V2™ Owner’s Manual Radial Engineering Ltd. - Page 13 True to the Music Radial Engineering Ltd. JX42 V2™ Owner’s Manual...
- Page 14 True to the Music JX42 V2™ Owner’s Manual Radial Engineering Ltd.
- Page 15 True to the Music Radial Engineering Ltd. JX42 V2™ Owner’s Manual...
- Page 16 RADIAL ENGINEERING LTD. 3 YEAR TRANSFERABLE WARRANTY RADIAL ENGINEERING LTD. (“Radial”) warrants this product to be free from defects in material and work- manship and will remedy any such defects free of charge according to the terms of this warranty. Radial will repair or replace (at its option) any defective component(s) of this product (excluding finish and wear and tear on components under normal use) for a period of three (3) years from the original date of purchase.


Need help?
Do you have a question about the X42 V2 and is the answer not in the manual?
Questions and answers