Advertisement
Quick Links
TOOLS REQUIRED
INSTALLATION INSTRUCTIONS
- Review instructions carefully before installation
- Installation should be completed by a qualified person
- Please dispose of packaging in a responsible manner
PARTS LIST
A
B
C
M8x65
4x
4x
F
G
H
M6*10
4x
4x
K
L
M
1x
1x
D
E
ST4.2*40
4x
4x
4x
I
J
4x
4x
4x
N
O
2x
1x
1x
Installation Support • No Nonsense™ Warranty • (800) 875-5285 • www.WarmlyYours.com
1-2
Step 1:
Before you
A G
start assembly
E
make sure
components
listed below are
in the package
Step 2:
insert plastic
bush (G) in
tube (E)
4-5
Step 4:
Insert metal
bushing (D) in
F
each tube and
H
place frame
D
against wall. Make
sure the frame is
level.
Step 5:
Using a pencil,
nake the position
of the bushes on
the wall.
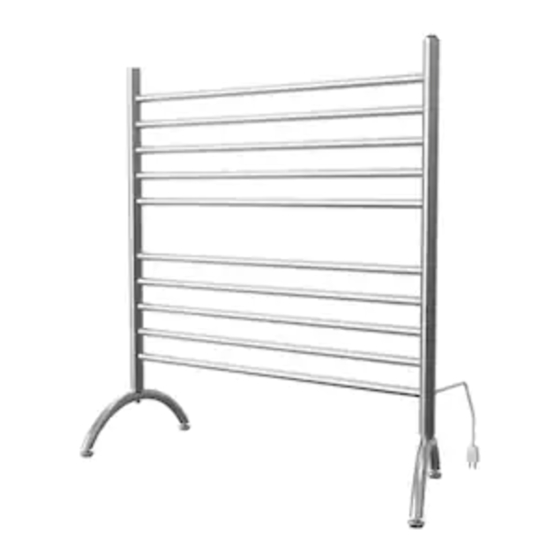
MADRID INSTALLATION MANUAL
WALL MOUNTED / FLOOR MOUNT
3
E
A G
O
6
Step 6:
Remove bushings
(D) from tube and
using the screw (C)
and the plug (B)
B
provided, fix the
D
C
bushing to the wall.
Depending on the
type of wall, other
2x4
methods can also be
used to fix the
Stud
bushings to the wall.
B
Step 3:
Using screw
(A) attach the
tube to the
nut on the
back of the
frame with
allen key (O)
D
C
Advertisement

Related Manuals for WarmlyYours MADRID


Summary of Contents for WarmlyYours MADRID
- Page 1 Step 5: used to fix the Stud Using a pencil, bushings to the wall. nake the position of the bushes on the wall. Installation Support • No Nonsense™ Warranty • (800) 875-5285 • www.WarmlyYours.com...
- Page 2 This product is for indoor use only. bushing. 3. If the heating wire inside the unit fails or becomes damaged, Step 8: turn the unit OFF and contact WarmlyYours. Do NOT attempt to Tighten all the sey repair screws (F) with the allen key (N) DO NOT or remove the power switch or heating wire.
Need help?
Do you have a question about the MADRID and is the answer not in the manual?
Questions and answers