Table of Contents
Advertisement
Quick Links
Advertisement
Table of Contents

Subscribe to Our Youtube Channel
Related Manuals for Transvideo Stargate Series


Summary of Contents for Transvideo Stargate Series
- Page 1 Stargate Operator Manual Revision 1.5 Stargate Operator Manual...
- Page 2 Stargate Operator Manual...
-
Page 3: Table Of Contents
Table of Contents Table of Contents Introduction ..............................6 About ................................6 Warning & Caution ............................. 7 First Steps ................................. 8 Unpacking ..............................8 Packing list ..............................8 2 years warranty (+ 1) ............................ 8 General safety instructions .......................... 8 Cables ................................ - Page 4 Service & maintenance........................... 42 General ..............................42 Useful tips ..............................42 Protection Glass ............................42 Hardware, Software and Firmware ......................42 Updating your Stargate ..........................43 Troubleshooting ............................43 Product Return ............................44 Transvideo Equipment Limited Warranty ..................... 45 Stargate Operator Manual...
- Page 5 Table of Figures Table of Figures Figure 1 Stargate Back ..............................11 Figure 2 Lemo 8 Pinout ..............................11 Figure 3 Stargate Front ..............................12 Figure 4 Temporary Buttons ............................12 Figure 5 Horizon Menu ..............................15 Figure 6 Markers Menu ..............................17 Figure 7 Luts Menu ................................
-
Page 6: Introduction
Introduction About Introduction About This Operator Manual describes the use of the Transvideo Stargate family. The Stargate is our latest contribution to Digital Cinematography, including advanced user tools for HD. The Stargate family includes the following product: Stargate 7” FullHD Monitor P/N 917TS0126 Physical, electrical and optical, and user interface characteristics of this product differ from previous product ranges. -
Page 7: Warning & Caution
The user and/or technician assume full responsibility or any risk of bodily injury, death or property damage arising out of the use or disassembly or repair of this equipment. In no event shall Transvideo S.A. or its local representatives be liable to a user, technician or third party for any loss of income or any damage of any kind resulting from the use of or work on the said equipment. -
Page 8: First Steps
The video cable must be adapted for carrying HD SDI signals. Proper 75 Ω connectors must be used. Always check the connector before plugging a cable to your monitor. Transvideo offers high quality cables for cameras, power supplies and other equipment. Contact Transvideo S.A. or its local representative in case of need. - Page 9 First Steps General safety instructions Transvideo manufactures high quality brackets and accessories for the comfort of use and security for the equipment and user. Please contact Transvideo S.A. or its local representative in case of need or visit http://www.transvideo.eu Stargate Operator Manual...
-
Page 10: Power Requirements
Transvideo Labs engineers integrated communication between the fuel computer of Logic Series Digital batteries from Anton-Bauer® and the Stargate. The FuelReader™ gives the remaining available percentage of battery and the time to run. You will need to use the battery plate from Transvideo (P/N 918TS0202-AB) to enjoy the benefits of the FuelReader™. -
Page 11: Product Overview
All connectors are on the back and on the right side of the monitor. Depending on the monitor model, the connectors and their location may differ. Figure 1 Stargate Back Part number, Serial number 1/4-20 thread to attach the monitor from Transvideo mounting system * the base HDMI Input Protective vent QR-Code... -
Page 12: User Interface
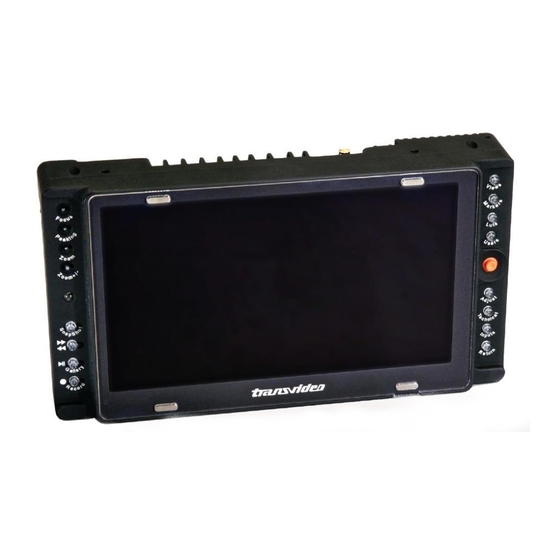
Product overview User interface User interface Figure 3 Stargate Front Views Focus Markers Peaking Luts (3D) Zoom Users Zoom + / Zoom - Adjust Tally LED Technical Snapshot Inputs Rewind / Forward Return Gallery Record Joystick Keys with temporary position Temporary Temporarily activates the concerned function with adjustable timer. -
Page 13: Direct Functions
Product overview User interface Direct functions Most of the functions are directly accessible from the keypad. Keys illuminate when the function is activated. Joystick When a menu is activated, the joystick (J) allows to adjust parameters or move into the menus tabs (up/down, left/right) and to validate (short/long push). -
Page 14: Functionalities
Functionalities Views Functionalities Views Views button is the first one starting at top-right. Full Screen The Full Screen View shows only the picture from the first to the last line of pixels. The DIT View features measurements and tools that are displayed outside of the picture. Waveform luminance Displays a graphical representation of luminance (Y component). -
Page 15: Body-Rig
Functionalities Views Body-Rig The Body-Rig view displays VirtualHorizon, mostly used by Camera Stabilizing devices, called AvengerLeveler™. Return In this view, a long push on the button opens the setting menu for the VirtualHorizon. Settings Range The range corresponds to the max tilt on each side that the bubble will show. The range is represented in ±Degrees and can be changed in the Horizon Menu. -
Page 16: Markers
Functionalities Markers Markers Function This function is used to apply markers or a user definable Safe Area on the picture. Markers are displayed in Zoom mode only when image is centered. Usage Markers button is the second one starting at top-right. Short push on this button will switch ON / OFF all the selected markers. -
Page 17: Markers Menu
Functionalities Markers Markers Menu Push the corresponding button to activate or deactivate the corresponding marker. All selected markers in this list will be switch On or Off when the user will use the quick access. Figure 6 Markers Menu Markers List Cross (Central Cross) 14/9 Safe Area... -
Page 18: 3D Lut
It is preferable to use the correct file format as every conversion could alter the 3D LUT. Not all conversions have been tested. If you find specific case where the conversion does not work, contact support@transvideo.eu with the specific file. -
Page 19: Lut Menu
Functionalities 3D LUT LUT Menu There are 4 selectable LUTs (A / B / C / D) which correspond to the 4 banks allocable from the browser, and a Browser Launcher. Use the right-hand buttons to select a LUT or to start the LUT Browser. LUT banks can be selected only if a LUT is affected, otherwise the text is shaded. -
Page 20: Browser
Functionalities 3D LUT Browser Usage This easy to use interface uses the joystick to navigate the menus and perform actions. Moving the joystick Left/Right will change the active Table (the currently active table is represented with a green background on the title) Moving the joystick Up/Down will change the current file or bank into the active table. -
Page 21: Tables
Functionalities 3D LUT Tables LUT Banks. This table shows the already affected LUT to the corresponding bank. User is limited to 4 banks. Memory. This is the Internal Memory where LUTs are stored. User can have more than 4 LUTs installed. Every LUT that is affected to a bank is necessarily copied into the Internal Memory. -
Page 22: Figure 9 Luts Browser : Selection
Functionalities 3D LUT Selected Table Selected File User info Figure 9 Luts Browser : Selection Available Actions Stargate Operator Manual... -
Page 23: User Selection
Functionalities User Selection User Selection Function Menu for quick access to functionalities. All of these functions are accessible by its original menu, and activation/deactivation from this menu will be reflected in the original menu. The original menu can still be used to control the function. -
Page 24: Adjust
Functionalities Adjust Adjust Function This menu is used to adjust different particularities of the displayed image. It allows to adjust the most common settings of an image such as brightness, contrast and saturation. Users can also apply False colors to the image, flip the image, display or output a SMPTE Mire, apply Gamma Profiles and so on. -
Page 25: Adjust Menu
Functionalities Adjust Adjust Menu Color Tab Figure 11 Adjust Menu - Color Tab Brightness Changes the brightness of the image. Contrast Changes the contrast of the image. iii. Saturation Changes the saturation of the image. White Point White point calibration – N/A yet False Color Apply false color on the image. -
Page 26: Figure 12 Adjust Menu - Image Tab
Functionalities Adjust Image Tab Figure 12 Adjust Menu - Image tab Flip No Flip Horizontal Flip (H Flip) Vertical Flip (V Flip) Horizontal and Vertical Flip (HV Flip) Aspect Ratio 16/9 Desqueeze 1.3x Desqueeze 2x iii. Fast Mode Fast Mode is used to remove maximum of treatment and offer a delay between video input and display less than 1 frames. -
Page 27: Figure 13 Adjust Menu - Profiles Tab
Functionalities Adjust Profile Tab Profiles are used to reverse the gamma correction applied to the image by the camera. Applying a profile that is not applied at the camera level will result in bad colorimetry. Figure 13 Adjust Menu - Profiles tab Profiles List Linear REC 709... -
Page 28: Technical
Functionalities Technical Technical Function Settings for general functionality, such as Locking the monitor, changing the dimmer, managing the medias, display the software information, resetting values and more. Usage Technical button is the third one starting at bottom-right, or the second one under the joystick. A short push opens the menu. - Page 29 Functionalities Technical iii. Fine Peaking Special mode for peaking, reducing the halo of the highlighted areas. See the Peaking section for info. Perm. Zoom Icon Option to have the zoom icon always displayed when zoom is activated. Dimmer Dimmer setting for the monitor. Changes the brightness of the display panel. TimeFunc Select timing for Focus Helper / Peaking / Zoom to be activated when using Temporary Keys...
-
Page 30: Figure 15 Technical Menu - Meta Tab
Functionalities Technical Meta Tab Figure 15 Technical Menu - Meta tab AutoRec Auto Rec function starts internal recording when camera starts recording. It uses the embedded tally in the SDI signal. Manual recording still works. There is no priority. The first “starts recording” signal received (button or embedded flag) will start the record and the first “stop recording”... -
Page 31: Figure 16 Technical Menu - Tally Tab
Functionalities Technical Tally Tab Figure 16 Technical Menu - Tally Tab There are 3 groups of setting for the Tally: Internal Recording, to set up a tally information for the internal record function. SDI Recording, to set up a tally information based on the tally flag embedded in the SDI signal. External Recording, to set up a tally information from the external connector (cf Lemo 8-pin), on GPI1 and GPI2. - Page 32 Functionalities Technical LED Mode OFF: The front LED does not represent tally for the corresponding group. Front: The front LED is used to represent tally for the corresponding group On Screen OFF: No draw for this group DOT: Small dot at top of screen Rect: Rectangle at top of the screen (moves depending on the view) OnAir: OnAir rectangle at the bottom of the image.
-
Page 33: Figure 17 Technical Menu - Tab Media
Functionalities Technical Media Tab Figure 17 Technical Menu - Tab Media Format SD Card Format the SD card and recreate the file system. The LED of the button is ON while formatting. This will wipe the content of the installed SD card. Format USB iii. -
Page 34: Figure 18 Technical Menu - Tab Infos
Functionalities Technical Info Tab Figure 18 Technical Menu - Tab Infos Soft Version IHM Version iii. FW Version Export Manual Export the manual onto the SD card in PDF file format. Factory Reset Reset all settings to default. Update Update the monitor. Stargate Operator Manual... -
Page 35: Inputs
Functionalities Inputs Inputs Inputs button is the second one starting at bottom-right, third one under the joystick. Short push on Inputs toggles between video inputs. HDMI Supported standards 3G SDI (SMPTE 425M 1920x1080p @ 50, 59.94, 60 Hz (SMPTE 424M) Level B) 1280x720p @ 24, 25, 29.97, 30 Hz (SMPTE 296M) -
Page 36: Focus Helper
Functionalities Focus Helper Focus Helper Focus Helper button is the first one starting at top-left. This function displays in-focus zone with user definable colours & densities, making manual focusing easier. When activating the focus helper, the settings are displayed on the right side of the screen. Select the desired emphasis color (left &... -
Page 37: Record And Playback
Functionalities Record and Playback Record and Playback Recording Specification Records are compressed using the H264 Codec. A manual conversion to MP4 is possible from the monitor gallery, format that is easier to read on most computers. It records directly on the SD card, and does not have any internal memory to record. Maximum size of a record is currently limited to 950 MB. -
Page 38: Gallery & Playback
Functionalities Record and Playback Gallery & Playback Switch between the galleries with the joystick (Up / Down) Video Gallery Figure 19 Video Gallery Stargate Operator Manual... -
Page 39: Figure 20 Snapshot Gallery
Functionalities Record and Playback Snapshot gallery Figure 20 Snapshot Gallery Stargate Operator Manual... -
Page 40: Specifications
Specifications Common Characteristics Specifications Common Characteristics 1 x 3G/HD/SDI Video inputs 1 x HDMI Video Output 1 x 3G/HD/SDI (processed) Recorder Yes (H264 format compression) LCD 7 inches Display Resolution 1920 x 1080 Contrast ratio 800:1 Viewing Angle ±85° H&V Brightness 800Nits White point calibration... -
Page 41: Sd Card Specifications
Specifications SD Card Specifications SD Card Specifications Size The maximum working size tested on the monitor is 128GBytes. Cards types SDSC, SDHC and SDXC Class 10 are supported to this limit. Capacities over 128GBytes have not been tested Format The SD card must be formatted in FAT32. The SD card could be formatted by any computer or devices that format the card into FAT32 File System. -
Page 42: Service & Maintenance
Please read TRANSVIDEO EQUIPMENT LIMITED WARRANTY chapter regarding the Transvideo S.A. warranty on the equipment described in this manual. For repairs contact Transvideo S.A. or its local representative or use the RAN procedure in the chapter Service & Maintenance, section Product Return. -
Page 43: Updating Your Stargate
Service & maintenance Updating your Stargate Updating your Stargate Please read the latest release requirements before updating. Step 1 Visit the Transvideo website, register if needed, then go to the Support section, choose Software Update, and download the latest software for the Stargate. Do not forget to check the... -
Page 44: Product Return
Log in to our website using your user account and visit Or contact us by: the Support section Email service@transvideo.eu www.transvideo.eu/support +33 2 3260 1479 +33 2 3222 3000 You will need to provide part number & serial number (found on the back of your product) and to briefly describe the reason for the return. -
Page 45: Transvideo Equipment Limited Warranty
Non-Transvideo brand peripheral equipment and software which may be distributed with Transvideo products are sold “AS IS” without warranty of any kind by Transvideo, including any implied warranty regarding merchantability or fitness for a particular purpose. The manufacturer or producer gives the sole warranty with... - Page 46 CAUSED BY THE USE, MISUSE OR INABILITY TO USE THE PRODUCT, REGARDLESS OF THE LEGAL THEORY ON WHICH THE CLAIM IS BASED, AND EVEN IF TRANSVIDEO HAS BEEN ADVISED OF THE POSSIBILITY OF SUCH DAMAGES. NOR SHALL RECOVERY OF ANY KIND AGAINST TRANSVIDEO BE GREATER THAN THE PURCHASE PRICE OF THE P>RODUCT SOLD BY TRANSVIDEO AND CAUSING THE...
- Page 47 25/10/2017 751TS0036 Rev 1.5 Stargate Operator Manual...
Need help?
Do you have a question about the Stargate Series and is the answer not in the manual?
Questions and answers