Table of Contents
Advertisement
Quick Links
Rear Blades
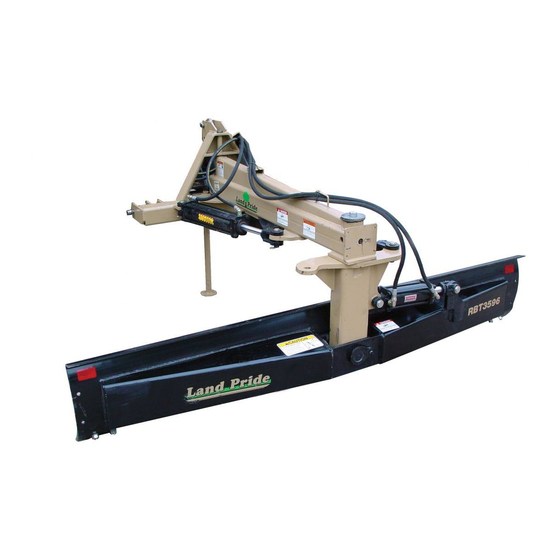
RBT3584 & RBT3596
24747
Table of Contents
!
Read the Operator's Manual entirely. When you see this symbol,
the subsequent instructions and warnings are serious - follow
without exception. Your life and the lives of others depend on it!
Cover photo may show optional equipment not supplied
with standard unit.
For an Operator's Manual and Decal Kit in French
Language, please see your Land Pride dealer.
301-251M
Operator's Manual
Printed 1/13/21
Advertisement
Table of Contents

Subscribe to Our Youtube Channel
Related Manuals for Land Pride RBT35 Series


Summary of Contents for Land Pride RBT35 Series
- Page 1 Your life and the lives of others depend on it! Cover photo may show optional equipment not supplied with standard unit. For an Operator’s Manual and Decal Kit in French Language, please see your Land Pride dealer. Printed 1/13/21...
-
Page 2: Machine Identification
Machine Identification Record your machine details in the log below. If you replace this manual, be sure to transfer this information to the new manual. If you, or the dealer, have added Options not originally ordered with the machine, or removed Options that were originally ordered, the weights and measurements are no longer accurate for your machine. - Page 3 Land Pride assumes no responsibility for errors or omissions. Neither is any liability assumed for damages resulting from the use of the information contained herein. Land Pride reserves the right to revise and improve its products as it sees fit. This publication describes the state of this product at the time of its publication, and may not reflect the product in the future.
- Page 4 Parts Manual for this link you to available dealers equipment. Download the appropriate for Land Pride products. App on your smart phone, open the App, Refer to Parts Manual QR point your phone on the QR code and Locator on this page for take a picture.
-
Page 5: Important Safety Information
Important Safety Information Important Safety Information Listed below are common practices that may or may not be applicable to the products described in this manual. Safety at All Times Look for the Safety Alert Symbol Careful operation is you best The SAFETY ALERT SYMBOL indicates there is a assurance against an accident. -
Page 6: Transport Safely
Replace parts on this implement correct tools and equipment. follow all shutdown procedures with genuine Land Pride parts only. Always properly match the wheel before leaving the operator’s seat to Do not alter this implement in a way size to the properly sized tire. -
Page 7: Avoid High Pressure Fluids
Use Seat Belt and ROPS Keep Riders Off Lights and Devices Machinery Land Pride recommends the use of a CAB or roll-over-protective- Slow moving tractors, and Never carry riders on the tractor or structures (ROPS) and seat belt self-propelled equipment can implement. - Page 8 Important Safety Information Listed below are common practices that may or may not be applicable to the products described in this manual. Avoid crystalline Silica Be aware of and follow OSHA If possible, change into disposable (or other local, State, or Federal) or washable work clothes at the (quartz) Dust guidelines for exposure to airborne...
- Page 9 Important Safety Information This page left blank intentionally. 1/13/21...
-
Page 10: Safety Labels
Spray soapy water on the surface where the label is to all damaged or missing labels. Order new labels from your be placed. nearest Land Pride dealer. To find your nearest dealer, Peel backing from label. Press firmly onto the surface. visit our dealer locator at www.landpride.com. - Page 11 Table of Contents Important Safety Information 24748 24748 818-487C Danger Avoid Injury (Both Sides) 24748 24748 818-491C Warning Pinch/Shear (Both Sides) 1/13/21 RBT3584 & RBT3596 Rear Blades 301-251M...
- Page 12 Table of Contents Important Safety Information 838-075C Caution Moldboard Falling 24748 838-614C 2" x 9" Red Reflector (2 places) 24748 RBT3584 & RBT3596 Rear Blades 301-251M 1/13/21...
- Page 13 Table of Contents Important Safety Information This page left blank intentionally. 1/13/21 RBT3584 & RBT3596 Rear Blades 301-251M...
-
Page 14: Using This Manual
Read this manual Your Land Pride dealer wants you to be satisfied with your and follow the recommendations to help ensure safe new implement. If for any reason you do not understand and efficient operation. -
Page 15: Tractor Requirements
A Selector Valve Kit may be purchased through your local Land Pride dealer if your tractor does not have the required number of duplex outlets. The selector valve provides a way to operate 2 hydraulic cylinders through one duplex outlet at the tractor. - Page 16 Table of Contents Section 1: Assembly & Set-up Assembly & Set-Up Safety RBT35 Rear Blade Refer to Figure 1-1: DANGER Locate shipping crate on a level surface. Remove & To avoid serious injury or death: separate blade assemblies from shipping crate. •...
-
Page 17: Point Hook-Up
With Cat. II Top Center Link Bushing Mounting Holes implement. NOTE: Land Pride’s Quick Hitch can be attached to the tractor to provide quick and easy 3-point hook- Quick Hitch up and detachment. See your nearest Land Pride Mounting Holes dealer to purchase a Quick-Hitch. - Page 18 Table of Contents Section 2: Options, Assembly & Set-Up Section 2: Options, Assembly & Set-Up Blade Offset Cylinder (Option) Position hydraulic cylinder (#3) with ports on top as shown. Select two 90 degree elbows (#4) without an Refer to Figure 2-1: orifice end and install them into the cylinder ports as shown.
- Page 19 Table of Contents Section 2: Options, Assembly & Set-Up Blade Angling Cylinder (Option) 2. Attach hydraulic cylinder to lugs located on right side of Rear Blade with clevis pins (#2). Make sure Refer to Figure 2-2: hydraulic ports are positioned on top and cylinder base is positioned to the front as shown.
- Page 20 Table of Contents Section 2: Options, Assembly & Set-Up Blade Tilting Cylinder (Option) 5. Thread adapter fittings (#5) to other end of hydraulic hoses and tighten. Refer to Figure 2-3: 6. Thread quick disconnect couplers (#8) to adapter WARNING fittings (#5). To avoid serious injury or death: Attach hydraulic cylinder (#3) to the lugs at back of blade with clevis pins (#1).
- Page 21 Table of Contents Section 2: Options, Assembly & Set-Up WARNING To avoid serious injury or death: 24757 Do not remove shipping block from blade tilt housing until Manual Link for Blade Offset after all manual links, ratchet jack, and/or hydraulic cylinders Figure 2-5 have been installed and cylinders have been charged with oil.
- Page 22 Table of Contents Section 2: Options, Assembly & Set-Up Hydraulic Selector Valve (Accessory) 5. Apply Teflon tape to pipe threads on the three 3/4MJIC x 1/2MNPT adapters (#1) and screw them Refer to Figure 2-7: into the double selector valve as shown until tight. Using selector mount (#5) as a template, locate and 6.
- Page 23 Table of Contents Section 2: Options, Assembly & Set-Up Cushion Valve (Accessory) 2. Screw eight fittings (#6) into both cushion valves (#1 & #2) until tight. Refer to Figure 2-8: 3. Attach hydraulic hose (#7) to the rear right fitting of CAUTION cushion valve (#2) as shown.
- Page 24 Table of Contents Section 2: Options, Assembly & Set-Up Skid Shoes (Accessory) End Plates (Accessory) (Pair of skid shoes) Kit Bundle Kit Bundle (Pair of End Plates) 301-333A ....SKID SHOE ASSEMBLY Refer to Figure 2-10: Refer to Figure 2-9: Attach right-hand end plate (#1) to moldboard as...
- Page 25 Table of Contents Section 2: Options, Assembly & Set-Up Single Gauge Wheel (Accessory) 2. Position hydraulic cylinder (#7) with ports on top as shown. Thread 90 degree elbows (#9) into the two Refer to Figure 2-11: ports and tighten. IMPORTANT: The top center 3-Point link should be 3.
-
Page 26: Blade Pitch
Table of Contents Section 3: Adjustments Section 3: Adjustments Blade Pitch Blade Angle and Reversing Blade pitch can be adjusted by lengthening or shortening WARNING tractor’s top center 3-Point link. Increasing blade pitch will increase blade digging ability. To avoid serious injury or death: •... -
Page 27: Blade Tilt
Table of Contents Section 3: Adjustments Gauge Wheel IMPORTANT: Make sure angle cylinder is installed Refer to Figure 2-11 on page 21: correctly before using the blade. If not, the blade and/or angle cylinder can be damaged. The gauge wheel provides accurate depth control when grading, leveling, or terracing. -
Page 28: Operating Checklist
Table of Contents Section 4: Operating Procedures Section 4: Operating Procedures • Operating Checklist Always keep a safe distance from obstructions. The implement can extend beyond tractor tires and makes a Hazard control and accident prevention are dependent wide swinging pattern when turning. Never hit solid objects upon the awareness, concern, prudence and proper with implement as this can damage property and cause training involved in the operation, transport, storage, and... -
Page 29: Inspection After Hook-Up
3. Shift to a lower gear when traveling over rough or hilly Hazard” on page 3 Replace damaged and worn terrain and when going downhill. hoses with genuine Land Pride parts. 4. When traveling on roadways: • Transport with blade centered behind the tractor to minimize blade overhang. -
Page 30: Rear Blade Functions
Table of Contents Section 4: Operating Procedures Rear Blade Functions Backfilling Backfilling is a process where the operator turns the WARNING blade around 180 and pushes product while backing-up. To avoid serious injury or death: Be careful not to overstress the Rear Blade while backfilling as load forces on blade and frame increase Never operate hydraulic cylinder(s) with blade in the ground when backing up. - Page 31 RBT35 Series Rear Blades were designed and built by may want to offset the blade so that the outside edge of Land Pride for category I or II three-point hitch and Quick the blade is beyond the outer edge of the tractor tire in Hitch attachment to 35 to 80 hp tractors equipped with working position.
-
Page 32: Long Term Storage
4. Repaint parts where paint is worn or scratched to WARNING prevent rust. Ask your dealer for Aerosol Land Pride To avoid serious injury or death: touch-up paint. Paint is also available in touch-up •... -
Page 33: Lubrication Points
Table of Contents Section 5: Maintenance & Lubrication Lubrication Points Lubrication Multi-purpose Multi-purpose Multi-purpose Intervals in hours at which Legend spray lube grease lube oil lube lubrication is required Seasonally Moldboard and Blade Grease moldboard and blade when storing for an extended period of time. - Page 34 Table of Contents Section 5: Maintenance & Lubrication Hours Blade Tilt Shaft Type of Lubrication: Multipurpose Grease Quantity = Until grease emerges 24759 24621 Hours Ratchet Jack Type of Lubrication: Multipurpose Grease Quantity = Until grease emerges Hours Gauge Wheel Spindle Type of Lubrication: Multipurpose Grease Quantity = Until grease emerges 24760...
-
Page 35: Section 6: Specifications & Capacities
Table of Contents Section 6: Specifications & Capacities Section 6: Specifications & Capacities RBT35 Series Rear Blades RBT3584 RBT3596 Blade Width 84" (2.13 m) 96" (2.44 m) Approximate Weight (lbs.) 709 lbs (321.6 kg) 745 lbs (337.9 kg) with manual links Maximum Tractor Horsepower 80 horsepower (59.7 kw) for 2 wheel drive... -
Page 36: Section 7: Features & Benefits
Table of Contents Section 7: Features & Benefits Section 7: Features & Benefits RBT35 Series Rear Blades Features Benefits Warranty One year parts & labor. See warranty page for complete details. 84" & 96" Working widths Choice of two sizes to pick from. Both sizes handle large capacities. -
Page 37: Section 8: Troubleshooting
Blade Does Not Penetrate Soil Ground is too hard. Loosen soil with a Land Pride Scarifier. Apply water to the surface or wait for a rain. Blade cutting edge is too dull. Replace blade to get a new cutting edge. -
Page 38: Section 9: Torque Values Chart
Table of Contents Section 9: Torque Values Chart Section 9: Torque Values Chart Torque Values Chart for Common Bolt Sizes Bolt Head Identification Bolt Head Identification 10.9 Bolt Size Bolt Size (inches) Grade 2 Grade 5 Grade 8 (Metric) Class 5.8 Class 8.8 Class 10.9 in-tpi... -
Page 39: Warranty
This Warranty is limited to the repair or replacement of any defective part by Land Pride and the installation by the dealer of any such replacement part, and does not cover common wear items. Land Pride reserves the right to inspect any equipment or parts which are claimed to have been defective in material or workmanship. - Page 40 Corporate Office: P.O. Box 5060 Salina, Kansas 67402-5060 USA www.landpride.com...
Need help?
Do you have a question about the RBT35 Series and is the answer not in the manual?
Questions and answers