Sign In
Upload
Download
Table of Contents
Contents
Add to my manuals
Delete from my manuals
Share
URL of this page:
HTML Link:
Bookmark this page
Add
Manual will be automatically added to "My Manuals"
Print this page
×
Bookmark added
×
Added to my manuals
Manuals
Brands
Kilsen Manuals
Control Panel
KFP-AF Series
Installation manual
Kilsen KFP-AF Series Installation Manual
Hide thumbs
Also See for KFP-AF Series
:
Installation manual
(120 pages)
1
2
3
4
5
6
7
8
9
10
11
12
13
14
15
16
17
18
19
20
21
22
23
24
25
26
27
28
29
30
31
32
33
34
35
36
37
38
39
40
41
42
43
44
45
46
47
48
49
50
51
52
53
54
55
56
57
58
59
60
61
62
63
64
65
66
67
68
69
70
71
72
73
74
75
76
77
78
79
80
page
of
80
Go
/
80
Contents
Table of Contents
Bookmarks
Table of Contents
Table of Contents
Important Information
Chapter 1 Introduction
Product Range
Product Compatibility
Fire Alarm Control Panels
Fire Alarm Repeater Panels
Repeater Functionality
Fire Routing Control and Indication
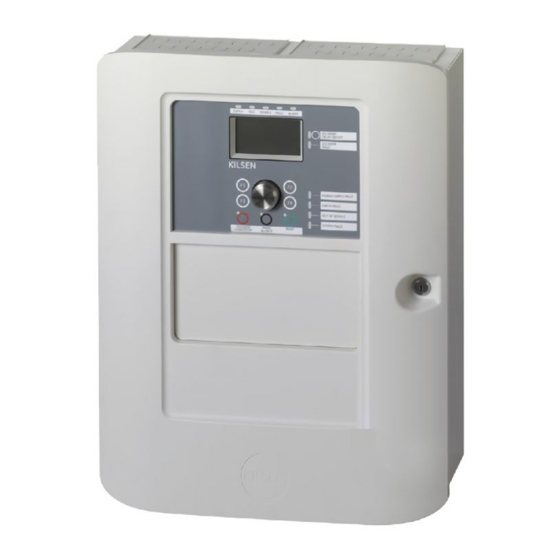
Control Panel Overview
The User Interface
Front Panel Controls and Indicators
LCD Controls and Indicators
Indication of Remote and Local Events on the LCD
Acoustic Indicators
Summary of Conditions
Chapter 2 Installation
Cabinet and PCB Layout
Cabinet Installation
Where to Install the Control Panel
Fixing the Cabinet to the Wall
Adding the Menu Inserts
Connections
Recommended Cables
Overview of Fire System Connections
Connecting Loops
Connecting Loop Devices
Connecting Inputs
Connecting Outputs
Connecting the Mains Power Supply
Connecting the Batteries
Connecting Expansion Boards
Connecting a Fire Network
Chapter 3 Configuration and Commissioning
User Levels
Configuration Overview
Maintenance Operation and Configuration
The Main Menu
Date and Time
Day/Night Mode
Backing up the Event Log
Clearing the Event Log
Viewing and Saving Reports
Disabling or Enabling System Features or Devices
Testing Zones
Testing Input and Output Activation
Testing Batteries
Changing Passwords
Installer Operation and Configuration
The Main Menu
Panel Configuration
Date and Time Configuration
ID Configuration
Regional Options
Firenet Configuration
Communications Configuration
Other Settings
Loading and Saving Configuration Files
Expansion Board Configuration
Field Configuration
Autosetup
Loop Device Configuration
Zone Configuration
Control Panel I/O Configuration
Delay Configuration
Changing Passwords
Loop Class Configuration
Commissioning
Chapter 4 Maintenance
Fire Alarm System Maintenance
Battery Maintenance
Chapter 5 Technical Specifications
Loop Specifications
Power Supply Specifications
Battery and Battery Charger Specifications
Communication Port Specifications
Fire Network Specifications
LCD Specifications
Input/Output Specifications
Mechanical and Environmental Specifications
Appendix A Default Configurations
Appendix B Menu Maps
Appendix C Product Compliance
Advertisement
Quick Links
1
Important Information
2
Fire Alarm Control Panels
3
Connecting Loops
4
Connecting Inputs
Download this manual
KFP-AF Series Installation
Manual
P/N 501-405103-1-10 • REV 1.0 • ISS 20NOV09
Table of
Contents
Previous
Page
Next
Page
1
2
3
4
5
Advertisement
Chapters
Table of Contents
3
Chapter 2 Installation
13
Chapter 3 Configuration and Commissioning
27
Chapter 5 Technical Specifications
61
Table of Contents
Need help?
Do you have a question about the KFP-AF Series and is the answer not in the manual?
Ask a question
Questions and answers
Related Manuals for Kilsen KFP-AF Series
Control Panel Kilsen KFP-AF Series Installation Manual
Fire alarm control panel (120 pages)
Control Panel Kilsen KFP-CE4 Series Installation Manual
Evacuation control panels (92 pages)
Control Panel Kilsen KFP-AE1(-S) Installation Manual
(148 pages)
Control Panel Kilsen KFP-CX3 Operation Manual
(38 pages)
Control Panel kilsen KFP-CX3 Installation Manual
Conventional fire alarm and extinguishing control panel (88 pages)
Control Panel Kilsen KFP-AF1 Installation Manual
(80 pages)
Control Panel Kilsen KFP-AF2 Installation Manual
(80 pages)
Control Panel Kilsen KFP-CX3E Series Operation Manual
(36 pages)
Control Panel Kilsen KFP-CX3E Series Installation Manual
(112 pages)
This manual is also suitable for:
Kfp-af1
Kfp-af2
Kfp-af1-fb
Kfp-af2-fb
Kfp-afr
Kfp-afr-fb
Table of Contents
Print
Rename the bookmark
Delete bookmark?
Delete from my manuals?
Login
Sign In
OR
Sign in with Facebook
Sign in with Google
Upload manual
Upload from disk
Upload from URL


Need help?
Do you have a question about the KFP-AF Series and is the answer not in the manual?
Questions and answers