Table of Contents
Advertisement
Advertisement
Table of Contents
Troubleshooting

Related Manuals for Glow-worm MiSet SRT 380


Summary of Contents for Glow-worm MiSet SRT 380
- Page 1 Operating and in- stallation instructions MiSet SRT 380 GB, IE...
-
Page 2: Table Of Contents
Contents Contents Serial number ......18 CE marking ........18 Safety ..........3 Guarantee and customer Intended use ........3 service ......... 18 General safety information..... 3 Recycling and disposal ....18 Product data in accordance with EU Ordinance no. 811/2013, -- Safety/regulations .... -
Page 3: Safety
Safety 1 1 Safety mental capabilities or lack of experience and knowledge if 1.1 Intended use they have been given supervi- In the event of inappropriate or sion or instruction concerning improper use, damage to the use of the product in a safe way product and other property may and understand the hazards in- arise. -
Page 4: Safety/Regulations
1 Safety competent person are marked by the symbol. 1.2.2 Danger caused by improper operation Improper operation may present a danger to you and others, and cause material damage. ▶ Carefully read the enclosed instructions and all other ap- plicable documents, particu- larly the "Safety"... -
Page 5: Product Description
Product description 2 2 Product description 2.5 What is the circulation? An additional water pipe is connected to 2.1 Which nomenclature is used? the domestic hot water pipe and forms a – System control: Instead of SRT 380 circuit with the domestic hot water cylin- –... -
Page 6: Preventing Malfunctions
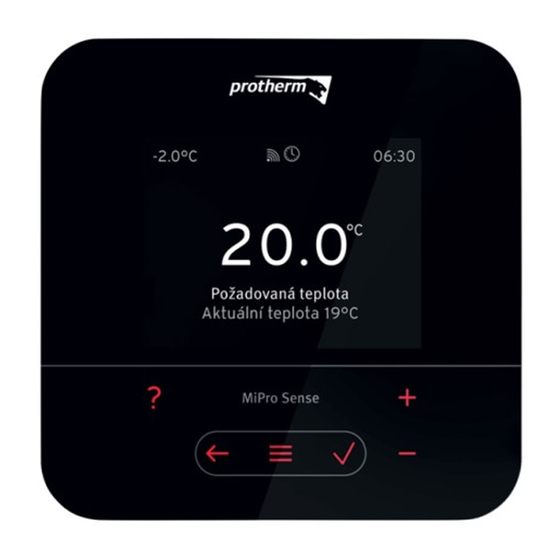
2 Product description regulates the living rooms to the lower set- ure, the heat curve is then translated, as back temperature (2) that is set. shown in the figure. The heat curve is dis- placed according to the value of the tar- 2.7 Preventing malfunctions get room temperature along axis a which ▶... - Page 7 Product description 2 2.9.2 Symbols Time-controlled heating active Button lock active Maintenance required Fault in the heating installation Contact the competent person 0020288229_00 MiSet Operating and installation instructions...
-
Page 8: Operating And Display Functions
2 Product description 2.10 Operating and display functions Note The functions described in this section are not available for all system configura- tions. To call up the menu, press twice. 2.10.1 CONTROL menu item MENU → CONTROL → Zone → Name of zone Changing the name Zone 1, which was set at the factory →... - Page 9 Product description 2 MENU → CONTROL → Mode: Domestic hot water weekly planner: Up to three time periods can be set per day DHW temperature: °C: Applies within the time periods Domestic hot water mode is switched off outside of the time periods Circulation weekly planner: Up to three time periods can be set per The circulation pump pumps hot water to the draw-off points within the time periods...
- Page 10 2 Product description MENU → SETTINGS → Installation con- Functions (→ Installation configuration menu item) figuration → Screed drying Activate the Screed drying profile function for freshly laid screed in accordance with the construction regulations. The system control regulates the flow temperature independently of the outdoor temperature.
- Page 11 Product description 2 MENU → SETTINGS → Installer level → Installation configuration → Control: Weath.- It is controlled via the outdoor temperature as soon comp. as an outdoor temperature sensor is connected. → Heat generator 1 → Status: → Current flow temperature: °C →...
- Page 12 2 Product description MENU → SETTINGS → Installer level → Installation configuration → Active Adjusting the flow temperature based on the cur- rent room temperature. → Expan- Adjusting the flow temperature based on the cur- rent room temperature. The system control also ac- tivates/deactivates the zone.
- Page 13 Product description 2 MENU → SETTINGS → Installer level → Installation configuration → Cylinder charging Desired temperature + offset = flow temperature for the domestic offset: K hot water cylinder. → Max. cyl. charging Setting the maximum time at which the domestic hot water cylin- time: der can be charged without interruption.
-
Page 14: Electrical Installation, Set-Up
-- Electrical installation, set-up -- Electrical installation, set-up Only qualified electricians may carry out the electrical installation. The heating installation must be decom- missioned before work is carried out on it. 3.1 Selecting the lines ▶ Do not use flexible lines for power sup- ply cables. -
Page 15: Installing The System Control
-- Electrical installation, set-up 3 3.2 Installing the system control Ø6 Ø 6 0020288229_00 MiSet Operating and installation instructions... - Page 16 -- Electrical installation, set-up Operating and installation instructions MiSet 0020288229_00...
-
Page 17: Start-Up
-- Start-up 4 5 Fault and maintenance -- Start-up messages 4.1 Prerequisites for starting up 5.1 Fault message – The system control and, if required, the outdoor temperature sensor have been with the text of the fault message electrically installed and wired. appears in the display. -
Page 18: Serial Number
Rated surge voltage 330 V dress that is provided on the back page, or Pollution degree you can visit www.glow-worm.co.uk. Rated current < 50 mA 0.75 to Supply line cross-section 1.5 mm²... - Page 19 Information about the product 6 75 ℃ Temperature for the ball pressure test Maximum permitted environ- 0 to 60 ℃ mental temperature Current room air hum. 35 to 95 % Mode of operation Type 1 Height 122 mm Width 122 mm Depth 26 mm 0020288229_00 MiSet Operating and installation instructions...
-
Page 20: Appendix
Appendix Appendix A Troubleshooting, maintenance message A.1 Troubleshooting Symptom Possible cause Measure Display remains dark Software error 1. Press and hold the button on the top right of the system control for longer than five seconds in order to force a restart. 2. -
Page 21: Maintenance Messages
Appendix A.2 Maintenance messages Message Description Maintenance work Interval Water defi- The water pressure is Refer to the operat- See the operating ciency: Fol- too low in the heating ing instructions for the instructions for the low the in- installation. relevant heat gener- heat generator structions... -
Page 22: Troubleshooting
Appendix B.2 Troubleshooting Message Possible cause Measure ▶ Outdoor temperature Outdoor temperature Replace the outdoor temperature sensor. sensor signal invalid sensor defective ▶ Heat generator 1 com- The cable is defective Replace the cable. ▶ munication interrupted Incorrect plug connec- Check the plug connection. -
Page 23: Index
Index Index Article number ........18 CE marking..........18 Competent person........3 Control elements ........6 Display............6 Disposal..........18 Documents ..........17 Fault ............17 Frost ............4 Intended use..........3 Lines, maximum length ......14 Lines, minimum cross-section ....14 Lines, selecting........ - Page 24 Vaillant Group UK LTD Nottingham Road ‒ Belper ‒ Derbyshire DE56 1JQ Telephone 01773 824639 ‒ Technical helpline 0330 100 7679 After sales service 0330 100 3142 www.glow-worm.co.uk 0020288229_00 0020288229_00 ‒ 12.12.2019 © These instructions, or parts thereof, are protected by copyright and may be reproduced or distributed only with the manufacturer's written consent.
Need help?
Do you have a question about the MiSet SRT 380 and is the answer not in the manual?
Questions and answers