Table of Contents
Advertisement
Advertisement
Table of Contents
Troubleshooting

Related Manuals for Medivance Arctic Sun Stat


Summary of Contents for Medivance Arctic Sun Stat
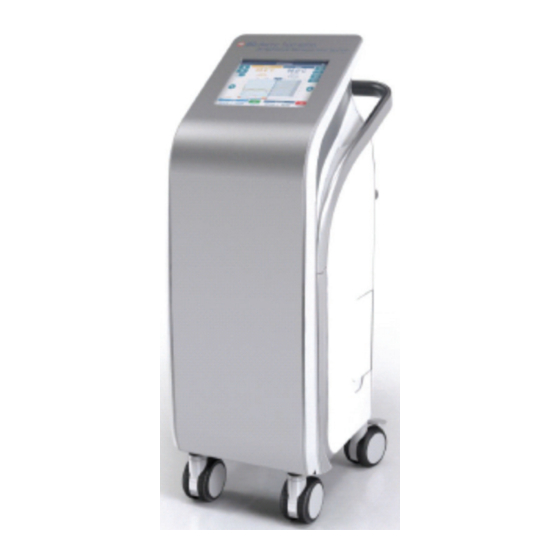
- Page 1 Arctic Sun™ Stat Temperature Management System SERVICE MANUAL...
-
Page 3: Table Of Contents
Service Manual TABLE OF CONTENTS Chapter 1 – Getting Started ............1 Chapter 8 – Component Replacement ........30 8.1 Tools/Pre-service Requirements ..........35 Introduction ..................... 1 8.2 Drain the Control Module ............35 Indications for Use ................1 8.3 Remove RIM Back Panel ............35 Warnings and Cautions ............... -
Page 4: Chapter 1 - Getting Started
English The current Service Manual can be found at www.medivance.com/manuals Chapter 1 – Getting Started patient coverings in use while warming, cooling, or not delivering therapy with the Arctic Sun™ Temperature Introduction Management System may actually alter or interfere The Arctic Sun™ Temperature Management System is a with patient temperature control. - Page 5 Service Manual CAUTIONS (Continued) skin injury. Skin injury may occur as a cumulative result of pressure, time and temperature. Possible skin injuries • BD supplies temperature simulators (fixed value include bruising, tearing, skin ulcerations, blistering, resistors) for testing, training and demonstration and necrosis.
-
Page 6: Setup Procedure
English The current Service Manual can be found at www.medivance.com/manuals CAUTIONS (Continued) • BD will not be responsible for patient safety or equipment performance if the procedures to operate, maintain, modify or service the Arctic Sun™ Temperature Management System are other than those RS232 specified by BD. -
Page 7: System Navigation
Service Manual System Navigation 7. Therapy Graph E. Patient Temperature Therapy Selection F. Water Temperature Use the Therapy Selection screen to initiate a New Patient, G. Date and Time Continue a Current Patient, or access the Advanced Setup H. Progress Bar screen. -
Page 8: Fill Reservoir
English The current Service Manual can be found at www.medivance.com/manuals Fill Reservoir 3. From the Hypothermia therapy screen, press the Manual Control button to open the Manual Control Approximately four liters of sterile water will be required to fill window. If the Manual Control button is not visible, the reservoir at initial installation. -
Page 9: Chapter 2- Components
Service Manual Chapter 2- Components Electronic Components Transmission Interface Module (T.I.M.) – an integrated Hydraulic Components transmission interface module located on top of the Fluid Delivery Line – reusable dual lumen tubing that Card Cage converts real time data for transmission to a connects the Control Module to the ArcticGel™... -
Page 10: Chapter 3 - Theory Of Operation
English The current Service Manual can be found at www.medivance.com/manuals INLET/OUTLET ATMOSPHERE MANIFOLD VENT CHILLER FILL LINE TANK BYPASS LINE CIRCULATION TANK SUPPLY TANK HEATER T2 FLOW METER FLUID FLUID DELIVERY DELIVEY CHILLER MIXING LINE LINE PUMP PUMP CIRCU- LATION... -
Page 11: Electronic Control System
Service Manual Clean the External Surfaces Electronic Control System After use, the external surfaces of the Arctic Sun™ The electronic system consists of two independent Temperature Management System may be a potential subsystems: control and monitor. The control subsystem biohazard. The Arctic Sun™ Temperature Management is responsible for delivering therapy to the patient. -
Page 12: Inspect Connectors And Cables
English The current Service Manual can be found at www.medivance.com/manuals Surface Disinfection Condenser Disinfect the Arctic Sun™ Temperature Management System • A dirty chiller condenser will significantly reduce the immediately following cleaning. Follow all manufacturers’ cooling capacity of the Control Module. -
Page 13: Inspect Screen Protector
Service Manual Chapter 5 - Advanced Setup Inspect Screen Protector The Control Panel’s touchscreen is supplied with a Use the Advanced Setup screen to view the current settings disposable screen protector. If it becomes damaged, it can and modify the settings for the following parameters. To be removed by lifting the edge and carefully peeling it from modify any parameter setting, press the button to the right the screen. - Page 14 English The current Service Manual can be found at www.medivance.com/manuals Download Patient Data Patient Data Fields The data for the 10 most recent patient therapies is Parameter Units stored on the Arctic Sun™ Temperature Management Date MM/DD/YY System Control Module internal storage. The data may be...
- Page 15 Service Manual Connectivity Settings • Turn Control Module Power Off. • Attach the drain line connectors to the two drain Use Connectivity Settings to connect the Arctic Sun™ ports on the back of the Control Module. The water Temperature Management System to the hospital network will passively drain into the bag.
- Page 16 English The current Service Manual can be found at www.medivance.com/manuals Number Format Current Date • To set the number format to the local requirements: To set the current local date: • From the Advanced Setup screen, press the button the •...
-
Page 17: Chapter 6 - Alarms
Service Manual Chapter 6 - Alarms Non-Recoverable Alarms If an Alarm condition occurs that prevents proper use of The Arctic Sun™ Temperature Management System the device or proper patient treatment (such as the five safety system continually monitors the state of the device main safety alarms discussed above), the system is placed and the patient, and issues alarms to notify the user of into Stop mode and will not allow therapy to continue. -
Page 18: Alarms Listing
English The current Service Manual can be found at www.medivance.com/manuals Alarms Listing Medium Priority Alarm The following table consists of a listing of the medium and low priority alarms that a user might Low Priority Alarm observe during use of the Arctic Sun™ Temperature Management System. - Page 19 Service Manual Alarm Problem Solution Verify Patient Temperature Accuracy Confirm patient temperature using a secondary site. Confirm that the primary temperature probe is properly placed and registering an accurate temperature. Verify Patient / Water Temperature Control Observe patient temperature Is the patient temperature decreasing? Observe water temperature.
- Page 20 English The current Service Manual can be found at www.medivance.com/manuals Alarm Problem Solution Verify Patient Temperature Accuracy Confirm patient temperature using a secondary site. Confirm that the primary temperature probe is properly placed and registering an accurate temperature. Verify Patient / Water Temperature Control Observe patient temperature.
- Page 21 Service Manual Alarm Problem Solution Check that the Temp In 1 probe is properly placed in the patient and has not dislodged. Check that the Temp In 1 probe is connected to the Temp In 1 cable / Temp In 1 probe is not detected, or connector on the back of the Control Module.
- Page 22 English The current Service Manual can be found at www.medivance.com/manuals Alarm Problem Solution Verify Patient Temperature Accuracy Compare to Temp In 1 reading. Confirm patient temperature using a secondary site. Confirm that the secondary temperature probe is properly placed and registering an accurate temperature.
- Page 23 Service Manual Alarm Problem Solution Verify Patient Temperature Accuracy Compare to Temp In 1. Confirm patient temperature using a secondary site. Confirm that the primary temperature probe is properly placed and registering an accurate temperature. Verify Patient / Water Temperature Control Observe patient temperature.
- Page 24 English The current Service Manual can be found at www.medivance.com/manuals Alarm Problem Solution Check that the Patient Temperature 2 probe is properly placed in the patient and has not dislodged. Check that the Patient Temperature 2 probe is connected to the Patient Temperature 2 cable / connector on the back of the Control Module.
- Page 25 Service Manual Alarm Problem Solution Check flow rate. A low flow rate or fluctuating flow rate may cause the water to overheat. If the flow rate is low, VIII. Troubleshooting-Water-Low 36 Water Temperature Water Flow for troubleshooting assistance. The secondary outlet water High temperature is above 44°C (111.2°F).
- Page 26 English The current Service Manual can be found at www.medivance.com/manuals Alarm Problem Solution Verify patient temperature from a secondary site. If patient temperature is less than 31°C (87.8°F), use Manual Control to raise patient temperature above 32°C (89.6°F) then resume using the previous control mode.
- Page 27 Service Manual Alarm Problem Solution Verify the custom parameters. Patient target is set to the correct temperature. See VI. Operation Guide–Therapy Screen–Hypothermia Therapy–Cooling or Normothermia Therapy – Control Patient for instructions on setting patient target temperature. One of the automatic patient control modes (e.g. Control Patient or Cooling) is activated.
- Page 28 English The current Service Manual can be found at www.medivance.com/manuals Alarm Problem Solution 67 Non-Recoverable Turn Control Module Off. Wait 30 seconds and turn Control Module On. Unable to disable pump power System Error (Monitor processor). If alarm persists, contact BD Customer Support.
- Page 29 Service Manual Alarm Problem Solution Cooling timer has reached the end of its set duration and Rewarming Press the Start button in the Rewarming window to initiate patient rewarming. Begins in Hypothermia Settings is 105 Cooling End See VI. Operation Guide–Therapy Screen–Hypothermia Therapy–Rewarming set to Manually.
- Page 30 English The current Service Manual can be found at www.medivance.com/manuals Alarm Problem Solution Verify the custom parameters. Patient target is set to the correct temperature. See VI. Operation Guide–Therapy Screen-topics Hypothermia Therapy–Rewarming or Normothermia Therapy–Control Patient for instructions on setting patient target temperature.
-
Page 31: Chapter 7- Troubleshooting
Service Manual Chapter 7- Troubleshooting The following are the most common issues and methods of resolution: 7.1 Diagnostic Screen 7.3.1 Device Not Controlling Patient Temperature The Diagnostic screen allows the user to view the The Arctic Sun™ Temperature Management System has flow, pressure, patient temperatures and individual a sophisticated control algorithm which calculates the water temperature sensor readings. -
Page 32: Troubleshooting Assistance
English The current Service Manual can be found at www.medivance.com/manuals 7.3.6 Low Flow Alarm If the device shows a Low Flow alarm, perform the following steps: • Power device on; ensure Fluid Delivery Line is connected. • With no pads or Shunt Tube attached, start the device in Manual Control and allow 3 minutes for bypass flow to stabilize. -
Page 33: Chapter 8- Component Replacement
Service Manual Chapter 8- Component Replacement The Arctic Sun™ Temperature Management System is designed and built to have a high degree of reliability; however, failures can occur. Use the troubleshooting methods in Chapter 7 or consult with BD Technical Support to determine the root cause component for the failure. - Page 34 English The current Service Manual can be found at www.medivance.com/manuals Card Cage Manifold Harness Main Harness: • Pump Connections • Control Panel Connection • Chiller Power Connection AC Breaker Harness Tank Heater Harness Chiller Evaporator Chiller Compressor Chiller Frame Fig 8-2 Control Module, Front inside view...
- Page 35 Service Manual Transmission Interface Module Connector Panel Bracket I/O Manifold Chiller Pump Drain Cup Hot Gas Bypass Valve Chiller Condenser Fig 8-3 Control Module, Right inside view...
- Page 36 English The current Service Manual can be found at www.medivance.com/manuals Heater Harness Connection AC Breaker Harness Connection Chiller Fan Fig 8-4 Control Module, Left inside view...
- Page 37 Service Manual Input/Output (I/O) Circuit Card Isolation Circuit Card Processor Circuit Card Power Circuit Card Fig 8-5 Card Cage, Circuit Card Identification The following two (2) Circuit Cards are mounted on the lower bracket next to the Chiller Condenser. Fig 8-6 Power Supply Fig 8-7 AC PCB...
-
Page 38: Tools/Pre-Service Requirements
English The current Service Manual can be found at www.medivance.com/manuals 8.1 Tools/Pre-service Requirements Total Drain A total drain activates the pumps to remove residual water. Tools required for component replacement: It is essential to perform this process if the device is to be •... -
Page 39: Remove Front Case Assembly
Service Manual Fig 8-10 Back Panel with removal of screen filter and screws Fig 8-12 Remove screws from Front Case Assembly (step 3) 8.4 Remove Front Case Assembly Tools and Supplies required: • 7/16” (11mm) nut driver • Flat blade screwdriver Lock all casters prior to attempting to remove the front case assembly. -
Page 40: Replace The Control Panel Assembly
English The current Service Manual can be found at www.medivance.com/manuals Using a 7/16” (11mm) nut driver, remove the six (6) 10. Connect the speaker harness and the three (3) screws holding the front panel to the side panels connectors connecting the upper main harness to then disengage each of the side panels from the the top of the control panel. - Page 41 Service Manual A) Input / Output (I/O) Circuit Card B) Isolation Circuit Card 1. Carefully disconnect each of the eight (8) cables 1. Remove and retain the two (2) screws attaching the connected to the I/O card, releasing each locking ribbon cable to the top of the card cage.
-
Page 42: Replace The Panel Esd Board
English The current Service Manual can be found at www.medivance.com/manuals 5. After replacing the Power Circuit Card, perform a calibration (see Chapter 9). Fig 8-22 Back of Panel ESD Board Fig 8-21 Power Circuit Card Connections 8.8 Replace the Panel ESD Board Tools and Supplies required: •... -
Page 43: Replace The Usb To Rs232 Converter (T.i.m.)
Service Manual 4. Disconnect the RS232 cable from the back of the 3. Assemble the new USB to RS232 converter USB to RS232 converter (T.I.M.) and the USB cable (T.I.M.) to the top of the card cage with the USB from connector panel bracket then remove the connection towards the connector panel (see figure connector panel bracket assembly from the device. -
Page 44: Replace The Drain Valves
English The current Service Manual can be found at www.medivance.com/manuals Fig 8-31 Remove tubing from back of drain valves Fig 8-29 Remove Level Sensor bracket Fig 8-32 Drain Valves at 12 O’clock position in drain cup 8.13 Replace the Inlet/Outlet Manifold Tools and Supplies required: •... -
Page 45: Replace The Inlet/Outlet Manifold Harness
Service Manual Fig 8-36 Manifold Harness FV (Fill Valve) BV (Bypass Valve) Fig 8-34 Remove screws securing manifold to upper bracket VV (Vent Valve) Fig 8-37 Manifold, showing position of the 3 solenoids (step 6) 8.15 Replace the Power Supply Tools and Supplies required: Fig 8-35 Remove hose clamps from back of manifold •... -
Page 46: Replace The Ac Pcb
English The current Service Manual can be found at www.medivance.com/manuals 8.16 Replace the AC PCB 8.17 Repairs Requiring removal of the Upper Components 1. Remove the power supply per step 8.15. Tools and Supplies required: 2. Disconnect the AC breaker harness, power supply jumper, lower main harness, chiller pump harness, •... -
Page 47: Replace Mixing Pump
Service Manual Fig 8-43 Lift up upper bracket (step 5) 8.18 Replace Mixing Pump Tools and Supplies required: Fig 8-46 Illustration of pump connector prior to being connected Flat blade screwdriver • (above), connected but seated incorrectly with one pin exposed (below left), and seated correctly (below right) 1. -
Page 48: Replace The Heater
English The current Service Manual can be found at www.medivance.com/manuals 3. Remove the black foam covering the two (2) hex head screw securing the heater to the lower bracket. Then using a 7/16” (11mm) nut driver, remove the two (2) screws. -
Page 49: Replace The Flowmeter
Service Manual 8.21 Replace the Flowmeter 8.22 Repairs requiring removal of Internal Components Tools and Supplies required: Tools and Supplies required: • Flat blade screwdriver • 7/16” (11mm) wrench • Small flat blade screwdriver • 1/16” (1.5mm) hex key • Wire cutters •... -
Page 50: Replace The Chiller Pump
English The current Service Manual can be found at www.medivance.com/manuals 8.23 Replace the Chiller Pump Tools and Supplies required: • 5/16” (8mm) nut driver 1. Remove Internal Components per step 8.22. 2. Disconnect the chiller pump harness from the bottom of the pump. -
Page 51: Replace The Thermistor Sensor Harness
Service Manual 8. Reconnect the T4 and T1/T2 sensors harnesses. 9. Reroute the harness and secure to the upper bracket using a cable tie. 10. Reinstall the chiller pump per step 8.23 and replace insulation between the sensors and tank. 11. -
Page 52: Chapter 9 - Calibration / Calibration Check
English The current Service Manual can be found at www.medivance.com/manuals Chapter 9 – Calibration / Calibration Check 9.4 Performing a Calibration To perform a calibration on the Arctic Sun™ Temperature 9.1 Calibration Test Unit Management System, press the Advanced Setup button on The Arctic Sun™... -
Page 53: Appendix A: Product Specifications
Service Manual Appendix A: Product Specifications Parameter Specification Technical Description Normothermia: Control Patient, Therapy Modes Rewarming The Arctic Sun™ Temperature Management System is a Hypothermia: Cooling, Rewarming thermoregulatory device that monitors and controls patient Heater Maximum Power 814 Watts temperature within a range of 32°C to 38.5°C (89.6°F to Circulating Fluid Sterile Water with Cleaning Solution 101.3°F). -
Page 54: Appendix B: Symbols
English The current Service Manual can be found at www.medivance.com/manuals Appendix B: Symbols The Arctic Sun™ Temperature Management System and its packaging bear the following symbols: Symbol Standard Reference Standard Title Symbol Title Explanatory Text ISO 15223-1 Medical Devices-Symbols Manufacturer Indicates the medical device Reference no. - Page 55 Service Manual Symbol Standard Reference Standard Title Symbol Title Explanatory Text IEC TR 60878 Graphical Symbols for Model number To identify the model number or type Reference no. 6050 Electrical Equipment in number of a product. In the application Medical Practice of this symbol, the model number or type number of the product should be accompanied with this symbol.
- Page 56 English The current Service Manual can be found at www.medivance.com/manuals IEC TR 60878 Graphical Symbols for Equipotentiality To identify the terminals Reference no. 5021 Electrical Equipment in which, when connected Medical Practice together, bring the various parts of an equipment or of a...
- Page 57 Service Manual ISO 7000 Graphical symbols for use on Universal Serial Bus (USB), To identify a port or plug Reference no. 3650 equipment port/plug as meeting the generic requirements of the Universal Serial Bus (USB). To indicate that the device is plugged into a USB port or is compatible with a USB port.
-
Page 58: Appendix C: Electromagnetic Compatibility
English The current Service Manual can be found at www.medivance.com/manuals Appendix C: Electromagnetic Compatibility 1.2 EN/IEC 60601-1-2 Table 2 Medical electrical equipment needs special precautions regarding Guidance and Manufacturer’s Declaration – Electromagnetic Immunity electromagnetic compatibility. Ensure that the Arctic Sun™... - Page 59 Service Manual 1.3 EN/IEC 60601-1-2: Table 3: 1.3 EN/IEC 60601-1-2: Table 3: Test Band Service Modulation Distance Immunity Guidance and Manufacturer’s Declaration – Electromagnetic Immunity freq. (MHz) Power Test Level The Arctic Sun™ Temperature Management System unit is intended for (MHz) (V/m) use in the electromagnetic environment specified below.
-
Page 60: Appendix D- Spare Parts And Accessories
English The current Service Manual can be found at www.medivance.com/manuals Appendix D- Spare Parts and Accessories Cables and Accessories Spare Parts Control Panel Assembly 404082-00 Shunt Line 709-04 Isolation Board Assembly 404086-00 Drain Bag 709-05 Panel ESD Board 404121-00 Drain Tube... -
Page 61: Appendix E- Temperature Cables
Service Manual Appendix E- Temperature Cables Temperature In Cables Temperature Out Cables... -
Page 62: Appendix F- Shipping
English The current Service Manual can be found at www.medivance.com/manuals Appendix F- Shipping Due to the size and weight of the Arctic Sun™ Temperature Management System, it should be shipped on a pallet using BD provided packaging materials. If the original packaging is not available, a shipping kit may be ordered. -
Page 63: Appendix G- Software Upgrade
Verify the software version has been updated. If the software version did not update, repeat steps above. If after two (2) attempts the software has not updated, contact BD Customer Service Arctic Sun Stat Splash Screen (844.823.5433). A progress bar and stopwatch will appear on the screen. -
Page 64: Appendix H- Warranty
English The current Service Manual can be found at www.medivance.com/manuals Appendix H- Warranty BARD LIMITED WARRANTY ON ARCTIC SUN STAT TEMPERATURE MANAGEMENT SYSTEM ™ Limited Warranty Bard Medical Division, C. R. Bard, Inc. (“Bard”) warrants to the original customer that each Arctic Sun Control Module (“Equipment”) and ArcticGel... -
Page 65: Appendix I - Transmission Interface Module Data Output Format
Service Manual Appendix I - Transmission Interface Module Data Output Format The data output stream is a repeating sequence of ASCII characters every five seconds. A “$” is sent as the first item of a new data sequence. Each data item within the sequence is separated by a comma (ASCII 44). The data sequence is terminated with a carriage return character (ASCII 13) followed by a new line character (ASCII 10). - Page 67 © 2021 BD. BD and the BD Logo are trademarks of 321 South Taylor Avenue, Suite 200 Becton, Dickinson and Company. Louisville, CO USA 80027 Bard, ArcticGel, Arctic Sun, Medivance, and Simply 303.926.1917 Phone Advanced are trademarks and/or registered trademarks 844.823.5433 Toll Free of Becton, Dickinson and Company.
Need help?
Do you have a question about the Arctic Sun Stat and is the answer not in the manual?
Questions and answers