
Related Manuals for LG TROMM LSF100


Summary of Contents for LG TROMM LSF100
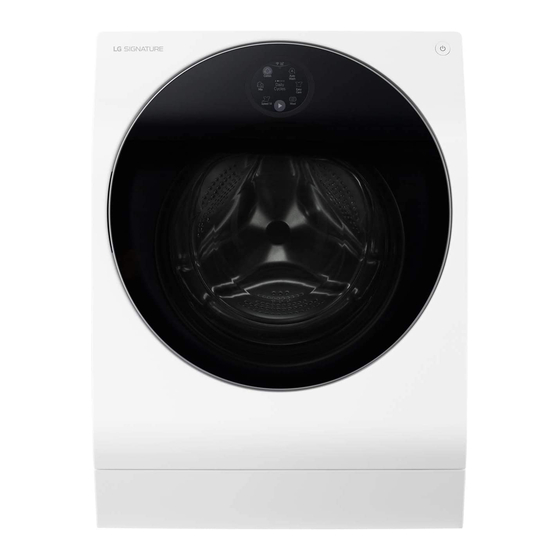
- Page 1 TROMM Front-loading Washer Technical Manual for Servicing Model name: FH6G1BAYK2 Note: Please read this guide carefully before repairing and operating the product.
-
Page 2: Table Of Contents
Table of Contents ........................................... 1. Product Features ............................2. New Technologies and Operation Principles ..............................3. Names and Functions of Components ........................................4. Service Sequence ............................5. How to Service the Controller Assembly .................................... 5-1. Cautions for Service 5-2. LQC Mode ..................................13 5-3. -
Page 3: Product Features
1. Product Features Movement of the washing tub in 6 directions for hand-wash effect This model, which enables the washing tub to move in 6 different directions, offers washing performance optimized for the type and load of washing and reduces the washing time. Front-loading washer with DD inverter This product is driven directly by the BLDC motor controlled by the inverter, is very quiet during operation, and is an energy saver. -
Page 4: New Technologies And Operation Principles
2. New Technologies and Operation Principles 2-1. Product Comparison (Dimensions and Functions) Category F12WH.AKOR Color BLUE WHITE Power AC220 V–, 60 Hz Product weight 80 kg Cold water 145 W Power consumption 1840 W Heated water Wash 50 rpm Rotation count Spin-dry No-spin dry/Low/Medium/High/Highest Standard quantity... - Page 5 2-2. How to Detect Laundry Weight • This product detects 5 levels of laundry weight. • Laundry weight detection is for pre-wash and spin-dried weight; the detected laundry weight data is used for: - Pre-wash laundry weight detection (prior to initial water supply): To determine the wash duration and the remaining time - Spin-dried laundry weight detection (after draining and prior to spin-dry): To determine the spin-dry algorithm and unbalanced state...
- Page 6 2-4. DOOR Open Control • Once the program is closed, the door lock is released, and you can press the door handle to open • When you pause the product, the drum operation stops, and the door lock is released and may be opened if the water level frequency is 23.4 kHz or lower and the in-tub temperature is below a certain level (45℃).
-
Page 7: Names And Functions Of Components
3. Names and Functions of Components 3-1. Names of Components Transit bolts Power plug Power button Tub lamp Drum Door Drain hose Drain pump Drain filter Lower cover Adjustable feet Auto liquid dispense Lid for auto liquid detergent Lid for auto liquid softener Feature control panel •... - Page 8 3-2. Function Operation Panel ※ F12WH.AKOR Display window Start/Pause button You can control the washing machine You can start or pause the selected ● by touching the screen. wash mode. Wash mode, remaining time, options, ● status messages, etc, are shown on the Wash mode display window screen.
- Page 9 Option Cycle Temp. button selects the wash and rinse temperature When you select a cycle, washing starts with the default combination for the selected cycle. Press the desired settings of options. If necessary, change the options as setting. All rinses use cold tap water. shown below.
-
Page 10: Service Sequence
• If a leveling foot needs to be loosened by adjusting the front leveling feet. moves when you shake it. 10 mm or more, place a height adjustment plate underneath. (Height adjustment Leveling plates are sold at LG Electronics service centers.) Rubber support Tightening nut... - Page 11 Connecting water supply hose • Water supply pressure must be between 100 kPa and 1000 kPa (1.0 ~ 10.0 kgf / cm • Do not strip or crossthread when connecting inlet hose to the valve. • If the water supply pressure is more than 1000 kPa, a decompression device should be installed. •...
- Page 12 Type-C : Connecting one touch type hose to tap without thread 1. Unfasten the adapter ring plate and the 4 adapter retaining screws. 2. Remove the guide plate if the tap is too large to fit the adapter. Ring plate 3.
- Page 13 Connect Drain Hose. If the drain hose is not installed properly, the unit will not drain properly. This allows water to flow back into the unit which can cause odors. Refer to owner’s manual for proper drain hose installation. The odor could also be coming from the home’s drain to which the drain hose is attached. Laundry tub about 100 cm Hose...
- Page 14 Check the horizontality with a level (Gage). Step 1 If washing machine legs are loose or not fully attached, then tighten with the spanner wrench. Using the level, level the washing machine from front to back and side to side. A level Lower Tighten...
- Page 15 Connect the water supply hose and power and perform a test run. • Listen carefully to the consumer's description of the fault and proceed with the following procedure as much as possible: Get ready Press the Power button Touch the Start/Pause button 세탁준비 과정...
-
Page 16: How To Service The Controller Assembly
5. How to Service the Controller Assembly 5-1. Cautions for Service ■ Since the output terminal of the controller ASSEMBLY has AC 220 V and DC connections, avoid electric shock while checking for a fault (wear cotton gloves while working). ■... - Page 17 1. Press the button for the 9 areas 1. Check if the Touch OK button turns indicated in red. green. 2. These turn green and OK; if you press all 9 areas, the screen returns to the previous one. 1. Check if the screen turns red. 2.
- Page 18 5-3. Check program mode ■ Enter the LQC mode. 1. Drag from the 3 o'clock direction on the left to down 2. Press in the 5 o'clock direction 3. Screen changed to LQC mode ■ Press the [Start] button; the product operates as follows each time it is pressed: ☞...
-
Page 19: Fault Confirmation Criteria And Method Of Checking
5-4. Fault Confirmation Criteria and Method of Checking * ERROR display • If an error occurs, press the Start/Stop key or Power key to cancel the error, and the product is paused. • If you do not cancel the error, the error automatically turns off in 20 seconds, and the display shows the error. - Page 20 Display Fault Confirmation Criteria Possible causes of faults Action • If the load is not 1. If the load is not distributed evenly in • Make sure the load is balanced during spin- the tub (DRUM ASM) but is distributed evenly concentrated on one side in the tub.
- Page 21 Display Fault Confirmation Criteria Possible causes of faults Action • If the thermistor 1. Thermistor fault • Replace the thermistor. is shorted and open • If the water 2. Heater driving circuit fault • Replace the controller. temperature is 145℃ or higher •...
-
Page 22: Fault Diagnosis And Solution Matrix
6. Fault Diagnosis and Solution Matrix 6-1. Diagnosis and Response to Operations Mistaken for Faults Consumer reports Questions to confirm fault fault • The controller's power is not turned Question 1: Did you connect the power plug to the outlet? (for 220 V) 예... - Page 23 • The door error is displayed during Question 1: Have you operated the product operation. or used the scheduling feature 예 with the door open? Please close the door completely. 아니오 Question 2: Do you have heavy load? Please reduce the load. 예...
- Page 24 Select the automatic detergent/ • A lot of bubbles get Enable the automatic Change the automatic detergent/softener softener option on the settings detergent/softener feature. level and press the OK button. formed and overflow in window. the detergent box and vent in the back, and washing and spin- dry do not work well.
-
Page 25: Fault Diagnosis And Solution Matrix
6-2. Fault Diagnosis and Solution Matrix CAUTION 1. Beware of electric shock and short between components while you measure the output to identify the fault. 2. When you diagnose the fault, first, check the terminal connection and wiring. 3. Each terminal is supplied with approximately 220 V. (excluding the sensor part) 4. - Page 26 If water is not supplied Wait until water is supplied Is water supply interrupted? 예 and continue washing. 아니오 Have you opened the water tap? Open the water tap. 아니오 예 SENSOR(PRESSURE) When in "Data View" mode during operation, Check if the air chamber or hose is the (DATA_N_3 * 100 + DATA_N_4) value 예...
- Page 27 If softener is not supplied automatically Turn on the automatic Have you turned on the automatic softener feature? 아니오 softener feature. 예 Install the detergent/softener Is the detergent/softener box installed in the box in the washing machine 아니오 washing machine? properly.
- Page 28 If heating does not occur even after water is supplied Water supply has not When in "Data View" mode during operation, reached Level 3, which is the is the (DATA_N_3 * 100 + DATA_N_4) value heating start level. Refer to 아니오...
- Page 29 If heating starts with no water supplied during wash When in "Data View" mode after water supply during the washing cycle, is the (DATA_N_3 * 100 + DATA_N_4) value Replace the SENSOR 아니오 24.75 kHz or lower? (PRESSURE). e.g., DATA_N_3 = 24, DATA_N_4 = 91 Water level frequency of 24.91 kHz 예...
- Page 30 If spin-dry does not occur During spin-dry, does the drainage pump start to If drainage does not occur, drain all water from the drum? 아니오 refer to the Actions. 예 After the water is completely drained during spin- Replace the SENSOR dry operation, when in "Data View"...
- Page 31 If the washing machine emits abnormal noises After you remove the COVER, BACK and test Fasten the BOLT. 예 ROTOR BOLT, is the BOLT loosened? 아니오 Is the magnet attached to the ROTOR Remove contaminants. If there are no contaminants, broken or contaminated 예...
- Page 32 If AE is displayed Are the valve and hose properly connected? Out tub. Replace the Ass’y. 아니오 예 Replace the Outer Tub. the ROTOR from the SHAFT? 예 아니오 Is the safety switch at the bottom faulty? Replace the safety switch. 예...
-
Page 33: How To Disassemble And Assemble
7. How to Disassemble and Assemble Remove the power plug from the outlet and start disassembling and repairing the product or its parts. Top plate component ① Remove 2 screws at the rear of the top plate. (PLATE ASSEMBLY, TOP) ②... - Page 34 Disassemble the PCB ass’y, Display ① Remove the protective cover from the back of the door. (Insert a flat tool at the groove of the red circle, and then push and lift.) ② Loosen 6 screws of the PCB cover. ③...
- Page 35 Main PCB component ① Remove the PCB bracket and display harness. ② Lift the main PCB box and remove the harness.
- Page 36 Cabinet cover Ass’y -1 ① Open the door and remove the label and screw. (Detaching and attaching the label several times will weaken the attaching power.) ② Remove 2 screws and use a flat tool for the gap in the 5 o'clock direction to push open the gap and remove it.
- Page 37 Cabinet cover Ass’y-2 ① Remove 4 screws from the cabinet cover bottom. ② Remove 4 screws from the cabinet cover top. Cabinet cover Ass’y -3 ① Remove the PCB harness. ② Lift and remove the cabinet cover.
- Page 38 Door Switch Ass’y ① Remove the cabinet cover and 2 screws at the indicated area. ② Remove the door switch harness.
- Page 39 Door Ass`y & Hinge Ass`y ① Remove 4 hexagonal bolts and 1 screw between the hinge and cabinet cover. ※ Upon reassembly, insert the harness into the indicated square hole. ② Open the top plate and remove the housing of the harness connected to the door.
- Page 40 Heater Ass’y ① After disassembling the cabinet cover and removing the thermistor sensor, housing, and M10 nut, pull the heater. (After reassembly, the heater should be inserted into the tub floor bracket; fasten the M10 nut sufficiently to assemble.) After fixing the heater, turn the drum with the hands to confirm that it is engaged properly.
- Page 41 Side cabinet component ① Remove 8 screws connecting the side cabinet and rear cover / base. ② Remove 1 screw at the bottom of the side cabinet front and lift and remove it.
- Page 42 Pump Ass'y ① Remove 4 pump harnesses and 4 clamps of each hose. (Make sure that all remaining water is completely removed prior to starting work.) ② Incline the product and remove 3 pump screws on the floor. Push the pump hook to the back of the product and remove it.
- Page 43 Detergent Box Component ① Remove the left-side cabinet. (For details on how to remove the top plate, cabinet cover, and side cabinet, see above.) ② Remove 2 clamps / 2 housings of the detergent / softener hose indicated at the rear of the detergent box.
- Page 44 8. Disassembly Diagram 8-1. CABINET & CABINET COVER ASSEMBLY A104 A111 A150 A430 A110 F111 A485 A141 F110 A080 A410 A161 A085 A145 A136 A134 K610 A138 A090 K645 K640 A162 A137 A133 A240 A440 A200 A130 A132 A276 A005 A220...
- Page 45 8-2. DISPENSOR & PUMP ASSEMBLY F330 F340 F310 F300 F301 F335 F224 F226 F315 A303 K342 K340 F220 A304 A300 K344 A302 A306 K346 A310 K348 A200 A220...
- Page 46 8-3. DRUM & TUB ASSEMBLY F160 F170 F161 A452 F180 K160 A450 K115 K105 F320 K338 K339 K510 A451 K467 K341 K117 K540 K141 K110 K461 K330 K520 K140 K530 K335 K320 K361 K123 K143 K531 K130 K124 K120 K350 K360 K150 K147...
-
Page 47: Post-Repair Check
9. Post-repair Check If you have replaced or repaired the component, check it against the following and perform a test run to identify any fault: 1) Check the insulation resistance. After you remove the power plug from the outlet, check the insulation resistance between the plug and body ground wire to confirm whether the resistance is 2 ㏁... - Page 49 P/No.: MFL69531302...
Need help?
Do you have a question about the TROMM LSF100 and is the answer not in the manual?
Questions and answers