• download user documentation and firmware updates • find answers to resolved problems in the FAQ database. Search by product, category, or phrases • report problems to Axis support by logging in to your private support area • visit Axis Support at www.axis.com/techsup Implementers Corporation.
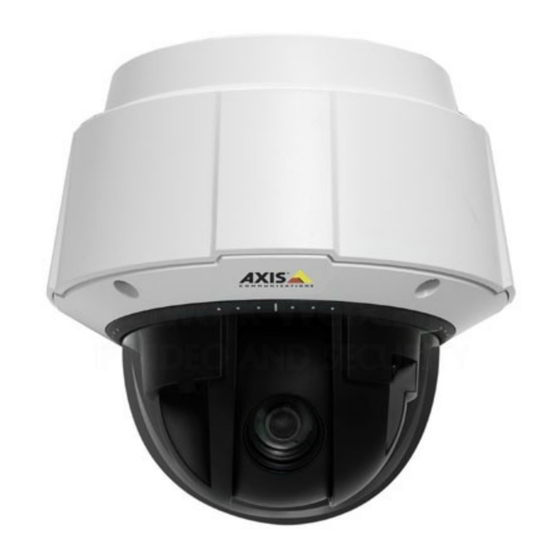
• AXIS P5532 offers a powerful 29x optical and 12x digital zoom, while AXIS P5534 offers 18x optical and 12x digital zoom. Both models come with autofocus and provide crisp, clear and rich detail of both zoomed in and zoomed out images.
Midspan (included). Shielded cables should be used to comply with EMC. Control button - The control button is used for • Connecting to an AXIS Video Hosting System service, see page 34. To connect, press and hold the button until the Status LED flashes green. •...
Flashes amber/red if network connection is unavailable or lost Flashes red for firmware upgrade failure Green Shows steady green for 10 seconds for normal operation after restart See also LED Indicator flash routine, on page 47. AXIS P5532/AXIS P5534 - Product Description...
Accessing the Camera To install the AXIS P5532/AXIS P5534 PTZ Dome Network Camera, refer to the Installation Guide supplied with your product. The network camera can be used with most operating systems and browsers. The recommended browsers are Internet Explorer with Windows, Safari with Macintosh and Firefox with other operating systems.
Options > Network > TCP/IP Advanced. For more information, please see NAT traversal (port mapping) for IPv4, on page 35. See also AXIS Internet Dynamic DNS Service at www.axiscam.net For Technical notes on this and other topics, visit the Axis Support web at www.axis.com/techsup Setting the root password To gain access to the product, you must set the password for the default administrator user - ‘root’.
Live View page. The following provides an overview of each available button. General controls View size – (AXIS P5534 only) Click to scale the image down to 800 pixels wide or to full scale. Only avail- able in MJPEG.
User-defined buttons can also appear in the Control panel, see Controls, on page 24. Select a PTZ preset position to steer the camera view to the saved position, see Preset Positions, on page 23. AXIS P5532/AXIS P5534 - Accessing the Camera...
Note also that all multicast viewers count as one unicast viewer in the maximum total of 20 simultaneous connections. AXIS Media Control negotiates with the camera to determine the transport protocol to use. The order of priority, listed in the AMC Control Panel, can be changed and the options disabled, to suit specific requirements.
• QuickTime adds latency to the video and audio stream (up to 3 seconds). • It may be possible to use other players to view the H.264 stream using the paths above, although Axis does not guarantee this. • <ip> = IP address Accessing audio streams The Live View page provides access to audio through AXIS Media Control;...
Setup Tools AXIS P5532/AXIS P5534 can be configured by users with administrator or operator rights. To access the product’s Setup tools, click Setup in the top right-hand corner of the Live View page. Administrators have unrestricted access to all settings.
Overlay Image, on page 17. Text, date and time can also be used as an overlay. Click for information on available options. AXIS P5532/AXIS P5534 - Video & Audio Text, date & time overlay...
Page 15
Configuration settings from Video & Audio > Audio Settings are displayed under Current Audio Settings. See Audio Settings, on page 18 for more information on audio settings. Note: A multi-connector cable (available from Axis) is required when connecting external audio equipment to AXIS P5532/AXIS P5534, see Multi-Connector Cable (not included), on page 41. H.264...
To remove a stream profile, click Remove. Pre-programmed profiles cannot be removed. • Camera Settings This page provides access to the advanced image settings for AXIS P5532/AXIS P5534. Image Appearance Color level - Select an appropriate level by entering a value in the range 0-100. Lower values mean less color saturation, whilst the value 100 gives maximum color saturation.
See the online help for supported image formats and sizes. To use your own image, e.g. a logo, it must first be upload to AXIS P5532/AXIS P5534. Click Browse and locate the image file on the computer.
You must actively transmit/receive sound using the Talk/Listen button available on the Live View page (see AXIS Media Control viewer toolbar, on page 9). In Push-To-Talk mode, click and hold the button to speak and release it when finished speaking.
To upload a file from a local hard drive or network disk, select the Upload radio button and click the Browse button. Navigate to the desired file and click Upload. To specify a file location, select the Location radio button and enter the Name and location under Location. Click Add clip. AXIS P5532/AXIS P5534 - Video & Audio...
A slower imaging alternative to Server Push (Motion JPEG only). Still image Displays still images only. Click the Refresh button in your browser to view a new image. AXIS P5532/AXIS P5534 - Live View Config • JVM (J2SE) 1.4.2 or higher • JRE (J2SE) 5.0 or higher...
Page 21
AXIS P5532/AXIS P5534 - Live View Config Viewer Settings Check the Show viewer toolbar box to display the AXIS Media Control (AMC) or the QuickTime viewer toolbar under the video image in your browser. The administrator can disable the installation of the H.264 decoder included with AXIS Media Control. This is used to prevent the installation of unlicensed copies.
The output ports must first be configured under System Options > Ports & Devices > I/O Ports, see I/O Ports, on page 38. Note: A multi-connector cable (available from Axis) is required when connecting I/O devices to AXIS P5532/AXIS P5534, see Multi-Connector Cable (not included), on page 41.
Position Setup window and the Live View window. The position's name will have (H) added, for example, Entrance (H). AXIS P5532/AXIS P5534 can also be configured to return to the Home position when the camera has been inactive for a specified length of time.
The administrator can set up a queue for the PTZ controllers. Once set up, the PTZ Control Queue buttons appear on the Live View page offering one viewer exclusive control for a limited period of time. Other users will be placed in queue. AXIS P5532/AXIS P5534 - PTZ (Pan Tilt Zoom) ±...
If somebody passes in front of the camera and an event has been configured to detect and respond to motion, the camera can record and saves images to an FTP server, and can send a notification e-mail to an e-mail address. Images can be sent as e-mail attachments. AXIS P5532/AXIS P5534 - Events Information required • Descriptive name •...
Include post-trigger buffer – Contains images from the time immediately after the trigger. The post-trigger buffer is configured in the same way as the pre-trigger buffer. AXIS P5532/AXIS P5534 - Events...
The Gatekeeper monitors an area such as an entrance gate and can pan, tilt, zoom in and take a snapshot of, for example a face, triggered by movement in the area. The camera will then automatically return to the Home position and continue to overview the monitored area. Follow the online instructions to configure the Gatekeeper. AXIS P5532/AXIS P5534 - Events...
To delete an Include or Exclude window: a) Using AXIS Media Control (Internet Explorer): Select the window in the list of windows and click Del. b) Using the Java applet: Select the window and click on the cross in the upper right corner.
If the button is pushed, the state of the input changes to active. Note: A multi-connector cable (available from Axis) is required when connecting I/O devices to AXIS P5532/AXIS P5534, see Multi-Connector Cable (not included), on page 41.
Audio recordings cannot be saved to the SD memory card. • The SD memory card is optional and not included in the product. • To play recordings in Windows Media Player download and install AXIS Matroska File Splitter from www.axis.com/techsup/software AXIS P5532/AXIS P5534 - Recording List...
• of the PTZ controls. Enable Basic Setup – Before using AXIS P5532/AXIS P5534, there are certain settings that should be made, most of • which require Administrator access privileges. To quickly access these settings use the Basic Setup in the menu. All settings are also available from the standard setup links in the menu.
Enable IEEE 802.1X - Check this box to enable the IEEE 802.1X protocol. Audio Support Enable audio support - This option allows clients to retrieve audio streams from AXIS P5532/AXIS P5534. See also Audio Settings, on page 18 for information on how to configure the audio settings.
Basic TCP/IP Settings AXIS P5532/AXIS P5534 supports both IP version 4 and IP version 6. Both versions may be enabled simultaneously, and at least one version must always be enabled. When using IPv4, the IP address for the camera can be set automatically via DHCP, or a static IP address can be set manually.
Use the following IP address - To use a static IP address for AXIS P5532/AXIS P5534, check the radio button and then make the following settings: IP address – Specify a unique IP address for your AXIS P5532/AXIS P5534. (To check if the IP address you intend to use •...
(WAN) side of a NAT router. With NAT traversal properly configured, all HTTP traffic to an external HTTP port in the NAT router is forwarded to the camera. LAN (intranet) AXIS P5532/AXIS P5534 - System Options WAN (internet) Broadband...
Page 36
The QoS in Axis network video products marks the data packets for various types of network traffic originating from the product. This makes it possible for network routers and switches to reserve a fixed amount of bandwidth for these types of traffic.
Page 37
QoS Settings - For each type of network traffic supported by your Axis network video product, enter a DSCP (Differentiated Services Codepoint) value. This value is used to mark the traffic’s IP header. When the marked traffic reaches a network router or switch, the DSCP value in the IP header tells the router or switch the type of treatment to apply to this type of traffic, for example, how much bandwidth to reserve for it.
Ports & Devices I/O Ports AXIS P5532/AXIS P5534 provides four configurable input and output ports for connection of external devices. A multi-connector cable (available from Axis) is required when connecting external devices, see Multi-Connector Cable (not included), on page 41.
Setup page to conveniently make adjustments in the camera’s settings. Logs & Reports When contacting Axis support, please be sure to provide a valid Server Report with your query. The Access Log is automatically included in the server report.
For more information, please visit the Video developer pages at www.axis.com/developer File Upload Files (e.g. web pages and images) can be upload to AXIS P5532/AXIS P5534 and used as custom settings. Uploaded files are accessed through http;//<ip address>/local/<user>/<file name> where <user> is the selected user access group (viewer, operator or administrator) for the uploaded file.
Multi-Connector Cable (not included) When connecting external equipment to AXIS P5532/AXIS P5534, a multi-connector cable (available from Axis) is required in order to maintain the camera’s IP51 rating. The multi-connector cable can be purchased from your Axis reseller. Connect the multi-connector cable to the camera’s multi-connector (see page 5). The cable provides the following connectors: Power connector - 3-pin terminal block used for power input.
The current firmware version in your camera is displayed on the page Setup > Basic Setup or under About. Upgrading the firmware When you upgrade your camera with the latest firmware from the Axis website, your camera receives the latest functionality available. Always read the upgrade instructions and release notes available with each new release, before updating the firmware.
AXIS P5532/AXIS P5534 - Troubleshooting Axis Support If you contact Axis support, please help us resolve your problem expediently by providing a Server Report and a detailed description of the problem. The Server Report contains important information about the server and its software, as well as a list of the current parameters.
You may need to manually type http or https in the browser’s address field. If the camera and client are on the same network, Run AXIS IP Utility to locate the camera. Identify the camera using its model or serial number Alternatively: 1) Move the camera to an isolated network or to one with no DHCP or BOOTP server.
Page 45
To enable the updating of video images in Internet Explorer, set your browser to allow ActiveX controls. Also, make sure that AXIS Media Control is installed on your workstation. Configure your camera to use a Java applet for updating the video images under Live View Config >...
Page 46
Video cannot be recorded SD Card cannot be mounted For further assistance, please contact your reseller or see the support pages on the Axis website at www.axis.com/techsup AXIS P5532/AXIS P5534 - Troubleshooting Check that the correct Audio Input source is selected under Setup > Audio > Source. Select Microphone for the internal microphone or for a connected external microphone.
Bad Checksum Flashes - RFL check* failed See Emergency Recovery Procedure, on page 42. * RFL (Resident Firmware Loader) check is a checksum method used to ensure that the software loading and firmware startup works correctly. AXIS P5532/AXIS P5534 - Troubleshooting...
• Pan: 360° (with auto-flip), 0.2 - 300°/s • Tilt: 180°, 0.2 - 300°/s • AXIS P5532: 29x optical zoom and 12x digital zoom, total 348x zoom • AXIS P5534: 18x optical zoom and 12x digital zoom, total 216x zoom...
Page 49
• AXIS T8123 High PoE Midspan 1-port included: 100-240 V AC • AXIS P5532: 24 - 34 V DC max 15 W; 20 - 24 V AC, max 20 VA • AXIS P5534: 24 - 34 V DC max 17 W; 20 - 24 V AC, max 23.6 VA •...
Camera: 1.9 kg (4.2 lb) Camera with drop ceiling mount: 2.3 kg (5.1 lb) AXIS T8123 High Power over Ethernet Midspan 1-port, mounting kit for hard and drop ceilings, clear and smoked dome cover, Installation Guide, CD with User’s Manual, recording software, installation and management tools,...
MAC address for an IP address. ARTPEC (Axis Real Time Picture Encoder) - This chip is used for image compression, and image processing such as conversion of raw image sensor data, color correction, sharpening, noise filtering etc.
Page 52
Ethernet systems are 10BASE-T and 100BASE-T10, which provide transmission speeds up to 10 Mbps and 100 Mbps respectively. ETRAX (Ethernet Token Ring AXIS) - Axis' own microprocessor. Factory default settings - These are the settings that originally applied for a device when it was first delivered from the factory.
Page 53
AXIS P5532/AXIS P5534 - Glossary of Terms Local storage - If a camera or video encoder supports local storage, an SD card can be inserted into the SD card slot to locally record and store a video stream.
Page 54
A proxy server receives requests for Internet services (such as web page requests) from many users. If the proxy server is also AXIS P5532/AXIS P5534 - Glossary of Terms a cache server, it looks in its local cache of previously downloaded web pages.
Page 55
TCP is a connection-oriented protocol, which means that a connection is established between the two end-points and is AXIS P5532/AXIS P5534 - Glossary of Terms maintained until the data has been successfully exchanged between the communicating applications.
Page 56
AXIS P5532/AXIS P5534 - Glossary of Terms server access statistics. WEP (Wireless Equivalent Privacy) - A wireless security protocol, specified in the IEEE 802.11 standard, which is designed to provide a wireless local area network (WLAN) with a level of security and privacy comparable to that usually expected of a wired LAN.
Need help?
Do you have a question about the P5532 and is the answer not in the manual?
Questions and answers