Table of Contents
Advertisement
Advertisement
Table of Contents

Subscribe to Our Youtube Channel
Related Manuals for RATTAN Challenger 2020


Summary of Contents for RATTAN Challenger 2020
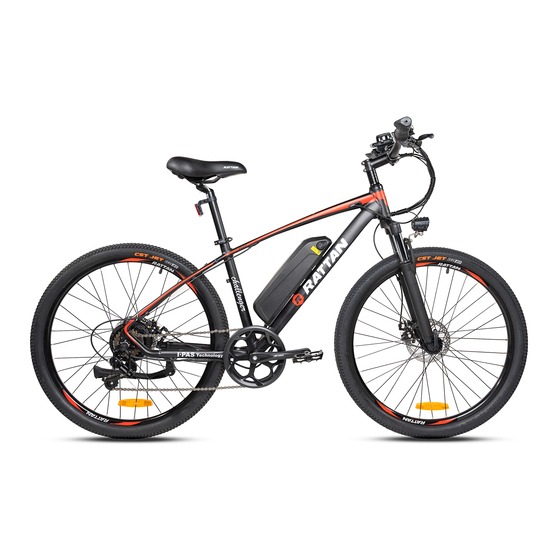
- Page 1 Model:Challenger 2020 User’s Manual 2020 www.rattanebike.com...
- Page 2 CONTENTS Part 1 Main Parts Introduction (page 1) Part 2 Assembly Instructions (page 2-3) Part 3 The Correct Usage of Main Accessories (page 4-5) Part 4 Check Before Riding (page 6) Part 5 Riding Guidance (page 7-8) Part 6 Adjustment of Main Parts and Components (page 9-19) Part 7 Handling of Abnormal Ebike Conditions...
- Page 3 Part 1 Main Parts Introduction 1. Handlebar 14. Peddle 2.Brake 15. Crank Set 3. Headlight 16. Crank 4. Suspension Front Fork 17. Chain 5.Rim 18. Saddle 6. Fender 19. Rear Rack 7.Valve 20. Seat Post Reflector 8. Brake Disc 21. Flywheel 9.
- Page 4 Part 2 Assembly Instructions Unboxing Image of the bike when you take it out of the box Assemble front fork...
- Page 5 Lossen the hub quick release to make enough space for the fork. In case of the spring drops from the quick release, here are the original position images of both sides of the hub quick release.
- Page 6 The two feet of the front fork must be aligned with the hub quick release position before the fork can be installed. Make sure the brake rotor is in the middle of brake pads so that it won`t make noise during riding or braking. Tighten the quick release till it fully close to the hub.
- Page 7 Install the handlebar Loosen the screws on the handlebar, hold the handlebar in the middle of the joint, tighten the screws.
- Page 8 Headlight Installation Place the headlight at a right position, then tighten the screw. Pedals installation “L” indicates the left side, “R”indicates the right side. Make sure tighten the screws connect the pedals and cranks.Twist to left when install the left side and twist to right when install the right one.
- Page 9 Part 3 How to use the part correctly Battery and Charger Make sure the charger is pressed to the end of charging connector when charging. Fully charge the battery for each ride to extend the life of battery Charger light in red means charging, charger light in green means fully charged.
- Page 10 Two ways for charging: 1. Charge the Ebike without removing the battery 2. Remove the battery, and charge it. Turn off the display and keep the key at power off position w hen charge the Ebike without removing the .
- Page 11 Part 4 Check before riding Make sure all components are tightened. Adjust the height of the handlebar and the seat post. DO NOT raise it above the safety line. Make sure the brakes can cut off the power supply to the motor, and whether it is sensitive and reliable.
- Page 12 Part 5 Riding Guidance The electric bike has three riding modes:Pedal Mode, Electric Mode, and Pedal Assist Mode: Pedal Mode: This mode does not require any power. It allows the E-bike to work as other regular bike. You will be automatically switched to this mode when the battery dies while riding ...
- Page 13 Always wear a helmet that meets the standards and make sure having the necessary protection to ensure the safety when riding the ebike, Turn on the headlight when riding at night. Use the headlight for a long time will consume part of the electric energy and reduce the mileage.
- Page 14 Part 6 Adjustment of main parts and components Display Instruction (MODEL: LCD-YL80C) Appearance Dimensions ...
- Page 15 Function Overview YL80C display provides a variety of functions to meet your riding needs, including: Electricity display Motor power indication Boost gear adjustment and indication Speed display (including real-time speed, maximum speed and average speed) Mileage display (including single mileage and total ...
- Page 16 Button Definition There are five buttons on the corresponding operation unit of YL80C instrument, of which the buttons replaced by the words "UP" and "DOWN" respectively in the following instructions. General Operations Press the button for few seconds to turn on/off the display and controller.
- Page 17 Display Interface Switch Electric Assistance Pushing Mode Keep pressing the DOWN button, and the ebike will enter the electric assistance pushing mode. The ebike will run at a constant speed of 6 km/h. At the same time, the screen shows Release the DOWN button and the electric bike will immediately power off.
- Page 18 Turn the Backlight On/Off Press the headlight button briefly to turn on the taillight and the controller will turn on the headlight at the same time when the environment light is dark or driving at night. Press the headlight button again,the display taillight turns light and the controller off.
- Page 19 Motor Power Indication The output power of the motor can be known through the display. Error Code Display The display will automatically show the error code When the electric control system is not working. See the table for the definition of the detailed error code.
- Page 20 General Settings Press the key for a few seconds to start the display. In the start up state, when the ebike is stationary, press the UP + DOWN button over 2 seconds. The display will access the display setting. ...
- Page 21 Conversion of Imperial and Metric Units U for units, 1 for imperial system and 2 for metric system. The default unit of the instrument is metric. Password Settings Press the "i" key to set the password, and the screen shows "P2" to indicate the password.
- Page 22 Password Switch Setting Y indicates password required; N indicates password not required. Select Y and press the "i" key to enter the password modification. Select N and exit the password setting. Default setting is N. Password Modification Press the UP/DOWN to switch the number.
- Page 23 setting; press the DOWN more than 2 seconds to cancel the operation and exit the setting. The display will exit the setting automatically if there’s no operation input in one minute. The adjustment of the saddle Sit on the saddle with your feet on the ground.
- Page 24 The adjustment of the derailleur Adjust the screw on the shifting wire when it is hard to switch the shifter. Loose screw 1 slightly when the shifter can`t switch to the 7th gear; on the contrary, if it can`t gear down to the 1st level, loose screw 2 slightly and try again.
- Page 25 Part 7 Common problems and solutions The battery cannot be charged, the display shows an abnormal battery power. Use a multimeter to check if the battery still have voltage. Check if the charger indicator is normal. (Red light means charging, green light means fully charged) ...
- Page 26 When an error code appears on the display. Error Code Definition Current Abnormality Throttle Abnormality Motor Abnormality Motor Hall Signal Abnormality Brake Abnormality Communication Abnormality Error code 21 and 30 indicates controller problem. Error code 25 indicates brake problem. Do following steps to make sure which brake is defective: ...
- Page 27 Can I do some upgrades of the bike? We provide upgrade service for some accessories. Contact Rattan for more details. I need to return the bike, what should I do? We only accept returns with original package. Any returns...
- Page 28 Part 8 Use and Maintenance Battery Maintenance Fully charge the battery for the first use. Do not use the battery in low power level. Must use the specified charger for charging. Do not charge the battery at high temperature (over 212 Fahrenheit/100°C).
- Page 29 Clean the brake regularly. Motor Maintenance Do not try to disassemble the motor. If there is any problems with the motor, contact Rattan with a video. Tire Maintenance Check regularly to prevent air leak.
- Page 30 Common failures and check Problem Possible reason Remedy 1. Battery voltage is too low. Make sure the battery is The speed adjuster 2. Speed adjusting handle connection fully charged doesn’t work or the becomes loosed. Disconnect and maximum speed 3.The spring is stuck.
- Page 31 Part 9 After sales and Warranty After sales Thanks for choosing Rattan Ebike as your green travel solution. Let’s ride together to keep our earth and home green. If you have any questions about our products, or would like to get the latest news, deals from us, please...
- Page 32 Warranty The main parts of the warranty provisions Warranty Depreciation Component Performance failure Remark period rate /day Natural sealing Except Front fork off. 1year 0.2% damaged handle bar Fracture key caused by riders parts crack.. Internal gear ...
- Page 33 Common Part Warranty Warranty Depreciation Performance Component Remark period rate/day failure Switch 1year 0.1% Not work Skid, fracture Freewheel/chain 1year 0.1% freewheel stagnation Crank 1year 0.1% Not work Except damaged Expansion brake 1year 0.1% Not work caused by rider Throttle 1year 0.1%...
- Page 34 Rattan, that have been made to your product. We will not be responsible for any damage to the product that occurs during the repair process that is a result of any unauthorized modifications or repairs or replacements not performed by Rattan.
- Page 35 2. Any unauthorized modification to the product, such as disassemble the bike without direction by Rattan, faulty installation, repair, or maintenance by anyone other than Rattan.
- Page 36 In most cases, we do not require you send the defective parts back to us. If applicable law requires Rattan to return a replaced item to you, you agree to pay Rattan the retail cost of the replacement item and shipping. Do-It-Yourself (DIY) Parts Service.
- Page 37 *Note: We DO NOT accept return of the bike except any unsolvable quality problem and we don’t accept return of the bike for personal reason. If you have any problems with the product, please contact us at info@rattanebike.com. Our dedicated customer support will be more than happy to assisting you.
Need help?
Do you have a question about the Challenger 2020 and is the answer not in the manual?
Questions and answers