Table of Contents
Advertisement
Quick Links
Advertisement
Table of Contents

Subscribe to Our Youtube Channel
Related Manuals for FujiFilm C 9070 9065


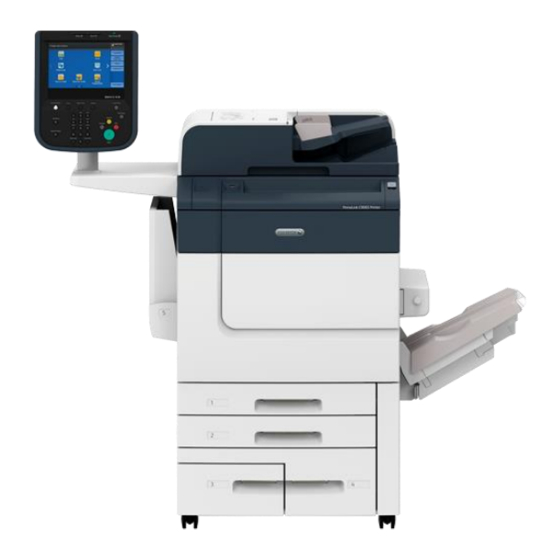
Summary of Contents for FujiFilm C 9070 9065
- Page 1 Quick Reference Notes - Print 簡易操作 – 列印 C 9070_9065 Page 1 of 1...
-
Page 2: Table Of Contents
GX-i Server Features ..................................2 Booklet ....................................... 2 1.1.1 Job Properties .................................. 2 1.1.2 Preview ....................................7 1.1.3 Print ......................................8 Repeat Image ..................................9 1.2.1 Basic Settings .................................10 1.2.2 Print ......................................12 SIQA (Simple Image Quality Adjustment) ........................13 Set paper tray ..................................13 2.1.1 How to set paper tray ..............................13 Simple Image Quality Management .........................14 Client Print Driver Features ..............................21... -
Page 3: Gx-I Server Features
1 GX- ERVER EATURES 1.1 B OOKLET 1.1.1 Job Properties 1. On Print Station, double-click the job to open Job Properties screen. Page 2 of 32... - Page 4 2. Click [Layout]. Under “Imposition Settings”, select [Booklet]. 3. Select an option under Binding Method: - Right Bind/Top Bind - Left Bind/Bottom Bind Page 3 of 32...
- Page 5 4. Select an option under “Document Orientation”: - Auto Detect - Portrait - Landscape * [Auto Detect] is not recommended. Define the orientation by how the page is placed in the booklet. 5. Click [Paper]. Under “Tray/Stock”, select the tray to print from (the paper orientation of the tray must be landscape).
- Page 6 6. Under “Scaling”, select [Fit to Paper Size]. 7. Select an option under “Cover Tray”. Use “Bypass Tray” for special paper (ensure the tray setting on C9060/9070 has been made). Page 5 of 32...
- Page 7 8. Click [Output]. Click [Stapling/Hole Punch/Folding]. 9. Under “Stapling”, select one of the following stapling options. [Saddle Stitch] is recommended. Page 6 of 32...
-
Page 8: Preview
1.1.2 Preview 1. Click the magnifying glass icon in Job Preview. Page 7 of 32... -
Page 9: Print
2. The output layout is displayed. The blue arrow on the right indicates the direction the paper is printed out. When completed, click [Close]. 1.1.3 Print Page 8 of 32... -
Page 10: Repeat Image
1. Click [OK] to save the setting and return to Print Station. Otherwise, click [Print] to print. 2. On Print Station, right-click the job. Click [Print] to print. 1.2 R EPEAT MAGE Page 9 of 32... -
Page 11: Basic Settings
1.2.1 Basic Settings 1. On Print Station, click [Imposition Template]. 2. Click the icon of [Create Imposition Template]. Page 10 of 32... - Page 12 3. Click [Layout]. (a) Enter the numbers of rows and columns. Click [Auto Calculate] to maximize the fitting area with the defined rows and columns. (b) Select [2 Sided] to print onto both side of the output sheet (by default, [1 Sided] is selected). (c) Enter the template name (d) Click [OK] to save.
-
Page 13: Print
1.2.2 Print 1. On Print Station, double-click the print job to open Job Properties screen. 2. Click [Layout]. Selection the created template under “Imposition Settings”. Click [OK] to save the setting and return to Print Station. Otherwise, click [Print] to print. Page 12 of 32... -
Page 14: Siqa (Simple Image Quality Adjustment)
2 SIQA (S IMPLE MAGE UALITY DJUSTMENT 2.1 S ET PAPER TRAY 2.1.1 How to set paper tray 1. Insert the paper at Tray 5. 2. On the screen, Click [Paper Supply]. 3. Choose Paper Type and Paper Size. Click [Save]. Page 13 of 32... -
Page 15: Simple Image Quality Management
2.2 S IMPLE MAGE UALITY ANAGEMENT 1. Press [Log In / Out] button. 2. Enter “11111” in [Admin’s Login ID] and then click [Next]. Page 14 of 32... - Page 16 3. Click [Tools]. 4. Click to scroll down. 5. Click [Maintenance… ]. Page 15 of 32...
- Page 17 6. Click to scroll down. 7. Click [Alignment Adjustment]. 8. Click [Auto Alignment Adjustment]. Page 16 of 32...
- Page 18 9. Click [Print Calibration Chart]. 10. Click [Print] to print out the calibration chart sheet. Page 17 of 32...
- Page 19 11. Perform either of the following actions: a. Load the calibration chart sheet on feeder. Click [Scan]. b. Load the calibration chart sheet on Document Glass. Click [Scan]. Page 18 of 32...
- Page 20 12. Wait until the message is gone. 13. Click [Start] to begin Alignment Adjustment. 14. Wait until the message is gone. Page 19 of 32...
- Page 21 15. Choose an item and click [Change Settings]. Enter a name (for example here, “A4”) 16. Choose the type to apply the new settings and click [Save]. 17. Adjustment has been completed. Click [Save] to finish. Page 20 of 32...
-
Page 22: Client Print Driver Features
LIENT RINT RIVER EATURES 3.1 S ELECT RINTER 1. Select [Print] from the [File] menu of the application. 2. Choose the appropriate printer from [Name:] list. 3. Click [OK] to send the print job. (Click [Properties] for feature settings – refer to Section 3.2 of this guide.) FXPrimeLink GX24 PS EN Page 21 of 32... -
Page 23: Configure The Properties
3.2 C ONFIGURE THE ROPERTIES 3.2.1 Basic 3.2.1.1 2 Sided Printing Select “NO” - Print on single page Select “Flip on Long Edge” - 2 sided print as head-to-head format Select “Flip on Short Edge” - 2 sided print as head-to-toe format Page 22 of 32... -
Page 24: Select Paper Tray
3.2.1.2 Select Paper Tray 1. Click [Job Properties]. 2. Select desired paper tray in [Tray/Stock]. (Remarks: ✓ All special media over 220 gsm must be loaded on Tray 5 (Bypass Tray). ✓ Special Media up to 350 gsm is supported. Maximum size is 330 x 660 mm. ✓... -
Page 25: Change Paper Tray Attributes (Paper Tray Setting)
3.2.1.3 Change Paper Tray Attributes (Paper Tray Setting) 1. On C9065/C9070 panel, click [Setup]. 2. Click [Paper Tray Attributes...]. 3. Select the tray to change. Page 24 of 32... - Page 26 4. Click [Paper Supply...]. 5. (a) Select the appropriate Paper Type and Paper Size. (b) If paper size is a non-standard size, select [Custom Size…] to enter manually. Page 25 of 32...
-
Page 27: Original Size
3.2.1.4 Original Size Click from [Original Size] to select the actual size of original document. 3.2.1.5 Output Paper Click from [Output Paper Size] to select the size of paper for output printing. Page 26 of 32... -
Page 28: Scaling
3.2.1.6 Scaling Select [Fit to Paper Size] to make the print image auto fit onto the output paper selected. Default is [Off]. Page 27 of 32... -
Page 29: Booklet
3.3 B OOKLET 3.3.1 Basic Settings 1. Click [Job Properties]. 2. Click [Layout]. Under “Imposition Settings”, select [Booklet]. Page 28 of 32... - Page 30 3. Select an option under Binding Method: - Right Bind/Top Bind - Left Bind/Bottom Bind Click [OK]. 4. Select appropriate [Original Size] and [Output paper size]. Select [Flip on short edge] in [2 sided printing]. Click [OK] to continue to print. Page 29 of 32...
-
Page 31: Cover Tray
3.3.2 Cover Tray It is used to insert special paper as a booklet cover. Go to [Layout] and select appropriate paper tray to be the Cover Tray. Booklet Fold & Staple (Optional) 3.3.3 Booklet Fold & Staple are available when booklet finisher installed. (Remark: It is an optional unit.) Click [Stapling/Hole Punch/Folding] in “Output”. -
Page 32: Staple & Punch
3.4 S & P TAPLE UNCH Staple / Punch features are available under [Stapling] & [Hole Punch] item. (Remark: Staple & Hole Punch are not a standard configure.) Select an option in [Stapling] / [Hole Punch] in “Basic”. [Stapling] [Hole Punch] Page 31 of 32... -
Page 33: Color
3.5 C OLOR Color Mode 3.5.1 If the output of print document shall be in Black & White, [Grayscale] must be turned on. Otherwise, it will be clicked as color meters. (Remark: Default setting is [Full Color].) Brightness 3.5.2 [Brightness] adjustment is available on [Color], + 5 degree of bright/Dark can be adjusted. Default is “0”. - Page 34 Customer Support Center 2513-2513...
Need help?
Do you have a question about the C 9070 9065 and is the answer not in the manual?
Questions and answers