Table of Contents
Advertisement
Available languages
Available languages
Quick Links
CAUTION:
CAUTION:
CAUTION:
CAUTION:
These products may represent a possible shock or fire hazard if improperly installed or attached in any way. Products should be
CAUTION:
CAUTION:
These products may represent a possible shock or fire hazard if improperly installed or attached in any way. Products should be
These products may represent a possible shock or fire hazard if improperly installed or attached in any way. Products should be
installed in accordance with the owner's manual, current electrical codes and/or the current National Electric Code (NEC).
installed in accordance with the owner's manual, current electrical codes and/or the current National Electric Code (NEC).
installed in accordance with the owner's manual, current electrical codes and/or the current National Electric Code (NEC).
PARTS INCLUDED
PARTS INCLUDED
PARTS INCLUDED
AA: Machine Screws (2pcs)
AA: Machine Screws (2pcs)
AA: Machine Screws (2pcs)
BB: Wire Nuts (3pcs)
BB: Wire Nuts (3pcs)
BB: Wire Nuts (3pcs)
CC: Cross Wood Screws (4pcs)
CC: Cross Wood Screws (4pcs)
CC: Cross Wood Screws (4pcs)
DD: Wall Anchors (4pcs)
DD: Wall Anchors (4pcs)
DD: Wall Anchors (4pcs)
EE: Connector (1pcs)
EE: Connector (1pcs)
EE: Connector (1pcs)
GG: Linking Cable (1pcs)
GG: Linking Cable (1pcs)
GG: Linking Cable (1pcs)
2.16''
2.16''
2.16''
This device complies with part 15 of the FCC Rules. Operation is subject to
This device complies with part 15 of the FCC Rules. Operation is subject to
This device complies with part 15 of the FCC Rules. Operation is subject to
the following two conditions: (1) This device may not cause harmful
the following two conditions: (1) This device may not cause harmful
the following two conditions: (1) This device may not cause harmful
interference, and (2) this device must accept any interference received,
interference, and (2) this device must accept any interference received,
interference, and (2) this device must accept any interference received,
including interference that may cause undesired operation. Note: This
including interference that may cause undesired operation. Note: This
including interference that may cause undesired operation. Note: This
equipment has been tested and found to comply with the limits for a Class B
equipment has been tested and found to comply with the limits for a Class B
equipment has been tested and found to comply with the limits for a Class B
digital device, pursuant to part 15 of the FCC Rules. These limits are
digital device, pursuant to part 15 of the FCC Rules. These limits are
digital device, pursuant to part 15 of the FCC Rules. These limits are
designed to provide reasonable protection against harmful interference in a
designed to provide reasonable protection against harmful interference in a
designed to provide reasonable protection against harmful interference in a
residential installation. This equipment generates, uses and can radiate radio
residential installation. This equipment generates, uses and can radiate radio
residential installation. This equipment generates, uses and can radiate radio
frequency energy and, if not installed and used in accordance with the
frequency energy and, if not installed and used in accordance with the
frequency energy and, if not installed and used in accordance with the
CAUTION: TURN OFF THE MAIN POWER AT THE CIRCUIT BREAKER BEFORE
CAUTION: TURN OFF THE MAIN POWER AT THE CIRCUIT BREAKER BEFORE
CAUTION: TURN OFF THE MAIN POWER AT THE CIRCUIT BREAKER BEFORE
INSTALLING THE FIXTURE IN ORDER TO PREVENT POSSIBLE ELECTRIC SHOCK.
INSTALLING THE FIXTURE IN ORDER TO PREVENT POSSIBLE ELECTRIC SHOCK.
INSTALLING THE FIXTURE IN ORDER TO PREVENT POSSIBLE ELECTRIC SHOCK.
Planning installation
Planning installation
Planning installation
• Turn off the electrical power at the fuse or circuit breaker box before installing or servicing any part of this fixture.
• Turn off the electrical power at the fuse or circuit breaker box before installing or servicing any part of this fixture.
• Turn off the electrical power at the fuse or circuit breaker box before installing or servicing any part of this fixture.
• Carefully remove the fixture from the carton and check to make sure that all parts are included.
• Carefully remove the fixture from the carton and check to make sure that all parts are included.
• Carefully remove the fixture from the carton and check to make sure that all parts are included.
• Be careful not to misplace any of the screws or parts needed for installing the fixture.
• Be careful not to misplace any of the screws or parts needed for installing the fixture.
• Be careful not to misplace any of the screws or parts needed for installing the fixture.
Installation
Installation
Installation
PARTS
PARTS
PARTS
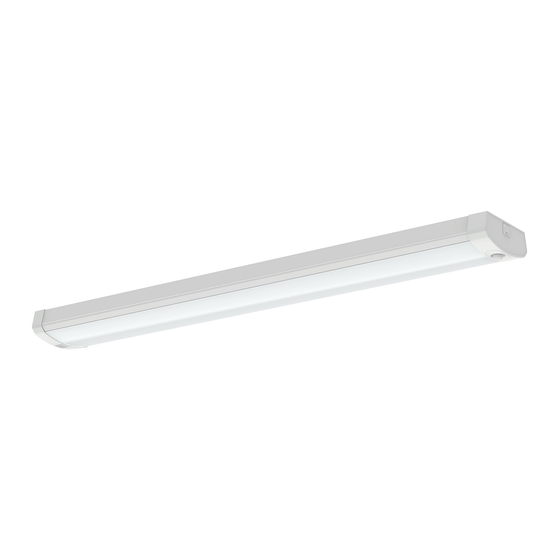
A - Luminaire housing
A - Luminaire housing
A - Luminaire housing
B - Diffuser
B - Diffuser
B - Diffuser
C - Small lid
C - Small lid
C - Small lid
C
C
12/06/2019 Page 1
12/06/2019 Page 1
12/06/2019 Page 1
CAUTION: Installation must not be made on a
CAUTION: Installation must not be made on a
radiant-heating ceiling.
radiant-heating ceiling.
Voltage: 120-277 Vac 50/60Hz
Voltage: 120-277 Vac 50/60Hz
47.24''
47.24''
47.24''
45.67''
45.67''
45.67''
C
Figure 1
Installation Instructions
Wraparound
WP440L40KU
CAUTION: Installation must not be made on a
radiant-heating ceiling.
Voltage: 120-277 Vac 50/60Hz
CAUTION, IMPORTANT
CAUTION, IMPORTANT
CAUTION, IMPORTANT
SAFETY INSTRUCTIONS
SAFETY INSTRUCTIONS
SAFETY INSTRUCTIONS
Fixture should be installed by a qualified electrician . The electrical system, and
Fixture should be installed by a qualified electrician . The electrical system, and
Fixture should be installed by a qualified electrician . The electrical system, a
method of electrical connection of the fixture, must be in accordance with the
method of electrical connection of the fixture, must be in accordance with the
method of electrical connection of the fixture, must be in accordance with t
National Electrical Code and local building codes.
National Electrical Code and local building codes.
National Electrical Code and local building codes.
Water entering into IP20 luminaire is strictly prohibited. Water ingress of IP20
Water entering into IP20 luminaire is strictly prohibited. Water ingress of IP20
Water entering into IP20 luminaire is strictly prohibited. Water ingress of IP2
luminaire may cause electrical failure or unsafe conditions.
luminaire may cause electrical failure or unsafe conditions.
luminaire may cause electrical failure or unsafe conditions.
instructions, may cause harmful interference to radio communications.
instructions, may cause harmful interference to radio communications.
instructions, may cause harmful interference to radio communications.
However, there is no guarantee that interference will not occur in a particular
However, there is no guarantee that interference will not occur in a particular
However, there is no guarantee that interference will not occur in a particula
installation. If this equipment does cause harmful interference to radio or
installation. If this equipment does cause harmful interference to radio or
installation. If this equipment does cause harmful interference to radio or
television reception, which can be determined by turning the equipment off
television reception, which can be determined by turning the equipment off
television reception, which can be determined by turning the equipment of
and on, the user is encouraged to try to correct the interference by one or more
and on, the user is encouraged to try to correct the interference by one or more
and on, the user is encouraged to try to correct the interference by one or m
of the following measures: Reorient or relocate the receiving antenna. Increase
of the following measures: Reorient or relocate the receiving antenna. Increase
of the following measures: Reorient or relocate the receiving antenna. Incre
the separation between the equipment and receiver. Connect the equipment
the separation between the equipment and receiver. Connect the equipment
the separation between the equipment and receiver. Connect the equipmen
into an outlet on a circuit different from that to which the receiver is connected.
into an outlet on a circuit different from that to which the receiver is connected.
into an outlet on a circuit different from that to which the receiver is connec
Consult the dealer or an experienced radio/TV technician for help.
Consult the dealer or an experienced radio/TV technician for help.
Consult the dealer or an experienced radio/TV technician for help.
A
A
A
C
B
B
Figure 1
Figure 1
Installation Instructions
Installation Instructions
Wraparound
Wraparound
WP440L40KU
WP440L40KU
NOTE: Turn o the electrical power at
NOTE: Turn o the electrical power at
NOTE: Turn o the electrical power
the fuse or circuit breaker box before
the fuse or circuit breaker box before
the fuse or circuit breaker box befor
installing or servicing any part of this
installing or servicing any part of this
installing or servicing any part of thi
fixture.
fixture.
fixture.
NOTE: Do not use or store in corrosive
NOTE: Do not use or store in corrosive
NOTE: Do not use or store in corrosi
environment with hazardous material
environment with hazardous material
environment with hazardous materi
e.g. Sulphur, Chlorine, Phthalates, etc.
e.g. Sulphur, Chlorine, Phthalates, etc.
e.g. Sulphur, Chlorine, Phthalates, et
C
C
Slide small lid (Part C) out from the end cap of
Slide small lid (Part C) out from the end cap of
Slide small lid (Part C) out from the end cap of
luminaire housing (Part A), then dig out the
luminaire housing (Part A), then dig out the
luminaire housing (Part A), then dig out the
diffuser (Part B).
diffuser (Part B).
diffuser (Part B).
B
Advertisement
Table of Contents

Subscribe to Our Youtube Channel
Related Manuals for SIGNIFY Pila WP440L40KU


Summary of Contents for SIGNIFY Pila WP440L40KU
- Page 1 Installation Instructions Installation Instructions Installation Instructions Wraparound Wraparound Wraparound WP440L40KU WP440L40KU WP440L40KU CAUTION: CAUTION: CAUTION: CAUTION: These products may represent a possible shock or fire hazard if improperly installed or attached in any way. Products should be CAUTION: CAUTION: These products may represent a possible shock or fire hazard if improperly installed or attached in any way. Products should be These products may represent a possible shock or fire hazard if improperly installed or attached in any way.
- Page 2 CAUTION: Before beginning installation turn off the circuit breaker and light switch. CAUTION: Before beginning installation turn off the circuit breaker and light switch. CAUTION: Before beginning installation turn off the circuit breaker and light switch. Junction box installation Junction box installation Junction box installation NOTE: Leave 1/4”...
- Page 3 wall stud wall stud wall stud Drywall Drywall Drywall Pilot hole Pilot hole Pilot hole Figure 10 Figure 10 Figure 10 Figure 9 Figure 9 Figure 9 . Remove the heat shrink tubing wrap from the ends of the black, white, and green wires in order to expose the copper wires prior to connect the AC wires 3.
- Page 4 Directives d’installation Enveloppant WP440L40KU WP440L40KU WP440L40KU AVERTISSEMENT : ces produits peuvent présenter des risques de choc ou d’incendie s’ils sont installés ou rattachés inadéquatement. Les produits doivent être installés en respectant les directives du manuel des propriétaires, les codes électriques courants et/ou le code électrique national (NEC).
- Page 5 AVERTISSEMENT : Avant de débuter l’installation, couper l’alimentation au disjoncteur du circuit et à l’interrupteur. Installation de la boîte de jonction 1. Insérer les deux vis (AA) dans la boîte de jonction. (Figure 2). NOTE : garder ¼ po de vis exposée pour recevoir le boîtier du luminaire. 2.
- Page 6 Téléphone 855-486-2216 Téléphone 800-668-9008 devis ni contrat, à moins qu’il n’en soit convenu autrement avec Signify. Toutes les marques déposées 2/06/2019 Page 3 12/06/2019 Page 3...
Need help?
Do you have a question about the Pila WP440L40KU and is the answer not in the manual?
Questions and answers