Advertisement
Quick Links
Advertisement

Related Manuals for SIGNIFY LEDALITE NatureConnect 912401564422


Summary of Contents for SIGNIFY LEDALITE NatureConnect 912401564422
- Page 1 NatureConnect Natural lighting system Installation guide North America February 2023...
-
Page 2: Table Of Contents
Order of installation 1. Control cabinet ..... 4 2. Lightscapes ......9 3. Large Island frame ....20 4. Small Island frame ....30 5. Skylights & Gear tray .... 38 6. Daylights ....... 45 7. Test installation ..... 62 NatureConnect - Installation guide - February 2023... -
Page 3: Lightscapes
Preparation, Sensors & User interface Island Daylights AC MAINS Skylights AC MAINS Cabinet Island gear tray 0-10 V Lighting control Ethernet system Standalone Daylights To next island Lightscapes NatureConnect - Installation guide - February 2023... - Page 4 Unpack cabinet and materials • Network cable Cat5e: Straight-through T-568B (for Lightscape) • Mounting material cabinet • 20AWG or better solid core copper cable for DALI connection to island Mount cabinet to a wall Use instructions that are Leave enough free area for cables included with the cabinet above and to the right of the cabinet 6 in...
- Page 5 Prepare DMX512 connection to Lightscape Content group # DMX512 CG # Content group 2 DMX512 CG 2 Content group 1 DMX512 CG 1 Straight-through T-568B DMX512 Lightscape controller Prepare Dali connection to Island The DALI connection block is yellow and gray Content group # Content group 2 Content group 1...
- Page 6 Ethernet Lighting control connection (not applicable for 0-10 V) Ethernet connection to lighting control system Ethernet internal A cabinet uses either this Ethernet lighting control connection, or it uses a 0-10V lighting control connetion. Refer to the lighting plan to see which one applies.
- Page 7 Connect network up-link and mains Internet connection Mains power 120 V Mains Internet connection block Check status LEDS in the cabinet Condition Module LED status Recommendation Dali/DMX cable Green blinking Module works correct connected Orange /Red led Issue in installation. Try disconnecting the cable Orange / Red led Issue in cabinet.
- Page 8 Configure the timezone into the control cabinet Download the NatureConnect Cabinet Configuration Tool: http:/ /downloads.natureconnect.cloud NatureConnect - Installation guide - February 2023...
- Page 9 Lightscape Data cable Trunking plate Mounting Assembly Locking Plate Lightscape 2 Lightscape 1 NatureConnect - Installation guide - February 2023...
- Page 10 Tools not included Unpack and check Lightscape 5/16 1/4-20 x 3/4" 1/4-20 8-B x 9/32" 10-24 x 1/2" 10-24 Prepare cable connections Lightscape 1 Lightscape 2 Lightscape 3 4G AWG12 Lightscape controller NatureConnect - Installation guide - February 2023...
- Page 11 Define distance from wall and floor 3/16 3/16 B > [30 mm] 15/16 [557 mm] 11/16 [500 mm] 15/16 [150 mm] Single Lightscape or multiple connected Lightscapes 1 Lightscape 2 or more connected Lightscapes NatureConnect - Installation guide - February 2023...
- Page 12 Define suspension points 49 1/8 in [1248 mm] Prepare suspension NatureConnect - Installation guide - February 2023...
- Page 13 Mount Lightscape to suspension Tighten upper nuts on both ends Secure mounting assembly with locking plate 19 in-lbs NatureConnect - Installation guide - February 2023...
- Page 14 Connect cables Data Data Enabler Pro Multiple Lightscapes: Define suspension points 49 1/8 in 3/16 3/16 [1248 mm] [1351 mm] [1351 mm] NatureConnect - Installation guide - February 2023...
- Page 15 Prepare suspension points Mounting Trunking Plate to end of Lightscape with incoming power Mount first Lightscape to the suspension points < 60 in-lbs NatureConnect - Installation guide - February 2023...
- Page 16 Tighten upper bolts on both ends Mount First Lightscape, secure Safety Brackets and place the adhesive gasket in the Trunking Plate side Attach second Lightscape Mount Second Lightscape with Trunking Plate NatureConnect - Installation guide - February 2023...
- Page 17 Secure trunking plate by tightening bolt and secure other end of Tighten upper bolts on both ends supsension cable with saftey bracket < 60 in-lbs Fix sides together 30 in-lbs NatureConnect - Installation guide - February 2023...
- Page 18 Repeat step 12 and 13 to add more Lightscapes Repeat steps 12 thru 16 to add additional Lightscapes Connect all cables Lightscape controller NatureConnect - Installation guide - February 2023...
- Page 19 Add end-cap to last Lightscape Add end-cap to first and last Lightscapes NatureConnect - Installation guide - February 2023...
-
Page 20: Large Island Frame
Large Island frame Inner frame: Main bars Inner frame: Cross bars Trim Adapters (recessed frame only) Corner brackets Island trim: Short side Island trim: Long side NatureConnect - Installation guide - February 2023... - Page 21 Tools not included Unpack and collect all material 5/16 Frame trim Inner frame 10-32 x 5/8" Recessed version only 6-B x 3/8" Suspension kit 40 in-lbs NatureConnect - Installation guide - February 2023...
- Page 22 Define suspension points positions 11/16 3/16 [601.3 mm] [1834 mm] + 3/4 in [19.05 mm] on each enside with recessed bars 9/16 [3036.7 mm] Prepare suspension to the ceiling Recessed version Suspended version Building structure Suspended ceiling B > [260 mm] NatureConnect - Installation guide - February 2023...
- Page 23 For recessed version, consdier frame position on suspended ceiling before starting the installation Recessed frame compatible with: - NEMA NFG - NEMA SS - NEMA F Cut the tiles and grids and place them on the recessed bars NatureConnect - Installation guide - February 2023...
- Page 24 Pass the cable through the brackets and fix them to the building structure ATTACH BRACKETS TO BUIDLING STRUCTURE WITH 5/16” HARDWARE (SUPPLIED BY OTHERS) NatureConnect - Installation guide - February 2023...
- Page 25 Attach main bars to ceiling suspension 3/16 [1384 mm] [895 mm] 1. Push cable through gripper 2. Tighten grippers top nut Mount cross bars to the main bars NatureConnect - Installation guide - February 2023...
- Page 26 Fix cross bars with screws 5/16 35 in-lbs Mount corner brackets 5/16 Do not tighten the screws yet NatureConnect - Installation guide - February 2023...
- Page 27 Measure diagonals 90˚ Insert the measure tape tab in the rectangular slot and measure to the 90˚ opposite rectangular slot 1/16 D1 = D2 +/- [2 mm] Tighten corners screws 5/16 35 in-lbs NatureConnect - Installation guide - February 2023...
- Page 28 Assemble long trim edges 5/16 35 in-lbs Mount long trim edges 5/16 35 in-lbs NatureConnect - Installation guide - February 2023...
- Page 29 Attach short trim on two sides Secure short trim edges 5/16 35 in-lbs NatureConnect - Installation guide - February 2023...
- Page 30 Mount recessed trims (recessed version only) 10 in-lbs Adjust cable grippers so that island is flush with suspended ceiling T-bar Building structure Suspended ceiling Building structure Suspended ceiling NatureConnect - Installation guide - February 2023...
-
Page 31: Small Island Frame
Small Island Frame Island trim: Short side Inner frame: Cross bars Corner brackets Trim Adapters (recessed frame only) Island trim: Long side NatureConnect - Installation guide - February 2023... - Page 32 Unpack and collect all material Tools not included 5/16 Frame trim Inner frame 10-32 x 5/8" Recessed version only 6-B x 3/8" Suspension kit 40 in-lbs NatureConnect - Installation guide - February 2023...
- Page 33 Define suspension points positions 9/16 [471.3 mm] [895 mm] + 3/4 in [19.05 mm] on each enside with recessed bars [1837.7 mm] Prepare suspension to the ceiling Recessed version Suspended version Building structure Suspended ceiling B > 260 mm NatureConnect - Installation guide - February 2023...
- Page 34 For recessed version, consdier frame position on suspended ceiling before starting the installation Recessed frame compatible with: - NEMA NFG - NEMA SS - NEMA F Cut the tiles and grids and place them on the recessed bars NatureConnect - Installation guide - February 2023...
- Page 35 Pass the cable through the brackets and fix them to the building structure ATTACH BRACKETS TO BUIDLING STRUCTURE WITH 5/16” HARDWARE (SUPPLIED BY OTHERS) NatureConnect - Installation guide - February 2023...
- Page 36 Attach main bars to ceiling suspension 1/16 [636.7 mm] [895 mm] 1. Push cable through gripper 2. Tighten grippers top nut Mount long trim edges 5/16 35 in-lbs NatureConnect - Installation guide - February 2023...
- Page 37 Attach short trim on two sides Secure short trim edges 5/16 35 in-lbs NatureConnect - Installation guide - February 2023...
- Page 38 Mount corner brackets 5/16 Do not tighten the screws yet Measure diagonals and tighten corner screws 90˚ Insert the measure tape tab in the rectangular slot and measure to the opposite rectangular slot Tighten screws 1/16 D1 = D2 +/- [2 mm] 90˚...
- Page 39 Mount recessed trims (recessed version only) 10 in-lbs Adjust cable grippers so that island is flush with suspended ceiling T-bar Building structure Suspended ceiling Building structure Suspended ceiling NatureConnect - Installation guide - February 2023...
-
Page 40: Skylights & Gear Tray
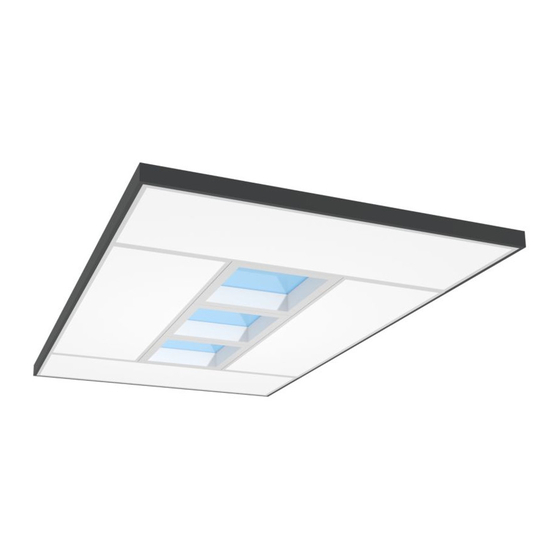
Skylights & Gear tray Gear tray Skylight Skylight brackets NatureConnect - Installation guide - February 2023... - Page 41 Unpack and check Skylight and parts Tools not included 8-B x 9/32" Don't remove protection foil Define orientation of the Skylights NatureConnect - Installation guide - February 2023...
- Page 42 Insert first Skylight and mount brackets 19 in-lbs Mount Skylights in the right orientation NatureConnect - Installation guide - February 2023...
- Page 43 Insert second and third Skylight Check Skylight orientation NatureConnect - Installation guide - February 2023...
- Page 44 Align and mount center Skylight 10-32 37 in-lbs Unpack and check Gear tray and accessories Tools not included 10-32 x 5/8" Lightscape controller (optional) To Terminal Block 8-32 x 1/2" 8-32 To Lightscapes NatureConnect - Installation guide - February 2023...
- Page 45 Mount Lightscape controller onto the gear tray (optional) Do not connect before Lightscapes are installed Green DALI+ Brown White DALI- Purple Black Choose gear tray position on island and route conduit NatureConnect - Installation guide - February 2023...
- Page 46 Insert and mount Gear tray 35 in-lbs 10-32 NatureConnect - Installation guide - February 2023...
- Page 47 Daylight (Island) Daylight panel Outer brackets Inner brackets NatureConnect - Installation guide - February 2023...
- Page 48 Unpack and check Daylight and accessories Tools not included M4 x 10mm #6x 5/16" 8-18B x 1/4" Place Daylight panel on a clean, flat surface Use a protective layer NatureConnect - Installation guide - February 2023...
- Page 49 Mount brackets on both sides 6-AB X 5/16 6-AB X 5/16 13 in-lbs Mount Daylight gear tray 17 in-lbs M4 x 10mm NatureConnect - Installation guide - February 2023...
- Page 50 Connect driver cables 19 in-lbs 8-18B x 1/4" Hook first panel onto the frame NatureConnect - Installation guide - February 2023...
- Page 51 Flip Daylight downwards in hanging position Repeat for all Daylights NatureConnect - Installation guide - February 2023...
- Page 52 Attach conduit from Skylight and Daylight panels to gear tray through Connect Skylights and Daylights knockouts Connect Skylight and Daylight panels to terminal blocks. Connect cables on the island gear tray Connect Lightscapes to Lightscape Controller To DALI Do not connect To Skylight/Daylight panels before Lightscapes To Mains...
- Page 53 Connect Mains & DALI to respective terminal blocks. Connect DMX. To DALI To Skylight/Daylight Panles Do not connect before Lightscapes To Mains are installed Ethernet Green DALI+ Purple White DALI- Brown Black To Lightscapes To Skylight/Daylight Panles To DMX Secure gear tray door with screws removed in step 9 NatureConnect - Installation guide - February 2023...
- Page 54 Safety cable installation Do NOT install Daylight without safety cable Adjust cable length as tight as possible NatureConnect - Installation guide - February 2023...
- Page 55 Push Daylights into the frame CLICK! Align elements There is a difference in height between the elements in the island. Align all corners Keep a distance of ±2.5 mm between all elements NatureConnect - Installation guide - February 2023...
- Page 56 T-bar recessed Standalone Daylight Unpack kit Tools not included 6-B x 3/8" Mount T-bar adapters NatureConnect - Installation guide - February 2023...
- Page 57 10 in-lbs Screw the flat brackets and then bend them NatureConnect - Installation guide - February 2023...
- Page 58 Mount luminaire to ceiling grid NatureConnect - Installation guide - February 2023...
- Page 59 Drywall recessed Standalone Daylight Unpack kit Tools not included 6-B x 3/4" Make an opening in the ceiling [626 mm] [1845 mm] NatureConnect - Installation guide - February 2023...
- Page 60 Assembly the frame 10 in-lbs Mount frame to ceiling and then luminaire to frame NatureConnect - Installation guide - February 2023...
- Page 61 Suspended standalone Daylight Unpack kit Tools not included 1/4-20 x 3/4" 10-32 x 5/8" Assemble frame parts around Daylight NatureConnect - Installation guide - February 2023...
- Page 62 Screw frame and secure Daylight panel with the screws Define suspension points 48 in [1219 mm] [580 mm] Check mounting instruction for suspension points installation (4). NatureConnect - Installation guide - February 2023...
- Page 63 Insert the cables in the four grippers until desired heigth Hide the extra cable in the frame channel NatureConnect - Installation guide - February 2023...
-
Page 64: Daylights
Test procedure Daylights Lightscapes Skylights NatureConnect - Installation guide - February 2023... - Page 65 Switch button to I: TEST MODE Power on island Power on cabinet Make sure all cables are connected first I = Test mode 0 = Normal mode Visually check all Skylights The Skylights will change from white sky to blue sky over 8 second If any of the Skylights remains static, please check if all cables are connected correctly.
- Page 66 Visually check all Daylights The Daylights will change from warm to cool white light over 8 second If any of the Daylight remains static, please check if all cables are connected correctly. Visually check all Lightscapes The Lightscapes will alternate the top and bottom row between yellow and blue over an 8 second period If any of the Lightscapes remains static, please check if all cables are connected correctly.
- Page 67 Switch button to 0: NORMAL MODE I = Test mode 0 = Normal mode The system will revert back to default setting until commissioning is completed by the commissioning engineer NatureConnect - Installation guide - February 2023...
- Page 68 Checklist Task Check All Daylights light up correctly All Skylights light up correctly All Lightscapes light up correctly Cabinet - functional internet connection Cabinet – LEDs blink green Timezone and time are setup in the cabinet Check alignment of the island (refer to page 53) NatureConnect - Installation guide - February 2023...
- Page 69 Note This equipment has been tested and found to comply with the limits for Class A digital device, pursuant to part 15 of the FCC Rules. these limits are design to provide reasonable protection against harmful interference when the equipment is operated in a commercial enviroment. This equipment generates, uses, and can radiate radio frequency energy and, if not installed and used in accordance with the instruction manual, may cause harmful interference to radio communica- tions.
- Page 70 © 2021 Signify Holding. All rights reserved. The information provided herein is subject Signify North America Corporation Signify Canada Ltd. to change, without notice. Signify does not give any representation or warranty as to 400 Crossing Blvd, Suite 600 281 Hillmount Road,...
Need help?
Do you have a question about the LEDALITE NatureConnect 912401564422 and is the answer not in the manual?
Questions and answers