Advertisement
Quick Links
Thank you for purchasing a Sealey product. Manufactured to a high standard this product will, if used according to these instructions
and properly maintained, give you years of trouble free performance.
Important: REAd THESE INSTRUCTIoNS CAREfUlly. NoTE THE SAfE oPERATIoNAl REQUIREMENTS, WARNINGS ANd CAUTIoNS. USE
THIS PAINT CAN CRUSHER CoRRECTly ANd WITH CARE foR THE PURPoSE foR WHICH IT IS INTENdEd. fAIlURE To do So MAy
CAUSE dAMAGE ANd/oR PERSoNAl INjURy ANd WIll INvAlIdATE THE WARRANTy. RETAIN THESE INSTRUCTIoNS foR fUTURE USE.
1. SAfETy INSTRUCTIoNS
WarnInG! Wear protective gloves and approved safety
eye protection (standard spectacles are not adequate).
WarnInG! Ensure Health & Safety, local authority, and
general workshop practice regulations are adhered to
when using this equipment.
do NoT allow untrained persons to use the crusher.
do NoT operate the paint can crusher when you are
tired or under the influence of alcohol, drugs or
intoxicating medication.
do NoT operate the crusher if parts are damaged or
missing as this may cause failure and/or personal injury.
do NoT use the crusher for a task it is not designed to
perform.
do NoT crush aerosol cans, cylinders of compressed
gas, fuel cans or containers of flammable liquids or
solvents.
do NoT smoke when using crusher.
do NoT modify the crusher or alter the operation in any
way to circumvent the interlocking door mechanism.
Remove Lids, place paint cans into the crushing
chamber open side down.
Maintain the paint can crusher in good condition.
Replace or repair damaged parts. Use genuine parts
only. Unauthorised parts may be dangerous and
invalidate the warranty.
Familiarise yourself with the applications, limitations and
potential hazards of the paint can crusher.
Keep work area clean, uncluttered and ensure there is
adequate lighting.
Maintain correct balance and footing. Ensure the floor is
not slippery and wear non-slip shoes.
Keep the crusher clean for best and safest performance.
When not in use release pressure from the paint can
crusher.
Wear appropriate PPE such as overalls safety glasses
and gloves.
Keep untrained/unauthorised personnel away from the
crusher.
Clean up any spilled paint immediately so it will not
cause a slipping hazard.
Leave the door ajar when not in use.
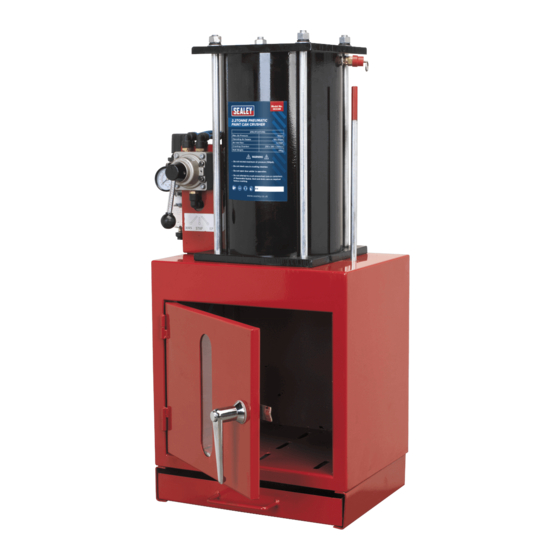
2. INTRodUCTIoN & SPECIfICATIoN
2.1
Introduction.
Reduce your waste disposal costs* - crushing paint cans
minimises the volume of your hazardous waste.
Air operated paint can press with safety lock-out device
which prevents the door being opened during operation.
Bench mounting unit with outlet for waste paint
collection.
* For disposal by volume customers.
2.2
Specification.
Internal Size (H x W x D): ................ 250 x 280 x 230mm
External Size (H x W x D): ............... 750 x 390 x 250mm
Air Supply: ..................................................... 100-130psi
Air Inlet: ...............................................................1/4"BSP
Weight: ..................................................................... 41kg
INSTRUCTIONS FOR:
PNEUMATIC PAINT CAN CRUSHER
MODEL No:
3. INSTAllATIoN
WarnInG! The unit is very heavy and should only be
moved with assistance.
3.1
location and Installation.
Locate the crusher in a suitable place indoors on a firm
and level surface.
3.2
fitting Pipes.
The pipes are a simple push fit and should be
configured as in Fig.1 below ensuring the pipes are fully
inserted.
3.3
Regulator.
Use the large nut to attach the regulator to the body and
insert the pipe as in Fig.1 below.
3.4
fitting door Handle.
Place the handle shaft through the door from the out
side and secure with nylon washer and nut (Fig.1a).
Note: The door handle has a locking button and when fitting
the handle it should be configured so the locking button
requires pressing to fully latch or unlatch the door. The handle
should be configured so the closed (locked) position will leave
the handle pointing downwards.
3.4.1
Place the washer and door catch on the end of the door
handle shaft and secure with the screw (Fig.1b).
fig.1a
Nylon Washer
Nut
HCC08
fig.1
fig.1b
Wave Washer
Domed Washer
HCC08
Issue No: 1 23/10/08
Screw
Advertisement

Subscribe to Our Youtube Channel
Related Manuals for Sealey HCC08


Summary of Contents for Sealey HCC08
- Page 1 HCC08 MODEL No: Thank you for purchasing a Sealey product. Manufactured to a high standard this product will, if used according to these instructions and properly maintained, give you years of trouble free performance. Important: REAd THESE INSTRUCTIoNS CAREfUlly. NoTE THE SAfE oPERATIoNAl REQUIREMENTS, WARNINGS ANd CAUTIoNS. USE THIS PAINT CAN CRUSHER CoRRECTly ANd WITH CARE foR THE PURPoSE foR WHICH IT IS INTENdEd.
- Page 2 2006/42/EC Machinery Directive For Jack Sealey Ltd. Sole importer into the UK of Sealey Professional Tools. notE: It is our policy to continually improve products and as such we reserve the right to alter data, specifications and component parts without prior notice.
Need help?
Do you have a question about the HCC08 and is the answer not in the manual?
Questions and answers