Advertisement

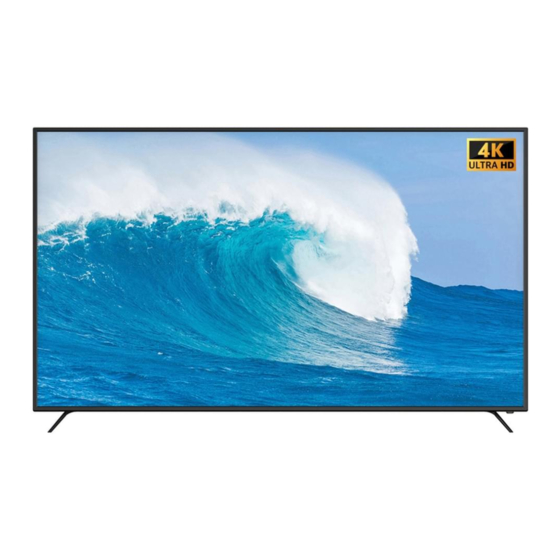
LE75L521

Advertisement

Table of Contents
loading

Summary of Contents for Teac L Series

  • Page 1 LE75L521...
  • Page 3 TERMS AND CONDITIONS...
  • Page 8: Table Of Contents

    Important Information If a television is not positioned in a sufficiently stable location, it can be potentially hazardous due to falling. Many injuries, particularly to children, can be avoided by taking simple precautions such as: • Using cabinets or stands recommended by the manufacturer of the television. •...
  • Page 9: Installation

    INSTALLATION Install the stand as described below, or if you want to mount it to a wall, please contact a professional installer. Please ensure the TV is not plugged into the wall socket and furthermore we recommend to get another person to assist in the following task. Attaching the stand Step 1 Place a soft cushioned material on top...
  • Page 10 INSTALLATION Wall-Mounting Instructions Please ensure the TV is not plugged into the wall socket and furthermore we recommend to get another person to assist in the following task. • We recommend you use a professional installer as we assume no liability for any eventual damage to the product or injury to yourself if you mount the TV on your own.
  • Page 11: Controls And Connections

    CONTROLS AND CONNECTIONS Channel Up Volume Up Volume Down OK/Select Channel Down Input Menu Power...
  • Page 12 CONTROLS AND CONNECTIONS OPTICAL USB2 DVD player Blu-ray disc player Camcorder PC (HDMI-output)
  • Page 13: Specifications

    SPECIFICATIONS Powered by webOS 5.0 Operating System 3840 x 2160 Resolution 1200 : 1 Contrast ratio: 320 cd/m2 Luminance 1.07 Billion Colours 16 : 9 Aspect Ratio Music: MP3, M4A, AAC,WMA Multimedia Playback Format under Movie: AVI,MP4,MPG,MKV,MOV,DAT, VOB,RM,RMVB USB Mode Photo: JPG, BMP, PNG 110-240V~ 50/60Hz Power Source...
  • Page 14: Remote Control

    REMOTE CONTROL Using the Remote Control Button POWER: ON/OFF. TV/RAD: Switch to TV or Radio. : Search. Enable/disable subtitles. SUBTITLE: : Enters the Quick Settings menu. Selects an input source. Number selection key. 0-9: The QUICK ACCESS edit screen appears. LIST: It displays the additional buttons on the remote control.
  • Page 15: Getting Started With Webos Tv

    Getting Started with webOS TV Home Tutorial Using the Home Feature of the webOS TV You can open the Home screen by pressing the button on your remote control. You can combine frequently used apps on a single screen and use whichever you want at any time.
  • Page 16 Getting Started with webOS TV Manage Home Manage webOS TV Home You can view a list of all apps installed on your TV, change their positions, or delete them. 1.Select the app you want to edit, and press and hold the Wheel (OK) button on the remote control.
  • Page 17 Getting Started with webOS TV Connecting to the Network Connecting to the Network If you configure settings for the network, you can use various services such as online contents and applications. Setting a Wired Network 1.Connect the LAN port of the TV and the router using a LAN cable. The router should be connected to the Internet beforehand.
  • Page 18 Getting Started with webOS TV Connecting to the Network Network Setting Warnings 1.Use standard LAN cable (connect to Cat7 or higher with RJ45 connector, 10 Base-T, or 100 Base TX LAN port). 2.Resetting the modem may fix some network connection problems. Turn the power OFF, disconnect and reconnect it, and then turn the power on to solve the problem.
  • Page 19 Getting Started with webOS TV Managing Your LG Account Creating LG Account In Account Management, you can use your email address to create a new LG account. Alternatively, you can create and log in to an LG account using the ID and password of an external service account.
  • Page 20: How To Operate Tv

    How to Operate TV Connecting to SIMPLINK (HDMI-CEC) Using SIMPLINK With a single remote control, you can easily manage various devices such as a soundbar or set-top box connected to a TV with HDMI. Up to three devices can be connected and used simultaneously. 1.Connect the SIMPLINK HDMI Output port to the TV HDMI IN port with an HDMI cable.
  • Page 21 How to Operate TV Supported SIMPLINK Functions Instant Play When you start a multimedia device, you can immediately watch content from the device on the TV without having to control anything. Controlling devices with the TV remote control Enables the user to control multimedia devices with the TV remote control to watch content. The pointer function of the Magic remote can be limited.
  • Page 22: Enjoy Live Tv

    Enjoy Live TV Making the Most of Live Menu Using Live Menu You can use the relevant features with ease when watching TV broadcasts. Press the LIST button on the remote control. Or press the Wheel (OK) button on the remote control and select Programmes. 1.Programmes : View a list of broadcast content that is currently being broadcast.
  • Page 23 Enjoy Live TV Viewing Guide Viewing TV Guide You can view programmes and the schedule of each programmes. Press the remote control's LIST button, and select the Guide tab on the left side of the screen. 1.Click on each area, and you can move to the app. 2.You can view information on the programme and broadcaster.
  • Page 24 Enjoy Live TV Checking Programme Info Viewing Programme Information During watch the Live broadcast, press the Wheel (OK) button. The Programme Banner appears. Move to the Programmes. To see the details, click the Enjoy Live TV Making the Most of Live Menu in User Guide. It displays the information about the programme you are watching.
  • Page 25 Enjoy Live TV During watch the live broadcast, select a point on the progress bar which you want by the pointer. You can also press the Left/Right buttons on your remote control to use this feature. Select a previous point than the current point on the progress bar The Live Playback function can be used only for broadcast programmes you view through the antenna input terminal.
  • Page 26 Enjoy Live TV Matters That Require Attention of Recording While recording, press the Wheel (OK) button to display information about the recording. The duration of the recording can be set before the recording starts. If multiple USB storage devices are connected, the last recorded storage device is selected automatically.
  • Page 27 Enjoy Live TV Music Catch Using Music Catch It is a function you can use to record the music from the TV any time. During watch the Live broadcast, press the Wheel (OK) button. Press Start Recording button on the bottom left corner of the screen. Press the Start Music Recording button Select a device to be used with record the music when USB HDD is connected to the TV.
  • Page 28 Enjoy Live TV You can change the alignment order or apply the filter. You can set the Delete Mode. You can set the New Scheduled Recording. You can set the New Reminder. Launch Guide. Programme Scheduling You can select a show to schedule it for watching or recording. Press the remote control's LIST button, and select the Guide tab on the left side of the screen.
  • Page 29 Enjoy Live TV Live TV Preparation 1.Select the storage device to play, the type of recording, the sorting method, and the view type. 2.Select and delete the desired content. 3.Display detailed information about the content. You can change the title of the content in the detailed information pop-up. 4.Launch Search.
  • Page 30 Enjoy Live TV TELETEXT To Use Teletext Teletext is a free service provided by the TV station that offers text-based information about TV programmes, news and weather. The teletext decoder of this TV can support the SIMPLE, TOP and FASTEXT systems. Press the More Actions button on the remote control.
  • Page 31 Enjoy Live TV Update Displays the TV picture on the screen while waiting for a new teletext page. The display will appear at the top left hand corner of the screen. When the updated page is available then display will change to the page number. Select this menu again to view the updated teletext page.
  • Page 32: Enjoying Content Store

    Enjoy Live TV Some models may not be supported. When Live Playback is in operation, HbbTV is disabled. While using HbbTV service, navigation keys and the Wheel (OK) button may be disabled if the Magic Remote’s pointer is activated on the screen. In this case, press the left, right, up and down keys in order to deactivate the pointer.
  • Page 33 ENJOYING CONTENT STORE 5.Read the details of the app and then press Install. 6.When the installation is complete, you can run the app immediately. Available categories may vary depending on the country or service status. If the storage on your TV is insufficient, you can install the apps by connecting an external memory device.
  • Page 34: Connecting External Devices

    ENJOYING CONTENT STORE Returns to the previous screen. Provides a list of content for the selected genre. Enter a search term. Exit the Search. You must connect to the network to use the search feature. Search results may vary depending on the programme, region, network settings, and whether you have agreed to the terms and conditions.
  • Page 35 CONNECTING EXTERNAL DEVICES Connecting Home IoT Devices Connecting Home IoT Devices You can check and control the status of the connected Home IoT Devices. 1.Install LG ThinQ app on your smartphone. 2.Log in to your LG ThinQ account, and register your own LG ThinQ device. 3.Press the button on the remote control and select Home Dashboard.
  • Page 36 CONNECTING EXTERNAL DEVICES Connect your TV and smart device to the same Wi-Fi network. You can check the Wi-Fi network of TV at → →Connection → Network Connection Settings → Wi-Fi Connection. Run the LG ThinQ app installed on your smart device. Follow the instructions from LG ThinQ app to connect your smart device to the TV.
  • Page 37 CONNECTING EXTERNAL DEVICES Playing Sound from a Smart Device through the TV’s Speakers Playing Sound from a Smart Device through the TV’s Speakers Connect a smart device to the TV via Bluetooth to play sound from the smart device through the TV’s speakers.
  • Page 38 CONNECTING EXTERNAL DEVICES Viewing Photos and Videos Viewing Photos and Videos You can view photos and videos using the Photo & Video app. 1.Press the button on the remote control. 2.Run the Photo & Video app. 3.Select your desired storage device. 4.Select and view your desired photo or video.
  • Page 39 CONNECTING EXTERNAL DEVICES 1.Returns to the entire content list. 2.You can select other content by displaying the playlist while watching a video. 3.You can control basic video playback functions. 4.Rotates videos. Some models may not be supported. 5.360-degree videos can be viewed in 360 degrees. Using the 360°...
  • Page 40 CONNECTING EXTERNAL DEVICES Video H.264/AVC, MPEG-4 Audio AAC, AMR-NB, AMR-WB Video MPEG-2, MPEG-4, H.264/AVC, VP8, VP9, HEVC, AV1   Audio Dolby Digital, Dolby Digital Plus, AAC, PCM, MPEG-1 Layer I, II, MPEG-1 Layer III (MP3) Video H.264/AVC, MPEG-2, HEVC Audio MPEG-1 Layer I, II, MPEG-1 Layer III (MP3), Dolby Digital, Dolby Digital Plus, AAC, PCM, Dolby AC-4 Video...
  • Page 41 CONNECTING EXTERNAL DEVICES 1.Select the desired type of content list. 2.Select and delete the desired content. You cannot delete files that are shared from other devices. 3.Select content and add it to My Playlist. 4.You can copy content to a USB storage device. Some models may not be supported.
  • Page 42 CONNECTING EXTERNAL DEVICES 5.Select “OK” to save the settings. 6.Select the connected PC in the Home Dashboard app on the TV, and then select and play the file you want. To play on other operating systems or devices, refer to the manual of the operating system/device. Matters That Require Attention of Content Share Check your network settings if the content share option does not work properly.
  • Page 43: Making The Most Of Smart Tv

    MAKING THE MOST OF SMART TV Surfing the Internet on TV Using the Web Browser You can enter the website when you input the web address on the URL bar. If you input the search word, it will find the information about search word base on the search engine. Press the button on the remote control.
  • Page 44 MAKING THE MOST OF SMART TV Search Engines You can select a search engine to search for when entering a keyword in the address bar. Search engine settings may be subject to change without notice based on the supplier’s circumstances. Show Recommended Sites You can set whether or not to display a list of Recommended Sites on the new tab screen.
  • Page 45: Settings

    SETTINGS Quick Settings To Use Setting Function Quickly Set of light-weight controls quickly and simply such as Picture Mode, Sound Out, Sleep Timer and so on. Press the button on the remote control. You can set Picture Mode. You can set Sound Mode. You can choose Sound Out.
  • Page 46 SETTINGS Game Suitable picture for gameplay. Depending on the input signal, the available picture modes may be different. When watching online service content, the Picture Mode may be changed to match the content being shown. Picture Mode change may modify Energy Saving settings and it can affect energy consumption. You can adjust their settings manually in the Energy Saving menu.
  • Page 47 SETTINGS Dynamic Colour Adjusts the Colour and saturation of the picture to make the image more Colourful and lively. Gamma Adjusts the medium brightness of the picture. Select Low for a bright picture, select High1 or High2 for a dark picture or select Medium for medium brightness.
  • Page 48 SETTINGS You can adjust the horizontal/vertical/diagonal dimensions of the screen and align the screen horizontally/vertically by using Adjust Zoom Ratio and Adjust Screen Position. The configurable items differ depending on model. The picture may get distorted while zooming in or out. Selecting a different screen size from the original size may cause the image to look different.
  • Page 49 SETTINGS Instant Game Response Using Instant Game Response → →Picture→Additional Settings→Instant Game Response Set the HDMI port connected to the device to be On to enjoy games with the optimal video for the game. If the connected device does not support this function, it may not work properly. Set the HDMI ULTRA HD Deep Colour feature to On for the HDMI terminal connected to the gaming device to enable Instant Game Response.
  • Page 50 SETTINGS Sound Out Setting Sound Out → →Sound→Sound Out When Instant Game Response is set to On, audio delays may occur if you set Sound Out to WiSA Speakers/Optical/HDMI ARC. Switch to Internal TV Speaker or change → →Sound→Additional Settings→HDMI Input Audio Format to PCM.
  • Page 51 SETTINGS Some models may not be supported. If you connect the wired headphones while the TV is powered on, it automatically detects the wired headphones and redirects audio through them. Playing Audio through the TV’s Internal Speakers and External Audio Device Simultaneously Audio can be played through the multiple devices simultaneously.
  • Page 52 SETTINGS AV Sync Adjustment Adjusting AV Synchronization → →Sound→Additional Settings→AV Sync Adjustment Adjusts the synchronization of the sound from the speaker that is working. The closer to Greater than, the slower the audio output. Bypass, Outputs the broadcast signals or the sound from external devices without any audio delay. The audio may be output before the video because of the time the TV takes to process the video input.
  • Page 53 SETTINGS Manual Tuning To Use Manual Programme Tuning → →Programmes→Programme Tuning (Programme Tuning & Settings) →Manual Tuning This function is for manually searching and saving programmes. For digital broadcasting, signal strength and signal quality can be checked. Signal Test To Use the Signal Test →...
  • Page 54 SETTINGS Multi Feed → →Programmes→Multi Feed You can watch the desired angle on the TV through the broadcast that filmed from various angles. Some models may not be supported. HbbTV Learn More about HbbTV HbbTV (Hybrid Broadcast Broadband TV) is a new broadcasting standard that enables super-teletext type services, delivered by a broadcast TV programme, to be integrated or linked to online services delivered over broadband to a connected Smart TV.
  • Page 55 SETTINGS Connect via WPS PIN. This is a method to connect to an access point using a Wi-Fi Protected Setup-Personal Identification Number (WPS-PIN). Select the access point you want to connect to. Enter the PIN displayed on the access point’s Wi-Fi device. Advanced Wi-Fi Settings Once you connect to a wireless network, you can view connection information such as detailed IP address information.
  • Page 56 SETTINGS General Language Configuring Language Settings → →General→Language You can choose the menu language displayed on the screen and the audio language of the digital broadcast. Menu Language You can select one of the menu languages to be displayed on the screen. The language for the speech recognition will be automatically set to the selected language for the menu.
  • Page 57 SETTINGS Time → →General→Time You can check the time or configure related settings. Set Automatically The TV time is automatically set to the time of digital broadcasting information sent from the broadcasting station or the time sent from the server. Time / Date / Time Zone You can manually set the time and date if the automatically set current time is incorrect.
  • Page 58 SETTINGS TV Rating Locks Enabling TV Rating Locks This function operates according to information from the broadcasting station. Therefore if the signal has incorrect information, this function does not operate. Prevents children from watching certain adult’s TV programmes, according to the ratings limit set. Enter a password to watch a blocked programme.
  • Page 59 SETTINGS Resetting a Lost Password If you lose the password you set, you can reset it as follows: 1.Press the Settings button on the remote control. 2.Select All Settings icon General Safety. 3.Press Programmes Up→Programmes Up→Programmes Down→ Programmes Up on the remote control.
  • Page 60 SETTINGS No Signal Image Configuring the Screen When There Is No Signal → →General→Additional Settings→No Signal Image You can turn on or off the image displayed when there is no signal. On: The default image is displayed if there is no signal. Off: The No Signal message is displayed if there is no signal.
  • Page 61 SETTINGS Accessibility Audio Description Menu for the Visually Impaired → →Accessibility→Audio Description The contents on the screen will be described with voice for visually impaired viewers. You can use this function if the broadcasting company supports Audio Description for the visually impaired.
  • Page 62 SETTINGS Hard of Hearing To Set Hard of Hearing Press the button on the remote control. Select Accessibility. Set Subtitles to On. Set Hard of Hearing to On. A caption will be provided for the hearing-impaired. When the Hard of Hearing is turned On, it will be prioritized over the general captions. Some models may not be supported.
  • Page 63 SETTINGS You can check the details by selecting the desired item. If it supports shortcuts, you can launch the app. You can delete notifications. You can delete all notifications Additional Settings → →Support Additional Settings User Agreements These are the terms and conditions for privacy for the use of Smart TV-related services.
  • Page 64: Troubleshootin

    TROUBLESHOOTIN Perform Check-up with the Quick Help Perform Check-up with the Quick Help When the TV malfunctions, you can get help to solve the problem. Press Settings button on the remote control and select → Support→Quick Help. You can also long-press the number 9 button of the remote control to run the Quick Help. Optimisation Settings You can automatically check the overall status of your TV and view and change the recommended setting values.
  • Page 65 TROUBLESHOOTIN I cannot turn the TV on with the remote control. Please make sure your TV power plug is correctly connected to the outlet. Replace the batteries in the remote control. (Use alkaline batteries.) Check if there is an obstacle blocking the signal in front of the TV's remote control receiver. If there is an obstacle, such as a soundbar, in front of the receiver at the bottom of the TV, IR recognition may not work properly.
  • Page 66 TROUBLESHOOTIN A digitally broadcasted programme stops or its screen is broken. This happens when a signal is weak or reception is unstable. Adjust the antenna direction or check the cable connection. → →Programmes Programme Tuning (Programme Tuning & Settings) Manual Tuning If the signal strength is too low in Manual Tuning, contact the broadcasting station or management office to have the signals checked.
  • Page 67 TROUBLESHOOTIN Troubleshooting PC Connection Issues Troubleshooting PC Connection Issues Press and hold the button on your remote control. Select Edit in the upper right corner of Home Dashboard. In the Edit mode, set the icon of the HDMI terminal connected to the PC to PC to apply the video and aspect ratio settings that are aligned with the PC.
  • Page 68 TROUBLESHOOTIN Check that the resolution is supported. Check that the video codec is supported. Check that the frame rate is supported. I get a message saying “This audio is not supported” or the video is playing normally but the audio is not. Check that the file plays without any problems on the video player on a PC.
  • Page 69 TROUBLESHOOTIN Is Scheduled Recording possible even if the TV is off? Scheduled Recording starts and completes recording at the set time even if the TV is off. Scheduled Recording does not function if the TV's power plug is unplugged. Troubleshooting Network Connection Issues Troubleshooting Network Connection Issues If you experience any of the problems below while using the product, please check the following: There may be no problem with the product.
  • Page 70 TROUBLESHOOTIN If you can't complete this setting, refer to the router's user manual and the instructions provided by your Internet provider. If you are still unable to establish your configuration, consult your router’s manufacturer or your Internet service provider Troubleshooting LG Account Issues Troubleshooting LG Account Issues I’ve signed up for the membership on TV.
  • Page 71 TROUBLESHOOTIN You cannot save attachments or images. If the Use Block Ads feature is turned on, the area on the website that appears to show an ad will appear blank. If some content on the website is hidden and invisible, try setting Menu icons Settings Use Block Ads to Off in Web Browser.

This manual is also suitable for:

Le75l521

Table of Contents