
Related Manuals for PowerTech MP-4554


Summary of Contents for PowerTech MP-4554
- Page 1 45 WATT SOLAR KIT INSTRUCTION MANUAL MP-4554 Distributed by: Electus Distribution Pty. Ltd. 320 Victoria Road Rydalmere NSW 2116 Australia Phone: 1300 738 555 Facsimile: 1300 738 500 www.electusdistribution.com.au Made in China...
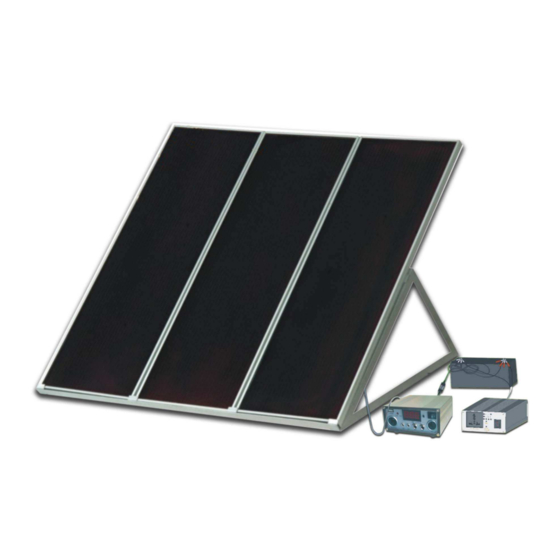
- Page 2 Specifications Panel Dimensions 315mm W x 925mm L x 22mm Thick Panel 15 watts per panel, 14.5 volts output (working) Peak Voltage 23.5 Voc (Open Circuit Volts) Nominal Voltage 14.5 volts battery output Adaptor Outlets from regulator 3 VDC, 6 VDC, 12 VDC, 12 VDC USB output 12VDC female CLA output Inverter female CLA output (for 12V inverter)
- Page 3 Solar Panels from the Regulator at night. 11. Stay alert. Watch what you are doing, use common sense. Do not operate any product when you are tired. 12. Check for damaged parts. Before using any product, any part that appears damaged should be carefully checked to determine that it will operate properly and perform its intended function.
- Page 4 5. Carefully place each Solar Panel (1) on the front of the Frame Assembly (6a-6d) so that the bottom of each panel fits into the slot on the bottom of the Frame Assembly (6a-6d). 6. Lock the two eye hooks on the back-center frame into the two protruding bolts on the Top Link Bar (6d). Caution: If the unit is to be mounted on a rooftop, always be especially careful when climbing ladders and walking on sloped roofs.
- Page 5 3. Never leave the battery (not included) unattended while charging. When the battery (not included) is fully charged, the reading on the voltage display will show “13” or above. Note: the voltage display will have to be turned on in order to monitor the batter voltage.
- Page 6 4. Plug the appropriate plug on the Multi Purpose Adaptor (5) into the appliance. The adaptor has 3 Volt DC, 6 Volt DC output. 5. Insert the plug on the other end of the wire attached to the Multi Purpose Adaptor (5) into the appropriate DC Outlet on the Regulator (2).
Need help?
Do you have a question about the MP-4554 and is the answer not in the manual?
Questions and answers