Table of Contents
Advertisement
Available languages
Available languages
Quick Links
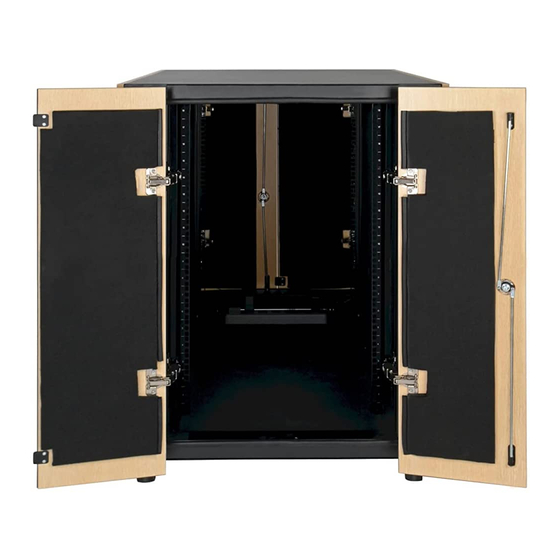
Quiet Rack Enclosure
with Sound Suppression
PROTECT YOUR INVESTMENT!
Register your product for quicker service and ultimate peace of mind.
You could also win an ISOBAR6ULTRA surge protector-a $100 value!
Copyright © 2018 Tripp Lite. All trademarks are the sole property of their respective owners.
Owner's Manual
SmartRack
Models: SRQ18U, SRQ24U
2
2
3
4
4
4
5
6
6
6
www.tripplite.com/warranty
1111 W. 35th Street, Chicago, IL 60609 USA • www.tripplite.com/support
®
1
7
7
8
8
8
9
10
19
Advertisement
Chapters
Table of Contents

Related Manuals for Tripp Lite SmartRack


Summary of Contents for Tripp Lite SmartRack
-
Page 1: Table Of Contents
Register your product for quicker service and ultimate peace of mind. You could also win an ISOBAR6ULTRA surge protector—a $100 value! www.tripplite.com/warranty 1111 W. 35th Street, Chicago, IL 60609 USA • www.tripplite.com/support Copyright © 2018 Tripp Lite. All trademarks are the sole property of their respective owners. -
Page 2: Important Safety Instructions
SAVE THESE INSTRUCTIONS All sections of this manual contain instructions and warnings that should be followed during the installation and use of the SmartRack Enclosures described in this manual. Read all instructions and warnings thoroughly before attempting to move, install or use the SmartRack Enclosures described in this manual. -
Page 3: Feature Identification
Feature Identification Front View Rear View Locking Front Doors with Foam Sound-Dampening Baffles Mounting Rails (Provide horizontal and vertical mounting points for equipment.) Cool-Air Intakes Side Panels with Foam Sound-Dampening Baffles Note: Side panels are not removable. Locking Rear Doors with Foam Sound-Dampening Baffles Power Strip (for use with Exhaust Fans) Brush Strip Plate Exhaust Fans... -
Page 4: Enclosure Installation
, then remove the heavy plastic bag surrounding the enclosure Examine the enclosure for any damage or loose parts. Confirm that all parts are present. If anything is missing or damaged, contact Tripp Lite for assistance. Do not attempt to use the enclosure if it has been damaged. -
Page 5: Placement
Then attach the bracket to secure mounting points in the floor using user-supplied hardware or Tripp Lite's SmartRack Bolt-Down Kit (model: SRBOLTDOWN). Note: Do not mount the bracket to the rear end of the unit. Doing so will obstruct the brush strip plate and prohibit... -
Page 6: Ground Connection
Enclosure Installation Ground Connection All enclosure components are grounded to the enclosure frame. Use the ground points located at the front or rear of the enclosure to connect an 8 AWG (3.264 mm) wire to your facility's earth ground connection. WARNING: Attach each enclosure to earth ground separately. Do not use the enclosure without an earth ground connection. -
Page 7: Equipment Installation
Equipment Installation WARNING: Do not install equipment until you have stabilized the enclosure. Install heavier equipment first and install it toward the bottom of the enclosure. Install equipment starting from the bottom of the enclosure and proceeding toward the top of the enclosure - never the reverse. If using sliding equipment rails, be careful when extending the rails. -
Page 8: Operation
Service Your Tripp Lite product is covered by the warranty described in this manual. A variety of Extended Warranty and On-Site Service Programs are also available from Tripp Lite. For more information on service, visit www.tripplite.com/support. Before returning your product for service, follow these steps: 1. -
Page 9: Warranty And Product Registration
Regulatory Compliance Identification Numbers For the purpose of regulatory compliance certifications and identification, your Tripp Lite product has been assigned a unique series number. The series number can be found on the product nameplate label, along with all required approval markings and information. When requesting compliance information for this product, always refer to the series number. The series number should not be confused with the marketing name or model number of the product. -
Page 10: Español
Conexión a Tierra Français Configuración del Gabinete Ajuste de los Rieles de Instalación 15 1111 W. 35th Street, Chicago, IL 60609 EE. UU. • www.tripplite.com/support Copyright © 2018 Tripp Lite. Todas las marcas registradas son propiedad de sus respectivos propietarios. -
Page 11: Instrucciones De Seguridad Importantes
CONSERVE ESTAS INSTRUCCIONES Todas las secciones de este manual contienen instrucciones y advertencias que deben observarse durante la instalación y uso de los Gabinetes SmartRack aquí descritos. Lea cuidadosamente todas las instrucciones y advertencias antes de intentar mover, instalar o utilizar los Gabinetes SmartRack descritos en este manual. -
Page 12: Identificación De Características
Identificación de Características Vista Frontal Vista Posterior Puertas Delanteras con Cerradura con Amortiguadores de Sonido de Espuma Rieles de Instalación (Proporcionan puntos de instalación horizontal y vertical para los equipos.) Entradas de Aire Fresco Paneles Laterales con Amortiguadores de Sonido de Espuma Nota: Los paneles laterales no son removibles. -
Page 13: Instalación Del Gabinete
. Examine el gabinete para detectar cualquier daño o parte floja. Confirme que están todas las partes. Si falta algo o está dañado, póngase en contacto con Tripp Lite para obtener ayuda. No intente usar el gabinete si ha sido dañado. -
Page 14: Colocación
Use una llave española de 13 mm para conectar el soporte a los puntos de instalación del soporte en el frente del gabinete. Luego coloque el soporte para fijar puntos de instalación en el piso utilizando los accesorios suministrados por el usuario o juego de pernos SmartRack de Tripp Lite (modelo: SRBOLTDOWN). -
Page 15: Conexión A Tierra
Instalación del Gabinete Conexión a Tierra Todos los componentes del gabinete son conectados a tierra en el bastidor del gabinete. Utilice los puntos de conexión a tierra ubicados en la parte delantera o trasera del gabinete para conectar un cable 8 AWG [Ø 3.264 mm] a la conexión de tierra física de la instalación. ADVERTENCIA: Conecte a tierra por separado cada gabinete. -
Page 16: Instalación Del Equipo
Instalación del Equipo ADVERTENCIA: No instale el equipo hasta que haya estabilizado el gabinete. Instale primero los equipos más pesados e instálelos hacia la parte inferior del gabinete. Instale los equipos a partir de la parte inferior del gabinete y proceda hacia la parte superior del gabinete - nunca al revés. Si utiliza guías de equipos deslizantes, tenga cuidado al extender los rieles. -
Page 17: Operación
Cualquier daño (directo, indirecto, especial o consecuencial) al producto incurrido durante el embarque a Tripp Lite o un Centro de Servicio Autorizado de Tripp Lite no está cubierto bajo la garantía. Los productos embarcados a Tripp Lite o un Centro de Servicio Autorizado de Tripp Lite deben tener cargos de transporte prepagados. -
Page 18: Garantía
Cumplimiento de las normas de los números de identificación Para fines de identificación y certificación del cumplimiento de las normas, su producto Tripp Lite tiene asignado un número de serie único. Puede encontrar el número de serie en la etiqueta de la placa de identificación del producto, junto con los símbolos de aprobación e información requeridos. -
Page 19: Français
Connexion à la terre Español Configuration du boîtier Réglage des rails de montage 1111 W. 35th Street, Chicago, IL 60609 USA • www.tripplite.com/support Droits d'auteur © 2018 Tripp Lite. Toutes les marques de commerce sont la propriété exclusive de leurs propriétaires respectifs. -
Page 20: Consignes De Sécurité Importantes
SmartRack décrits dans ce manuel. Lire attentivement toutes les instructions et les avertissements avant d'essayer de déplacer, d'installer ou d'utiliser les boîtiers SmartRack décrits dans ce manuel. Le non-respect de ces instructions et de ces avertissements créera un risque de lésions corporelles et de dommages matériels, et pourrait annuler la garantie. -
Page 21: Identification Des Caractéristiques
Identification des caractéristiques vue avant vue arrière Portes avant verrouillables avec chicanes en mousse pour l'amortissement du bruit Rails de montage (fournissent des points de montage horizontaux et verticaux pour l'équipement) Entrées d'air frais Panneaux latéraux avec chicanes en mousse pour l'amortissement du bruit Remarque : Les panneaux latéraux ne sont pas amovibles. -
Page 22: Installation Du Boîtier
Confirmer qu'il ne manque aucune pièce. Si quoi que ce soit manque ou est endommagé, contacter Tripp Lite pour obtenir de l'aide. Ne pas tenter d'utiliser le boîtier s'il a été endommagé. -
Page 23: Placement
Utiliser une clé à fourche de 13 mm pour connecter le support aux points de montage du support à l'avant du boîtier. Fixer ensuite le support pour fixer les points de montage dans le plancher en utilisant de la quincaillerie fournie par l'utilisateur ou la trousse de fixation SmartRack de Tripp Lite (modèle : SRBOLTDOWN). -
Page 24: Connexion À La Terre
Installation du boîtier Connexion à la terre Toutes les parties du boîtier sont mises à la masse sur le cadre du boîtier. Utiliser les points de mise à la masse à l'avant ou à l'arrière du boîtier pour connecter un fil de 8 AWG (3,264 mm) à la connexion de mise à la masse de l'établissement. AVERTISSEMENT : Fixer séparément chaque boîtier à une mise à la masse. -
Page 25: Installation De L'équipement
Installation de l'équipement AVERTISSEMENT : Ne pas installer l'équipement avant d'avoir stabilisé le boîtier. Installer d'abord l'équipement le plus lourd et l'installer dans la partie inférieure du boîtier. Installer l'équipement à partir de la partie inférieure du boîtier en continuant vers le haut du boîtier – jamais le contraire. -
Page 26: Fonctionnement
(directs, indirects, particuliers ou consécutifs) encourus par le produit lors du transport à Tripp Lite ou à un service autorisé Tripp Lite ne sont pas couvert par la garantie. Les frais liés au transport des produits expédiés à Tripp Lite ou à un centre de service autorisé Tripp Lite doivent être entièrement payés d'avance. -
Page 27: Garantie
Numéros d'identification de conformité aux règlements À des fins de certification et d’identification de conformité aux règlements, votre produit Tripp Lite a reçu un numéro de série unique. Ce numéro se retrouve sur la plaque signalétique du produit, avec les inscriptions et informations d'approbation requises. - Page 28 1111 W. 35th Street, Chicago, IL 60609 USA • www.tripplite.com/support 18-05-346 93-352E_revB...
Need help?
Do you have a question about the SmartRack and is the answer not in the manual?
Questions and answers