Makita DUR187U Original Instructions Manual
Cordless grass trimmer
Hide thumbs
Also See for DUR187U:
- Instruction manual (112 pages) ,
- Instruction manual (21 pages) ,
- Instruction manual (93 pages)

Related Manuals for Makita DUR187U


Summary of Contents for Makita DUR187U
- Page 1 INSTRUCTION MANUAL Cordless Grass Trimmer DUR187U DUR187L DUR188U DUR188L Read before use.
- Page 2 SPECIFICATIONS Model: DUR187U DUR187L DUR188U DUR188L Type of handle Bike handle Loop handle Bike handle Loop handle No load speed 4,000/5,000/6,000 min Overall length 1,791 mm (without cutting tool) Nylon cord diameter 2.0 - 2.4 mm Applicable cutting tool and...
- Page 3 Before using the machine and after any Dress Properly. The clothing worn should be impact, check for signs of wear or damage and functional and appropriate, i.e. it should be repair as necessary. tight-fitting but not cause hindrance. Do not wear either jewelry or clothing which could Take care against injury from any device become entangled with high grass.
-
Page 4: Battery Cartridge
before making any adjustments, chang- Check damaged parts before further use of — the tool. A guard or other part that is damaged ing accessories or storing; should be carefully checked to determine — whenever the tool starts vibrating that it will operate properly and perform its unusually;... - Page 5 Follow your local regulations relating to dis- posal of battery. SAVE THESE INSTRUCTIONS. CAUTION: Only use genuine Makita batteries. Use of non-genuine Makita batteries, or batteries that have been altered, may result in the battery bursting causing fires, personal injury and damage. It will also void the Makita warranty for the Makita tool and charger.
-
Page 6: Table Of Contents
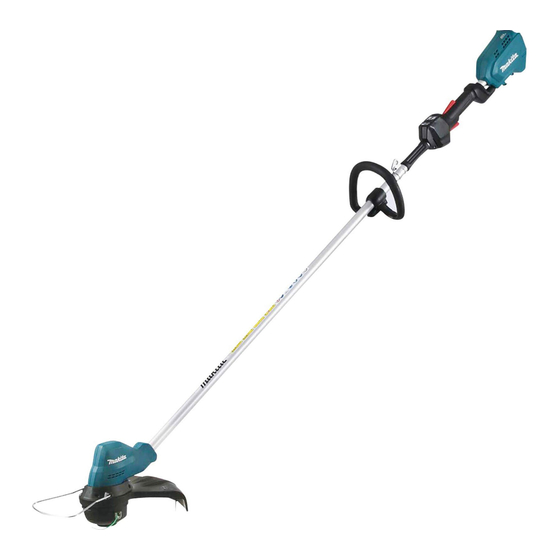
PARTS DESCRIPTION 9 10 Battery cartridge Lock-off lever Switch trigger Hanger Handle Protector (cutting tool Wire guard Lock lever guard) (DUR188U and DUR188L only) Joint cover Speed indicator Auto speed control (DUR188U and (DUR188U and indicator DUR188L only) DUR188L only) Power lamp Main power button Reverse button Shoulder harness * The shape of the protector varies depending on the country. 6 ENGLISH... - Page 7 FUNCTIONAL Status Indicator lamps Blinking DESCRIPTION Overload WARNING: Always be sure that the tool is switched off and the battery cartridge is removed before adjusting or checking function on the tool. Overheat Failure to switch off and remove the battery cartridge may result in serious personal injury from accidental start-up.
-
Page 8: Lock-Off Lever
To start the tool, grasp the handle (the lock-off lever is released by the grasp) and then pull the switch trigger. Indicator lamps Remaining To stop the tool, release the switch trigger. capacity DUR187U and DUR188U Lighted Blinking 75% to 100% 50% to 75% 25% to 50%... -
Page 9: Reverse Button
Installing the handle For DUR187U and DUR188U only Insert the shaft of the handle into the grip. Align the screw hole in the grip with the one in the shaft. ► 1 . Reverse button Tighten the screw securely. -
Page 10: Lock Lever (Dur188U And Dur188L Only)
► 1 . Grip 2. Screw 3. Handle ► 1 . Lock lever 2. Joint cover 3. Pipe Place handle between handle clamp and handle Make sure that the surface of the lock lever is parallel holder. Adjust the handle to an angle that provides a to the pipe. comfortable working position and then secure with hex Turn the lever to the direction of the arrow shown socket head bolts. - Page 11 Installing the guard WARNING: Never use the tool without the guard illustrated in place. Failure to do so can cause serious personal injury. CAUTION: Take care not to injure yourself on the cutter for cutting the nylon cord. NOTE: The shape of the protector varies depending on the country.
- Page 12 Make sure to remove the hex personal injury. wrench after installation. CAUTION: Make sure to remove the hex wrench after installation. NOTICE: Be sure to use genuine Makita nylon cutting head. NOTICE: Be sure to use genuine Makita plastic blade. 12 ENGLISH...
- Page 13 ► 1 . Hex socket head bolt 2. Handle Adjust the handle and hanger position to obtain confort- able handling of the tool. Loosen the hex socket head bolt on the hanger. Move For DUR187U and DUR188U the hanger to a comfortable working position and then Loosen the hex socket head bolts on the bottom of the tighten the bolt.
- Page 14 DUR187U and DUR188U Hex wrench storage CAUTION: Be careful not to leave the hex wrench inserted in the tool head. It may cause injury and/or damage to the tool. When not in use, store the hex wrench as shown in the figure to keep it from being lost. DUR187L and DUR188L ► 1 . Hex wrench For DUR187L and DUR188L only Attachment of shoulder harness...
- Page 15 DUR187U and DUR188U WARNING: Make sure that the cover of the nylon cutting head is secured to the housing properly as described below. Failure to properly secure the cover may cause the nylon cutting head to fly apart resulting in serious personal injury.
- Page 16 ► 1 . Arrow on the protector 2. Arrow on the blade ► 1 . Spool 2. Housing 3. Eyelet To maintain product SAFETY and RELIABILITY, repairs, any other maintenance or adjustment should Align the protrusion on the underside of the cover be performed by Makita Authorized or Factory Service with the slots of the eyelets. Then push the cover firmly Centers, always using Makita replacement parts. onto the housing to secure it. 16 ENGLISH...
- Page 17 CAUTION: These accessories or attachments are recommended for use with your Makita tool specified in this manual. The use of any other accessories or attachments might present a risk of injury to persons. Only use accessory or attachment for its stated purpose.
- Page 20 Makita Corporation 885546C5 20170206 www.makita.com...
Need help?
Do you have a question about the DUR187U and is the answer not in the manual?
Questions and answers