Table of Contents
Advertisement
Advertisement
Table of Contents

Related Manuals for Focustronic Mastertonic

Summary of Contents for Focustronic Mastertonic
- Page 1 User manual English v 3.2...
-
Page 2: Table Of Contents
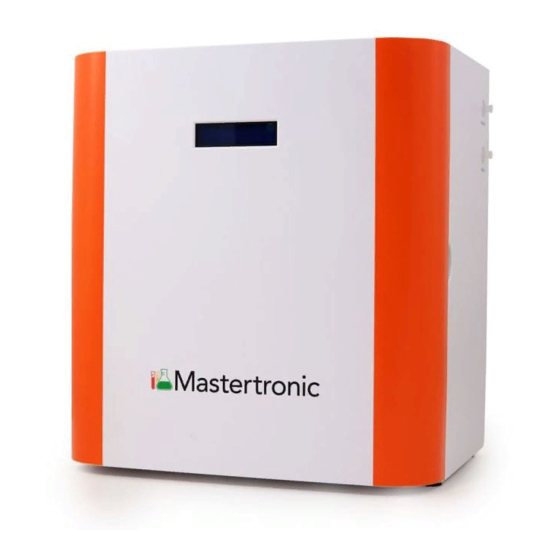
Introduction Basic Philosophy Set-up-procedure Placement Connecting external hoses Sample Water IN RO Water IN Waste Water OUT Placement of Magnetic stirrer bars Hardware preparations Establishing software connection Mount needles and syringe Fill up the reagents Calibrating Stepper pump (Sample water pump) Pump A (RO water pump) Syringe OLI calibrate... - Page 3 Each unit of Mastertronic carries a limited factory warranty for 12 months upon registration. The online registration must be done within 14 days after purchase in order to be deemed valid. FOCUSTRONIC will also send updated information such as firmware updates or new features via the registered email account.
-
Page 4: Introduction
Introduction Congratulations for choosing this highly advanced device, measuring nitrate, phosphate, calcium, magnesium, alkalinity and OLI, and also has an inbuilt possibility for measuring even more elements in the future. Please read the whole manual very carefully before setting up and using the device. - Page 5 KH test (Alkatronic). In MT the alkalinity test is limited to 1 scheduled test per day, and therefore the KH from MT will not be able to control the DT. Congratulations on your choice of Mastertronic, fulfilling a keystone to bring coral reefing to a higher level than ever before! /Focustronic...
-
Page 6: Set-Up-Procedure
Set-up-procedure When setting up this device for first time, follow every point below very carefully. Also refer to the last page with an overall picture of all the internal items. Placement Make sure you place the Mastertronic in a location that allows you to easily manage regular maintenance. -
Page 7: Hardware Preparations
The app is running on the internet/wifi. Do NOT power on the unit yet! If this is your first Focustronic product and have no account yet, start with step I-III (users with existing accounts can start from point 1): Download the Focustronic All in One app from Google Play or App Store. -
Page 8: Mount Needles And Syringe
to find Mastertronic 6. Mastertronic will show up in ”other networks” with its serial number ”Mxxxxxxxx” 7. Connect to Mastertronic’s WIFI (Mxxxxxxxx) and use the password: mtpassword. 8. If you have Android it may ask you if you want to stay connected despite no internet access. -
Page 9: Fill Up The Reagents
3. Put needle through the needle stabilisator (the white plastic part) and mount needle and stabilisator into it fittings according to the pics. Now you can proceed with calibration and fill up reagents. Fill up the reagents Mastertronic uses the high end reagents that exist on the market, and we have tested and chosen those that are best for this purpose. - Page 10 The ”active” position is slightly to the carousel. left of center. Assign the reagents for a parameter: 1) Open the Focustronic app and choose Mastertronic in the device list from the Dashboard 2) Choose the parameter, and choose Assign reagent vials. Choose your brand of reagent refill.
-
Page 11: Calibrating
Note: The Mastertronic reagent labels (A,B,C,1,2,3) are the same as the manual test kit labels. Note: The parameter needs at least one scheduled measure to show the assigned reagents and its remain volume automatically. Repeat the procedure for each parameter. Table : This shows which reagent brand you shall use for each parameter. -
Page 12: Stepper Pump (Sample Water Pump)
Stepper pump (Sample water pump) Pump A (RO water pump) 1) Open the Mastertronic app, and enter calibrate, and choose ‘Stepper' or ‘Pump A' 2) Press ”Ready”. Now machine will perform a procedure and just wait until the machine completely has stopped. 3) Now carefully check the feeding hoses (see pic) to the chamber are fully primed. -
Page 13: Syringe
Syringe 1) Open the Mastertronic app, and enter “calibrate", and choose “Syringe” 2) Press ”Ready”. 3) Now press ”Start/Redo” and the syringe will move to a certain position. 4) Read the syringe very carefully (note that every line corresponds to 0.02ml), and enter the value (for instance 0.64 ml) in the app and save. -
Page 14: Syringe
0.60 ml. 5) End by pressing ”Empty Syringe” Dashboard The Dashboard is the Home Screen in the Focustronic app. Here you will get an overview in graphical form of all the parameters. By choosing one of the headline... -
Page 15: Parameters Menu
“Nutrients” , “Build elements” you will see summarising graphs concerning all the parameters your Focustronic system has measured. In same page you also always see the values of the latest measurements concerning all parameters your device/s has measured. At the bottom of the Dashboard you see the device list, where you access all the units in more detail. - Page 16 Action Mode If you own one of our power sockets or a Dosetronic, you can let these units do actions based on the measurements from Mastertronic. If you want these interactions then set action mode to ON, and set the reference values. Mastertronic will now interact with Dosetronic/PowerTronic by changing an assigned channel (see below) or open/close an assigned socket, when the values of the parameter are outside the reference values.
- Page 17 Direction Mode Minus (-) direction Mode A value above high ref value, will lead to a decrease of the dosing schedule in the assigned Dosetronic channel. And if a power socket is assigned, a closure of that socket. A value below low ref value, will lead to an increase of the dosing schedule in the assigned Dosetronic-channel.
- Page 18 Ex: You are in the parameters menu for Nitrate. Action Mode ON, and Automatic Mode ON. You assign Dosetronic channel 1, Minus Direction Mode (default) , and Dosetronic channel 2, Plus Direction Mode. You assign socket 1, Plus Direction Mode. In channel 1 you dose Nitrate. In channel 2 you dose organic carbon.
-
Page 19: Maintenance Functions
As long as you have reagents for NO measurements you also have it for NO measurements. Maintenance functions These functions you find under ”Maintenance”, and most of them you don't use regularly. Empty Hoses and Chambers Normally you will never use this function as Mastertronic takes care of all priming and emptying procedures, also when calibrating. -
Page 20: Maintenance Position
Maintenance position Maintenance position is used when you change the hose of the stepper pump, or clean the chamber. Standby position Standby position is ideally never used, as all algorithms and failsafes always make sure the needle is in the correct position. So this function is just to take the needle to the highest position above the reaction chamber in case of any unpredicted errors Carousel Movement... -
Page 21: Maintenance
A,B,C every 12 months. Put the needle in ”maintenance position” , when changing the stepper hose, and in ”standby position” when changing hoses in pump A-C. For tips on how to change the hoses check out www.Focustronic.net for a video. Recalibration Calibration is to be done around 8 weeks. -
Page 22: Replace Needle And Syringe
• In LCD now you see a message prompt you to manually fill the reaction chamber with 11 ml of rinsing solution. Be careful to not spill any water outside the chamber! The rinsing solution shall be the same as you use for cleaning pH-probes, a 0.1M HCL solution. -
Page 23: Frequently Asked Questions
Frequently asked questions Unit does not respond Check if the unit is online. If not, then check the router handles 2.4 GHZ, and if a firewall in the router is blocking the communication. LCD says that leakage has been detected Mastertronic has an inbuilt leakage sensor for security reasons. - Page 24 6) Now, use Mastertronic as usual and it should work correct. IF you despite actions above experience that Mastertronic is measuring obviously wrong (Like always very very low values), then sensor may need to be dried some more and then proceed with the additional steps below: A.
-
Page 25: The Waste Hose Is Not Fully Emptied During Calibration Process
The waste hose is not fully emptied during calibration process During the calibration process the last step is emptying pump/s B and C by delivering the water to your collecting cylinder via the waste hose. These pumps runs with huge margins, so in normal case this is 100% automatic. -
Page 26: Sometimes Po4 Seems To Be Too High
The values, specially KH, Mg, Ca, are at the lowest or highest ranges all time. As long as MT is correct calibrated, it has its accuracy and precision specified below. But if you notice that the values are always very 790 - 1580 mg/l close at the max or min limits, then it could be something wrong. -
Page 27: Appendix
Appendix OLI is our own parameter designed by Focustronic, and has a range between 0-200 Units. It measures the yellow discolouration of water, but also other colours as a sign of organic waste substances in the water. Until now it has been a... -
Page 28: Reagent Info
, and Focustronic will send out separate instructions how to do that. Reagent info Chart below explains how many test kits you have to buy to be able to load all vials to 20 ml, and how many tests MT can do/manual test kit. -
Page 29: If I Suspect Mt Is Not Measure Correct, Or Just Want To Double Check
If I suspect MT is not measure correct, or just want to double check If Mastertronic is correctly calibrated by the user and you use accurate reagents, the accuracy is as stated as in user manual. Here is some tips and things to check if you suspect a value is not correct from 4) Just do a manual test with exact same reagent (same batch and preferable from same bottles) as in Mastertronic. - Page 30 Then go through this check list on this page . If everything seems good besides Mg that seems to be too high first of all, its probably true values of reasons stated below: • Mg is abundant and that means it follows salinity. Small changes in salinity means significant changes of Mg •...
-
Page 31: Contents In The Box
Contents in the Box • Main unit • 3 External Hoses, each 2 meter • Needle stabilisator • AC/DC adapter • 2 Microfilter • Needles and syringes • 2 magnetic bars: one for reaction chamber (10x5 mm) , one extra for reagent vials (15x5 mm). -
Page 32: Measurements Data
Measurements data Accuracy +-0.5 mg/l (within range 0-20 mg/l) +-0.005 mg/l (within range 0-0.5 mg/l) +-0.005 mg/l +-20 mg/l +-6 mg/l +-0.15 dKH +- 0.01 mg/l Precision 0.2 mg/l 0.002 mg/l 0.005 mg/l 20 mg/l 6 mg/l 0.10 dKH +- 0.005 mg/l Resolution 0.01 mg/l 0.001 mg/l... -
Page 33: Explanation Of Internal Items
Explanation of internal items 1) Pump A 7) Reaction chamber 2) Pump B 8) Rinsing chamber 3) Pump C 9) Reagent carousel 4) Stepper 10) Transport screw 5) Needle stabilisator 11) SD card slot 6) Syringe 12) Leakage sensor Author: Jonas Roman Cred to Pete Bird for language corrections...
Need help?
Do you have a question about the Mastertonic and is the answer not in the manual?
Questions and answers