Table of Contents
Advertisement
Available languages
Available languages
Quick Links
Advertisement
Chapters
Table of Contents

Subscribe to Our Youtube Channel
Related Manuals for SHE SHE12KL2001F


Summary of Contents for SHE SHE12KL2001F
- Page 1 BEDIENUNGSANLEITUNG Mobiles Klimagerät SHE12KL2001F HERZLICHEN GLÜCKWUNSCH! VIELEN DANK, DASS SIE SICH FÜR EIN PRODUKT VON SHE ENTSCHIEDEN HABEN. Diese Bedienungsanleitung gibt es in folgenden Sprachen Seite 2 – 20 DEUTSCH Seite 21 – 38 ENGLISH...
-
Page 2: Table Of Contents
Inhaltsverzeichnis Wichtige Informationen zur Sicherheit, Standort und zum elektrischen 3 – 5 Anschluss Recycling, Entsorgung, Konformitätserklärung Beschreibung des Geräts Inbetriebnahme Vorbereitung zur Verwendung 7 – 8 Installation Bedienfeld und Fernbedienung Bedienfeld Fernbedienung 11 – 13 Funktionen einstellen Schutzfunktionen Tipps zur Richtigen Anwendung Wartung und Reinigung Luftfilter reinigen Reinigen des Gehäuses... -
Page 3: Wichtige Informationen Zur Sicherheit, Standort Und Zum Elektrischen Anschluss
LESEN SIE BITTE DIE BEDIENUNGSANLEITUNG SORGFÄLTIG DURCH BEVOR SIE MIT MONTAGE, INSTALLATION, BEDIENUNG ODER WARTUNG BEGINNEN. SCHÜTZEN SIE SICH SELBST UND ANDERE, INDEM SIE DIE SICHERHEITSHINWEISE BEFOLGEN. DIE NICHTBEACHTUNG VON ANWEISUNGEN KÖNNTE ZU PERSONEN UND/ODER SACHSCHÄDEN UND/ODER ZUM VERLUST DES GARANTIEANSPRUCHS FÜHREN! WICHTIGE INFORMATIONEN ZUR SICHERHEIT, STANDORT UND ZUM ELEKTRISCHEN ANSCHLUSS. - Page 4 Benutzen Sie das Klimagerät nicht in der Nähe von Wasser oder starker Feuchtigkeit, z.B. im feuchten Keller, neben Schwimmbecken, Badewanne oder Dusche. Achten Sie darauf, dass kein Wasser in das Gerät eindringt. Stellen Sie keine schweren oder heißen Gegenstände auf das Gerät und decken Sie das Gerät nie ab.
-
Page 5: Recycling, Entsorgung, Konformitätserklärung
Für weitere Information wenden Sie sich bitte an Ihren Händler oder die örtlichen Behörden. KONFORMITÄTSERKLÄRUNG Hiermit bestätigen wir, dass dieser Artikel den grundlegenden Anforderungen, Vorschriften und Richtlinien der EU entspricht. Die ausführliche Konformitätserklärung können Sie jederzeit unter folgendem Link einsehen: www.she.at.at/downloads/doc/she12kl2001f.pdf Irrtümer und technische Änderungen vorbehalten. www.she.at Seite 5 von 38... -
Page 6: Beschreibung Des Geräts
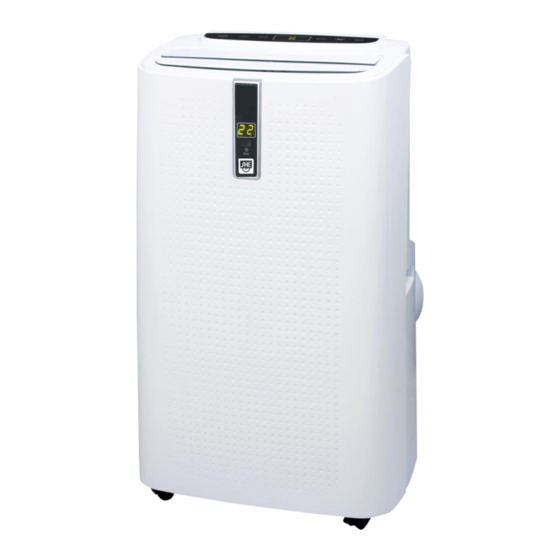
BESCHREIBUNG DES GERÄTES BEZEICHNUNG DER EINZELNEN TEILE 1. Bedienfeld 2. Signalempfänger Fernbedienung + Display 3. Luftauslassgitter 4. Laufrollen 5. Obere Abdeckung 6. Luftleitlamellen 7. Handgriff 8. Gitter + darunter liegender Luftfilter 9. Gehäuse 10. Öffnung für den Abluftschlauch 11. Luftfilter 12. -
Page 7: Inbetriebnahme
INBETRIEBNAHME VORBEREITUNG ZUR VERWENDUNG WICHTIG! Lassen Sie das Gerät mindestens 2 Stunden aufrecht stehen, bevor Sie es das erste Mal in Betrieb nehmen und vergewissern Sie sich, dass der Kondenswasserauslass (16) gut verschlossen ist. Stellen Sie das Gerät bei einer richtig geerdeten Steckdose auf einen ebenen Untergrund in der Nähe des Fensters auf. - Page 8 Der Abluftschlauch ist genau auf dieses Gerät abgestimmt. Verlängern Sie ihn nicht und ersetzen Sie ihn auch nicht durch einen anderen Schlauch, andernfalls könnten Sie das Gerät beschädigen. Empfehlung von SHE Wir empfehlen Ihnen einen SHE Hot-Air Stop bei der Installation Fenstern, Balkontüren oder Schiebetüren.
-
Page 9: Bedienfeld Und Fernbedienung
BEDIENFELD UND FERNBEDIENUNG BEDIENFELD 1. Beschreibung des Bedienfelds 1. TIMER 2. FAN Gebläsestufe 3. UP Erhöhen 4. Display mit Kontrollleuchten 5. DOWN Senken 6. MODE 7. POWER 2.+3. SLEEP 1. Display (zeigt Temperatur an) 2. Signalempfänger 3. Wasserstandsanzeige Seite 9 von 38... -
Page 10: Fernbedienung
FERNBEDIENUNG 1. Fernbedienung vorbereiten – Batterien einlegen oder tauschen Bitte beachten Sie die folgenden Anweisungen: 1. Entfernen Sie die Abdeckung auf der Rückseite der Fernbedienung. 2. Legen Sie nun 2x Batterien vom Typ „A“ ein Um die Batterien richtig einzulegen, beachten Sie dazu die Hinweise auf der Innenseite des Batteriefachs. -
Page 11: Funktionen Einstellen
FUNKTIONEN EINSTELLEN Sie können alle Funktionen direkt am Gerät als auch mithilfe der Fernbedienung einstellen. Je nach eingestellter Funktion leuchten sowohl die Kontrollleuchten auf dem Display des Bedienfelds auf als auch die Symbole auf dem Display der Fernbedienung. GERÄT EINSCHALTEN 1. - Page 12 Entfeuchtungs-Modus Optimal zur Reduzierung der Feuchtigkeit im Raum (z.B.: im Frühling und Herbst, für feuchte Räume, während Regenperioden usw.). GERÄT FERNBEDIENUNG Drücken Sie die MODE-Taste bis die „DRY“- -Taste bis die „DRY“- Drücken Sie die Kontrollleuchte Bedienfeld Kontrollleuchte Bedienfeld aufleuchtet. aufleuchtet.
- Page 13 Temperatur und Gebläsestufe. (z.B.: Kühlen, 25°C und hohe Gebläsestufe). 2. Programmiertes Ausschalten GERÄT FERNBEDIENUNG Während das Gerät eingeschalten ist: Drücken Sie „TIMER“ Drücken Sie „ “ Benutzen Sie die Tasten und , um die Vorlaufzeit (1-24 Stunden) einzustellen. Sobald die eingegebene Zeit abgelaufen ist, schaltet sich das Gerät automatisch ab SLEEP Diese Funktion ist vor allem für den Betrieb des Geräts während der Nacht nützlich, da es seine Leistung schrittweise reduziert.
-
Page 14: Schutzfunktionen
SCHUTZFUNKTIONEN Das Klimagerät verfügt über verschiedene Schutzfunktionen. 1. Frostschutzfunktion: Im Kühl-, Entfeuchtungs- und Energiesparmodus wird die Maschine automatisch in einen Schutzstatus versetzt, wenn die Temperatur im Abluftschlauch zu niedrig ist. Sobald die Temperatur wieder ansteigt, versetzt sich das Gerät wieder automatisch in den Normalbetrieb. -
Page 15: Wartung Und Reinigung
WARTUNG UND REINIGUNG LUFTFLITER REINIGEN Um eine effiziente Funktion des Klimagerätes sicherzustellen, sollten Sie den Luftfilter nach jeder Betriebswoche reinigen. Die Luftfilter befinden sich im Lufteintrittsgitter. Schalten Sie das Gerät vor der Reinigung Schrauben aus, warten Sie einige Minuten und ziehen Sie dann den Stecker, um das Gerät vom Gitter elektrischen Netz zu trennen. -
Page 16: Wassertank Entleeren & Permanenter Wasserablauf
WASSERTANK ENTLEEREN Das Gerät besitzt ein automatisches Wasserverdampfungssystem. Durch die Zirkulation des Kondenswassers wird der Kompressor gekühlt, was nicht nur die Kühlleistung verbessert, sondern auch Energie spart. Falls der Wassertank trotzdem voll ist, erscheint dies am Display auf der Vorderseite des Geräts und der Kompressor stoppt automatisch. -
Page 17: Tätigkeiten Zu Saisonbeginn/-Ende
TÄTIGKEITEN ZU SAISONBEGINN/- ENDE TÄTIGKEITEN ZU SAISONENDE Entleeren Sie sorgfältig den Kondenswasserbehälter zur Gänze in ein geeignetes Gefäß wie im Abschnitt „Wassertank entleeren“ beschrieben. Lassen Sie das Klimagerät 2 Stunden lang im Gebläse/Lüfter-Modus laufen, bis das Gerät innen komplett trocken ist. ... -
Page 18: Behebung Von Problemen
BEHEBUNG DER PROBLEME Bevor Sie sich mit unserer Kundenhotline/ Servicestelle in Verbindung setzen, prüfen Sie bitte, ob sich der Fehler anhand der untenstehenden Hinweise beheben lässt. PROBLEM MÖGLICHE URSACHE LÖSUNG Stromausfall Wiederherstellung Stromversorgung abwarten. Gerät nicht Gerät an die Stromversorgung Stromversorgung angeschlossen. -
Page 19: Technische Informationen
Technische Informationen Artikelnummer SHE12KL2001F Kühlleistung 12000Btu Leistungsaufnahme (Kühlen) 1357W Max. Leistungsaufnahme 1492W Eingangsspannung 220-240V~ Frequenz 50Hz Max. Stromstärke Kühlbetrieb 6.0A Max. Stromstärke 6.6A Kältemittel/Füllung R290 / 230g Energieeffizienz EER 2.60 Energieeffizienzklasse Luftumwälzung 400m Geräuschpegel (Schalldruck) 53dB(A) Geräuschpegel (Schallleistung) 65dB LRA des Kompressors 25.4A... -
Page 20: Garantie
Mit diesem Qualitätsprodukt von SHE haben Sie eine Entscheidung für Innovation, Langlebigkeit und Zuverlässigkeit getroffen. Für dieses SHE Gerät gewähren wir eine Garantiezeit von 2 Jahren ab Kaufdatum gültig in Österreich! Sollten in diesem Zeitraum wider Erwarten dennoch Servicearbeiten an Ihrem Gerät notwendig sein, garantieren wir Ihnen hiermit eine kostenlose Reparatur (Ersatzteile und Arbeitszeit) oder (nach Ermessen der Firma Schuss) das Produkt auszutauschen. - Page 21 Table of contents 22 – 23 Important informations on safety, location and electrical connection Recycling, Disposal and declaration of confirmity Technical description Start Up Preparing for use 25 – 26 Installation Operating Panel and Remote Control Operating Panel Remote Control 29 –...
-
Page 22: Important Informations On Safety, Location And Electrical Connection
(failure to do so will void the warranty). For any repairs to the device, power plug or cable, always and exclusively contact authorized service centers. The customer service centers can be accessed online at www.she.at. ●... -
Page 23: Recycling, Disposal And Declaration Of Confirmity
We hereby confirm that this article complies with the essential requirements, regulations and directives of the EU. The detailed declaration of conformity can be viewed at any time under the following link: www.she.at/downloads/doc(she12kl2001f.pdf Errors and technical changes reserved. www.she.at Seite 23 von 38... -
Page 24: Technical Description
TECHNICAL DESCRIPTION PART DESIGNATION 1. Operating panel Signal receiver remote control + display Air outlet guard Rollers 5. Top cover 6. Air guidance slats Handle 8. Guard + air filter underneath 9. Housing 10. Opening for air outlet hose 11. Air filter 12. -
Page 25: Startup
STARTUP PREPARING FOR USE IMPORTANT! Leave the device in an upright position for at least 2 hours before starting it up for the first time and make sure the condensation outlet (16) is well sealed. Place the device on a level surface close to a window and a grounded outlet. ... - Page 26 Non-compliance can lead to damages to the device. RECOOMMANDATION FROM SHE We recommand a SHE Hot-Air Stop for installation on windows, balcony doors or sliding doors: They offer the following advantages: ...
-
Page 27: Operating Panel And Remote Control
OPERATING PANEL AND REMOTE CONTROL OPERATING PANEL 1. Description of the operating panel 1. TIMER 2. FAN Speed level 3. UP Increase 4. Display with indicators 5. DOWN Decrease 6. MODE 7. POWER 2.+3. SLEEP 1. Display (shows temperature) 2. -
Page 28: Remote Control
REMOTE CONTROL 1. Preparing the remote control – inserting or replacing batteries Please follow these instructions: 1. Remove the cover on the back of the remote control. 2. Now insert two AAA batteries Observe the information on the inside of the battery compartment to properly insert the batteries. -
Page 29: Setting Functions
SETTING FUNCTIONS You can set all functions directly on the device or using the remote control. Depending on the set function both the indicators on the operating panel display and the symbols on the remote control display illuminate. SWITCHING THE DEVICE ON 1. - Page 30 Dehumidification mode Perfectly suited to reducing the humidity in the room (e.g. in the spring and autumn, in humid rooms, during rainy periods etc.). OPERATING PANEL REMOTE CONTROL Press the MODE button until the “DRY” button until the “DRY” Press the indicator on the operating panel lights up.
- Page 31 2. Programmed deactivation OPERATING PANEL REMOTE CONTROL When the device is switched on: Press “TIMER“ Press “ ” Use the buttons to set the lead time (1-24 hours). The device automatically switches off once the set time has elapsed SLEEP This function is particularly suited to operating the device during the night as it gradually reduces its performance.
-
Page 32: Protective Functions
PROTECTIVE FUNCTIONS The air conditioning unit is equipped with various protective functions. 1. Frost protection function: In cooling, dehumidification and energy saver mode the device is automatically put in a protection status if the temperature in the air hose is too low. Once the temperature rises again device automatically... -
Page 33: Maintence And Cleaning
MAINTENANCE AND CLEANING CLEANING THE AIR FILTER To assure the air conditioning unit’s proper function you should clean the air filters every week of operation. The air filters are located in the air inlet guard. Switch the device off prior to cleaning, wait a Screws few minutes and then pull the plug to disconnect the device from mains. -
Page 34: Emptying The Water Tank & Permanent Water Drain
EMPTYING THE WATER TANK The device is equipped with an automatic water evaporation system. Circulating the condensed water cools the compressor which not only improves the cooling performance but also saves energy. Should the water tank still fill up the respective indicator on the front display lights up and the compressor stops automatically. -
Page 35: Tasks At Beginning And End Of The Season
TASKS AT BEGINNING AND END OF SEASON TASKS AT END OF SEASON Carefully empty the condensed water tank into a suitable container as described in the section on “emptying the water tank”. Let the air conditioning unit run for 2 hours in the blower/fan mode until the device is completely dry inside. -
Page 36: Troubleshooting
TROUBLESHOOTING Before contacting our customer hotline / service line check whether you can rectify the fault using the information below. PROBLEM POSSIBLE CAUSE LÖSUNG Power outage Wait for power to come back on. The device is not connected to a Connect the device to a power power supply. -
Page 37: Technical Informations
Technical information Item no. SHE12KL2001F Cooling performance 12000Btu Power consumption (cooling) 1357W Max. power consumption 1492W Input voltage 220-240V~ Frequency 50Hz Max. current in cooling operation 6.0A Max. current 6.6A Refrigerant/capacity R290 / 230g EER energy efficiency 2.60 Energy efficiency class... -
Page 38: Seite 2 Von
By purchasing a SHE quality product you have acquired an innovative, long lasting and reliable item. For this SHE device we grant a warranty of 2 years from the date of purchase, valid in Austria only. In the unlikely event that service work is required on your device in this period we warrant free repair (spare parts and labour) or (subject to Schuss’s decision) to replace the product.
Need help?
Do you have a question about the SHE12KL2001F and is the answer not in the manual?
Questions and answers