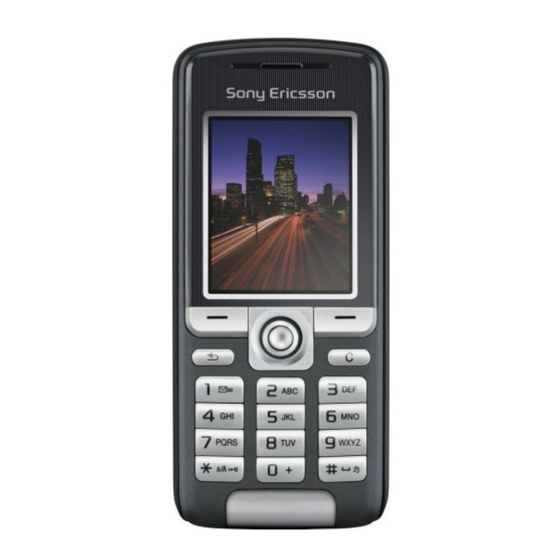
Sony Ericsson K320 Working Instruction, Mechanical
Hide thumbs
Also See for K320:
- Uživatelská příručka (94 pages) ,
- User manual (88 pages) ,
- Working instruction, mechanical (51 pages)
Table of Contents
Advertisement
Quick Links
Working Instruction, Mechanical
Applicable for K320
CONTENTS
1 Introduction .............................................................................. 3
1.1 Equipment.................................................................................4
1.2 General cautions ......................................................................5
2 Disassembly ............................................................................. 6
2.1 Overview ...................................................................................6
3 Replacements......................................................................... 12
3.1 Battery Cover..........................................................................13
3.2 Front Cover assy ....................................................................13
3.3 Metal Frame assy ...................................................................13
3.4 Frame sub- assy .....................................................................13
3.5 LCD Module ............................................................................14
3.6 Joystick Cap & Joystick Gasket ...........................................16
3.7 Camera Module VGA & Camera Gasket...............................18
3.8 System Connector..................................................................20
3.9 Liquid Intrusion Indicator ......................................................21
3.10 UI Module Frame ....................................................................22
3.11 Dome Sheet assy....................................................................23
3.12 Keypad assy ...........................................................................24
3.13 Audio Pipe assy......................................................................25
3.14 Pogo Pin..................................................................................26
3.15 Receiver ..................................................................................27
3.16 IR Window ...............................................................................28
3.17 Speaker, Speaker Gasket & Speaker Dust Net....................29
3.18 Vibrator....................................................................................31
3.19 Microphone assy ....................................................................32
3.20 Camera Key assy....................................................................33
3.21 Power Key assy ......................................................................34
3.22 Operator Key assy..................................................................35
3.23 Operator Logo assy ...............................................................36
3.24 Operator Key Label ................................................................37
3.25 Label ......................................................................................38
3/000 21-1/FEA 209 544/124 A
©
Company Internal
Sony Ericsson Mobile Communications AB
2.1.1
2.1.2
Front Cover assy ................................................................... 8
2.1.3
PBA Unit................................................................................ 9
2.1.4
Metal Frame assy................................................................ 10
2.1.5
Keypad PWB assy............................................................... 11
Working Instruction, Mechanical
Advertisement
Table of Contents

Related Manuals for Sony Ericsson K320


Summary of Contents for Sony Ericsson K320
-
Page 1: Table Of Contents
3.19 Microphone assy ..............32 3.20 Camera Key assy..............33 3.21 Power Key assy ..............34 3.22 Operator Key assy..............35 3.23 Operator Logo assy ...............36 3.24 Operator Key Label ..............37 3.25 Label ..................38 3/000 21-1/FEA 209 544/124 A © Company Internal Sony Ericsson Mobile Communications AB... - Page 2 4.1.2 Metal Frame assy..............41 4.1.3 PBA Unit................42 4.1.4 Front Cover assy ..............43 4.1.5 Battery & Battery Cover............44 5 Revision history ..............45 3/000 21-1/FEA 209 544/124 A 2(45) © Company Internal Sony Ericsson Mobile Communications AB...
-
Page 3: Introduction
Working Instruction, Mechanical 1 Introduction K320 3/000 21-1/FEA 209 544/124 A 3(45) © Company Internal Sony Ericsson Mobile Communications AB... -
Page 4: Equipment
LABEL EQUIPMENT The following special equipment is required when replacing or installing a new label: • Hot air flow solder station • Zebra printer connected to computer 3/000 21-1/FEA 209 544/124 A 4(45) © Company Internal Sony Ericsson Mobile Communications AB... -
Page 5: General Cautions
NEVER TOUCH THE DISPLAY GLASS • USE AIR BLOW EQUIPMENT TO KEEP THE FRONT WINDOW AND DISPLAY MODULE DUST FREE Turn off the phone before the start of the disassembly. 3/000 21-1/FEA 209 544/124 A 5(45) © Company Internal Sony Ericsson Mobile Communications AB... -
Page 6: Disassembly
The disassembly is done in the following sequence: 1. Battery Cover (a) & Battery 2. Front Cover asm 3. PBA unit 4. Metal Frame asm 5. Keypad PWBA asm 3/000 21-1/FEA 209 544/124 A 6(45) © Company Internal Sony Ericsson Mobile Communications AB... -
Page 7: Battery Cover Assy & Battery
Press on the bottom of the battery cover and simultaneously push it upwards. Lift the battery cover up and release it from the frame. Release the battery at the bottom and remove it. 3/000 21-1/FEA 209 544/124 A 7(45) © Company Internal Sony Ericsson Mobile Communications AB... -
Page 8: Front Cover Assy
Unhook the front cover by gently bending it out from the system connector. Grab the front cover and carefully remove it from the frame. 3/000 21-1/FEA 209 544/124 A 8(45) © Company Internal Sony Ericsson Mobile Communications AB... -
Page 9: Pba Unit
2.1.3 PBA Unit Use torx bit no. 6 to remove the four screws. Lift and remove the PBA unit starting at the bottom of the phone. 3/000 21-1/FEA 209 544/124 A 9(45) © Company Internal Sony Ericsson Mobile Communications AB... -
Page 10: Metal Frame Assy
Use the front opening tool to unsnap the metal frame from the PBA. Grab the metal frame at the top and carefully lift it upwards to remove it. 3/000 21-1/FEA 209 544/124 A 10(45) © Company Internal Sony Ericsson Mobile Communications AB... -
Page 11: Keypad Pwb Assy
Working Instruction, Mechanical 2.1.5 Keypad PWB assy Grab the keypad PWB and remove it. 3/000 21-1/FEA 209 544/124 A 11(45) © Company Internal Sony Ericsson Mobile Communications AB... -
Page 12: Replacements
The instruction usually ends by directing you to the Reassembly section with a specification of the instructions you have to carry out in order to reassemble the phone. REPLACEMENTS Contents Start page DISASSEMBLY REASSEMBLY Done 3/000 21-1/FEA 209 544/124 A 12(45) © Company Internal Sony Ericsson Mobile Communications AB... -
Page 13: Battery Cover
Follow the 3.13 & 3.15 – 3.22 Removal instructions! Prepare the new frame. Follow the 3.15 – 3.22, 3.13 & 3.25 Installation instructions! Follow the 4.1.3 – 4.1.5 Reassembly instructions! 3/000 21-1/FEA 209 544/124 A 13(45) © Company Internal Sony Ericsson Mobile Communications AB... -
Page 14: Lcd Module
Use the flex film opening tool to remove the flex film. Carefully lift up the LCD module. INSTALLATION Use the flex film opening tool and insert the flex film into the ZIF-connector. 3/000 21-1/FEA 209 544/124 A 14(45) © Company Internal Sony Ericsson Mobile Communications AB... - Page 15 ZIF-connector towards the ZIF-connector to close it. HE LCD MODULE HAS GUIDING PINS Use the guiding pins to position the LCD module on the PBA. Follow the 4.1.1 – 4.1.5 Reassembly instructions! 3/000 21-1/FEA 209 544/124 A 15(45) © Company Internal Sony Ericsson Mobile Communications AB...
-
Page 16: Joystick Cap & Joystick Gasket
LEAN THE JOYSTICK SURFACE WITH ISOPROPYL ALCOHOL Use the tweezers to mount the new joystick gasket on the joystick cap. Note the orientation of the joystick cap! 3/000 21-1/FEA 209 544/124 A 16(45) © Company Internal Sony Ericsson Mobile Communications AB... - Page 17 Working Instruction, Mechanical Joystick Cap & Joystick Gasket continued Carefully press down the joystick gasket on the joystick switch. Follow the 4.1.1 – 4.1.5 Reassembly instructions! 3/000 21-1/FEA 209 544/124 A 17(45) © Company Internal Sony Ericsson Mobile Communications AB...
-
Page 18: Camera Module Vga & Camera Gasket
Use your fingers and press the camera removal tool down into the socket and lift the tool up. Use your fingers to remove the camera module from the socket. 3/000 21-1/FEA 209 544/124 A 18(45) © Company Internal Sony Ericsson Mobile Communications AB... - Page 19 AKE SURE THAT THE CAMERA MODULE IS SECURED IN THE SOCKET Use your fingers to attach the camera gasket on the camera module. Follow the 4.1.2 – 4.1.5 Reassembly instructions! 3/000 21-1/FEA 209 544/124 A 19(45) © Company Internal Sony Ericsson Mobile Communications AB...
-
Page 20: System Connector
Use your fingers to remove the system connector. INSTALLATION OTE THE ORIENTATION OF THE YSTEM ONNECTOR Use your fingers to mount the system connector. Follow the 4.1.1 – 4.1.5 Reassembly instructions! 3/000 21-1/FEA 209 544/124 A 20(45) © Company Internal Sony Ericsson Mobile Communications AB... -
Page 21: Liquid Intrusion Indicator
Use a dentist hook to remove the liquid intrusion indicator. INSTALLATION Use the tweezers to attach a new liquid intrusion indicator. Follow the 4.1.2 – 4.1.5 Reassembly instructions! 3/000 21-1/FEA 209 544/124 A 21(45) © Company Internal Sony Ericsson Mobile Communications AB... -
Page 22: Ui Module Frame
Use the guiding pins to position the dome sheet on the UI module frame. Press the dome sheet carefully down onto the UI module frame to snap the together. Follow the 4.1.1 – 4.1.5 Reassembly instructions! 3/000 21-1/FEA 209 544/124 A 22(45) © Company Internal Sony Ericsson Mobile Communications AB... -
Page 23: Dome Sheet Assy
Attach a new dome sheet by starting at the bottom. Continue the attachment of the dome sheet and end it at the top. Follow the 3.10 Installation instructions! Follow the 4.1.1 – 4.1.5 Reassembly instructions! 3/000 21-1/FEA 209 544/124 A 23(45) © Company Internal Sony Ericsson Mobile Communications AB... -
Page 24: Keypad Assy
INSTALLATION Position the keypad into the front cover. Carefully press to attach the keypad to the front cover. Follow the 4.1.4 – 4.1.5 Reassembly instructions! 3/000 21-1/FEA 209 544/124 A 24(45) © Company Internal Sony Ericsson Mobile Communications AB... -
Page 25: Audio Pipe Assy
Place the hook on the audio pipe underneath the tap in the frame. Position the audio pipe and gently press on it to snap fit them together. Follow the 4.1.3 – 4.1.5 Reassembly instructions! 3/000 21-1/FEA 209 544/124 A 25(45) © Company Internal Sony Ericsson Mobile Communications AB... -
Page 26: Pogo Pin
Press the pogo pins in place and make sure they are in the right positions. Follow the 3.13 Installation instructions! Follow the 4.1.3 – 4.1.5 Reassembly instructions! 3/000 21-1/FEA 209 544/124 A 26(45) © Company Internal Sony Ericsson Mobile Communications AB... -
Page 27: Receiver
BE CAREFUL NOT TO DAMAGE THE RECEIVER CONNECTORS DURING THIS PROCEDURE Use the tweezers to mount the receiver. Follow the 3.13 Installation instructions! Follow the 4.1.3 – 4.1.5 Reassembly instructions! 3/000 21-1/FEA 209 544/124 A 27(45) © Company Internal Sony Ericsson Mobile Communications AB... -
Page 28: Ir Window
Use your fingers to carefully press it into frame to secure the snap fit. Follow the 3.13 Installation instructions! Follow the 4.1.3 – 4.1.5 Reassembly instructions! 3/000 21-1/FEA 209 544/124 A 28(45) © Company Internal Sony Ericsson Mobile Communications AB... -
Page 29: Speaker, Speaker Gasket & Speaker Dust Net
Use the dentist hook to remove the speaker gasket. Use the dentist hook to remove the dust net. INSTALLATION Clean the surface with isopropyl alcohol. Use the tweezers to attach the dust net. 3/000 21-1/FEA 209 544/124 A 29(45) © Company Internal Sony Ericsson Mobile Communications AB... - Page 30 Use the tweezers to attach the speaker gasket. Use the tweezers to install the speaker. Follow the 3.13 Installation instructions! Follow the 4.1.3 – 4.1.5 Reassembly instructions! 3/000 21-1/FEA 209 544/124 A 30(45) © Company Internal Sony Ericsson Mobile Communications AB...
-
Page 31: Vibrator
O NOT PRESS ON THE CONNECTORS Use he tweezers to position the vibrator. Press on the vibrator beside the connectors to secure the position. Follow the 4.1.3 – 4.1.5 Reassembly instructions! 3/000 21-1/FEA 209 544/124 A 31(45) © Company Internal Sony Ericsson Mobile Communications AB... -
Page 32: Microphone Assy
O NOT PRESS ON THE CONNECTORS Press on the microphone in the middle, between the connectors, to secure a good fit. Follow the 4.1.3 – 4.1.5 Reassembly instructions! 3/000 21-1/FEA 209 544/124 A 32(45) © Company Internal Sony Ericsson Mobile Communications AB... -
Page 33: Camera Key Assy
HE FRAME HAS GOT TWO GUIDING PINS Position the camera key in the frame. Attach the camera key at both ends. Follow the 4.1.3 – 4.1.5 Reassembly instructions! 3/000 21-1/FEA 209 544/124 A 33(45) © Company Internal Sony Ericsson Mobile Communications AB... -
Page 34: Power Key Assy
Use the tweezers to attach the power key by placing the knob in the notch. Use the tweezers to push down the ear onto the notch. Follow the 4.1.3 – 4.1.5 Reassembly instructions! 3/000 21-1/FEA 209 544/124 A 34(45) © Company Internal Sony Ericsson Mobile Communications AB... -
Page 35: Operator Key Assy
Use the tweezers to attach the operator key by placing the knob in the notch. Place the two ears behind the pins. Follow the 4.1.3 – 4.1.5 Reassembly instructions! 3/000 21-1/FEA 209 544/124 A 35(45) © Company Internal Sony Ericsson Mobile Communications AB... -
Page 36: Operator Logo Assy
Place the operator logo on the UI module frame and press with your fingers a few seconds to secure a good attachment. Follow the 4.1.1 – 4.1.5 Reassembly instructions!. 3/000 21-1/FEA 209 544/124 A 36(45) © Company Internal Sony Ericsson Mobile Communications AB... -
Page 37: Operator Key Label
Remove the operator key label with great care using the dentist hook. INSTALLATION Attach a new operator key label and press on it for a few seconds to secure a good attachment. 3/000 21-1/FEA 209 544/124 A 37(45) © Company Internal Sony Ericsson Mobile Communications AB... -
Page 38: Label
• Take the new label and place it onto the frame as in the adjacent picture NE LABEL ONLY IS ALLOWED Follow the 4.1.5 Reassembly instructions! 3/000 21-1/FEA 209 544/124 A 38(45) © Company Internal Sony Ericsson Mobile Communications AB... -
Page 39: Reassembly
The reassembly is done in the following sequence: 1. Keypad PWBA asm 2. Metal Frame asm 3. PBA unit 4. Front Cover asm 5. Battery (a) and Battery Cover (b) 3/000 21-1/FEA 209 544/124 A 39(45) © Company Internal Sony Ericsson Mobile Communications AB... -
Page 40: Keypad Pwba Assy
Working Instruction, Mechanical 4.1.1 Keypad PWBA assy Place and press the keypad PWB onto the PBA. 3/000 21-1/FEA 209 544/124 A 40(45) © Company Internal Sony Ericsson Mobile Communications AB... -
Page 41: Metal Frame Assy
Working Instruction, Mechanical 4.1.2 Metal Frame assy Carefully slide the metal frame under the operator logo. Press on the metal frame to secure it to the PBA. 3/000 21-1/FEA 209 544/124 A 41(45) © Company Internal Sony Ericsson Mobile Communications AB... -
Page 42: Pba Unit
Apply 17 Ncm when tightening two long screws at the bottom and two short screws at the top of the phone using torx bit no. 6. 3/000 21-1/FEA 209 544/124 A 42(45) © Company Internal Sony Ericsson Mobile Communications AB... -
Page 43: Front Cover Assy
Start at the top and continue towards the bottom by pressing on the front cover to make it snap to the frame. There should be no gaps between the front cover and the frame. 3/000 21-1/FEA 209 544/124 A 43(45) © Company Internal Sony Ericsson Mobile Communications AB... -
Page 44: Battery & Battery Cover
Place the battery cover on top of the battery and push towards the bottom of the phone to secure it. There should be no gaps between the battery cover and the frame. 3/000 21-1/FEA 209 544/124 A 44(45) © Company Internal Sony Ericsson Mobile Communications AB... -
Page 45: Revision History
Working Instruction, Mechanical 5 Revision history Rev. Date Changes / Comments 2006-10-10 First release 3/000 21-1/FEA 209 544/124 A 45(45) © Company Internal Sony Ericsson Mobile Communications AB...
Need help?
Do you have a question about the K320 and is the answer not in the manual?
Questions and answers