Table of Contents
Advertisement
Quick Links
INSTALLATION AND OPERATION INSTRUCTIONS
PERLICK NITRO BEVERAGE DISPENSING KIT (SINGLE AND DUAL INFUSERS)
Introduction
Congratulations on your purchase of a Perlick Nitro
Beverage Dispensing Kit. This manual has been prepared
to assist you in the setup of your kit and to acquaint you
with its operation and maintenance.
We dedicate considerable time to ensure that our products
provide the highest level of customer satisfaction. If
service is required, your dealer or customer support at
techservice@partstown.com or (800)438-8898 can
provide you with a list of qualified service agents. For
your own protection, never return merchandise for credit
without our approval.
We thank you for selecting a Perlick product and assure
you of our continuing interest in your satisfaction.
PERLICK CORPORATION 8300 W. Good Hope Road, Milwaukee, WI 53223 • 800.558.5592 • perlick.com
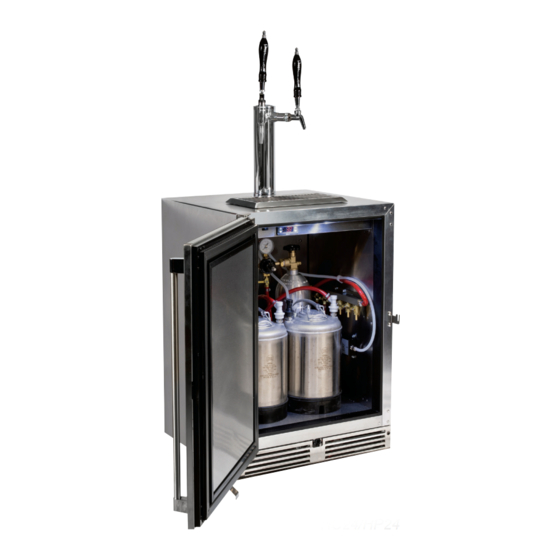
1030849 installed
in HC24/HP24
GENERAL INFORMATION
Warranty
To register your product, visit our web site at www.perlick.
com. Click on "Commercial", then "Service". Click on the
link "Warranty Registration Form". You must complete and
submit this form or the installation date will revert back to
the ship date.
Please record the purchase date and the dealer's name,
address and telephone number below.
Model Number: ________________________________
Order Number: _________________________________
Purchase Date: _________________________________
Dealer Name & Address __________________________
______________________________________________
______________________________________________
______________________________________________
Phone Number _________________________________
PRODUCT NUMBERS
RS-NDK
1030849 (Single)
1030850 (Dual)
Form No. Z2751
Rev. 05.26.21
Advertisement
Table of Contents

Related Manuals for Perlick RS-NDK 1030849


Summary of Contents for Perlick RS-NDK 1030849
-
Page 1: General Information
We thank you for selecting a Perlick product and assure ______________________________________________ you of our continuing interest in your satisfaction. ______________________________________________ ______________________________________________ Phone Number _________________________________ Form No. Z2751 Rev. 05.26.21 PERLICK CORPORATION 8300 W. Good Hope Road, Milwaukee, WI 53223 • 800.558.5592 • perlick.com... -
Page 2: Table Of Contents
Read and understand all information in this manual before attempting the installation. All plumbing and electrical work must be performed by a qualified technician and conform to all applicable state and local codes. Perlick is committed to continuous improvement. Therefore, we reserve the right to change specifications without prior notice... -
Page 3: Infuser Warranty Information
MALLET OR HAMMER FOR KNOCKOUT CENTER PUNCH LARGE ADJUSTABLE WRENCH TORPEDO LEVEL HAND DRILL/DRIVER MEASURING TAPE OR RULER GLOVES OPTIONAL: NEEDLE-NOSE PLIERS Perlick is committed to continuous improvement. Therefore, we reserve the right to change specifications without prior notice Form No. Z2751 Rev. 05.26.21... -
Page 4: Preparing For Use
Perlick is committed to continuous improvement. Therefore, we reserve the right to change specifications without prior notice... -
Page 5: Parts List
MOUNTING TEMPLATE, 1031011 1 EA DISPENSING TOWER INSTALLATION INSTRUCTIONS 1 EA Page 7 BAG, TAPPING PARTS 1 EA Perlick is committed to continuous improvement. Therefore, we reserve the right to change specifications without prior notice Form No. Z2751 Rev. 05.26.21... - Page 6 NITRO INSTALLATION INSTRUCTIONS 1 EA MOUNTING TEMPLATE, 1031023 1 EA DISPENSING TOWER INSTALLATION INSTRUCTIONS 1 EA Page 7 BAG, TAPPING PARTS 1 EA Perlick is committed to continuous improvement. Therefore, we reserve the right to change specifications without prior notice...
- Page 7 BUSHING, REDUCER, NYLON, 3/4" NPT, 1/2" NPT BUSHING, SNAP, 1.5", NYLON BUSHING, SNAP, 2", NYLON CLAMP, CABLE, 3/4" DIA X 1/2", PLASTIC TIE, CABLE Perlick is committed to continuous improvement. Therefore, we reserve the right to change specifications without prior notice Form No. Z2751 Rev. 05.26.21...
-
Page 8: Infuser Assembly Instructions
10. Attach the beverage line from the input of nitro infuser to a black quick disconnect with a worm drive clamp and 1/4” hex-nut driver (Reference Operation 5). Perlick is committed to continuous improvement. Therefore, we reserve the right to change specifications without prior notice... - Page 9 1/4” hex-nut driver (Reference Operation 5). Perlick is committed to continuous improvement. Therefore, we reserve the right to change specifications without prior notice Form No. Z2751 Rev. 05.26.21...
-
Page 10: Installation Operations
(Always drill on right wall unless there is a condensing unit DRILL SITES next to it, then drill on the left/ opposite wall). Perlick is committed to continuous improvement. Therefore, we reserve the right to change specifications without prior notice... - Page 11 (Always drill on right wall unless there is a condensing unit next to it, then drill on the left/opposite DRILL SITES wall). Perlick is committed to continuous improvement. Therefore, we reserve the right to change specifications without prior notice Form No. Z2751 Rev. 05.26.21...
- Page 12 Worm drive Up to six attachment points for gas lines for dual clamp infuser kit (up to five for single infuser kit) Fig. 3 Perlick is committed to continuous improvement. Therefore, we reserve the right to change specifications without prior notice...
- Page 13 Interior Exterior nitrogen nitrogen tank tank install install Fig. 6 All Components shown are reference only Fig. 7 Perlick is committed to continuous improvement. Therefore, we reserve the right to change specifications without prior notice Form No. Z2751 Rev. 05.26.21...
- Page 14 Operation 1. Single infuser inputs Fig. 8 Dual infuser inputs Perlick is committed to continuous improvement. Therefore, we reserve the right to change specifications without prior notice...
- Page 15 A noticeable clicking sound & positional shift will be made when the disconnect is secured. Fig. 12 Perlick is committed to continuous improvement. Therefore, we reserve the right to change specifications without prior notice Form No. Z2751 Rev. 05.26.21...
- Page 16 Lucky and Panther Towers’ installation instructions. Attach the faucets to the tower via the faucet wrench Fig. 14 located in the tapping parts bag. Perlick is committed to continuous improvement. Therefore, we reserve the right to change specifications without prior notice...
- Page 17 BBR & BBRN BBR24 Remove only one knockout per (Except BBR24) Only tower for all air scoops. Perlick is committed to continuous improvement. Therefore, we reserve the right to change specifications without prior notice Form No. Z2751 Rev. 05.26.21...
- Page 18 Give the chain a slight tug to ensure it is properly affixed. Install nitrogen tank by sliding safety chain up the tank until it is secure. Fig. 17 Perlick is committed to continuous improvement. Therefore, we reserve the right to change specifications without prior notice...
-
Page 19: Filling The Keg
Pull ring to alleviate pressure. Open Closed valve valve Fig. 18 Fig. 19 Perlick is committed to continuous improvement. Therefore, we reserve the right to change specifications without prior notice Form No. Z2751 Rev. 05.26.21... -
Page 20: Line Setup Check
Fig. 20 (Line Setup Check for Single Infuser) All Components shown are reference only Perlick is committed to continuous improvement. Therefore, we reserve the right to change specifications without prior notice... - Page 21 Ensure the regulator is tightly affixed to the tank. Fig. 21 (Line Setup Check for Dual Infuser) All Components shown are reference only Perlick is committed to continuous improvement. Therefore, we reserve the right to change specifications without prior notice Form No. Z2751 Rev. 05.26.21...
-
Page 22: System Cleaning
CAUTION that are designed for cold beverage equipment and dispensing systems that rinse clean and do not leave behind any residue or odor. Perlick is committed to continuous improvement. Therefore, we reserve the right to change specifications without prior notice... - Page 23 9. Turn Nitrogen Gas off and vent keg pressure. 10. Remove keg lid and rinse keg thoroughly with fresh water. Perlick is committed to continuous improvement. Therefore, we reserve the right to change specifications without prior notice Form No. Z2751 Rev. 05.26.21...
-
Page 24: Troubleshooting
Refer to the Nitrogen Adjustment Video on the first page of the installation instructions. Refer to the troubleshooting installation guide (Operation 16). Issues with installation N/A Perlick is committed to continuous improvement. Therefore, we reserve the right to change specifications without prior notice... - Page 25 • If fluid flow can not be resolved through this troubleshooting process, proceed to the last step. k) Reach out to customer support at techservice@partstown.com or (800)438-8898 for any additional questions. Perlick is committed to continuous improvement. Therefore, we reserve the right to change specifications without prior notice Form No. Z2751...
-
Page 26: Service Parts List
1030979 5 FEET OF SNORKEL TUBING (5 EA) 1030980 AIR SLEEVE (1 EA) 1030981 REGULATOR (1 EA) 1030982 WRENCH, COMBINATION (1 EA) 1030986 Perlick is committed to continuous improvement. Therefore, we reserve the right to change specifications without prior notice... - Page 27 PERLICK NITRO BEVERAGE DISPENSING KIT Operation/Installation Manual NOTES Perlick is committed to continuous improvement. Therefore, we reserve the right to change specifications without prior notice Form No. Z2751 Rev. 05.26.21...
- Page 28 Form No. Z2751 Rev. 05.26.21 PERLICK CORPORATION 8300 W. Good Hope Road, Milwaukee, WI 53223 • 800.558.5592 • perlick.com...
Need help?
Do you have a question about the RS-NDK 1030849 and is the answer not in the manual?
Questions and answers