Table of Contents
Advertisement
Owner's Manual
ANS Z21.97-2010, Outdoor Decorative Gas Appliances
CGA CR 97-003 Outdoor Gas Fireplaces
INSISTS ON THE HIGHEST STANDARD OF QUALITY IN MANUFACTURING.
IN CASE OF ANY ISSUES DO NOT RETURN TO STORE.
CALL 1-800-379-2185 OR E-MAIL US AT info@calell.com WITH QUESTIONS OR WARRANTY ISSUES.
OUR OFFICE HOURS ARE MONDAY TO FRIDAY 8 AM – 4 PM (PST).
WE WILL BE BACK TO YOU AS QUICKLY AS POSSIBLE.
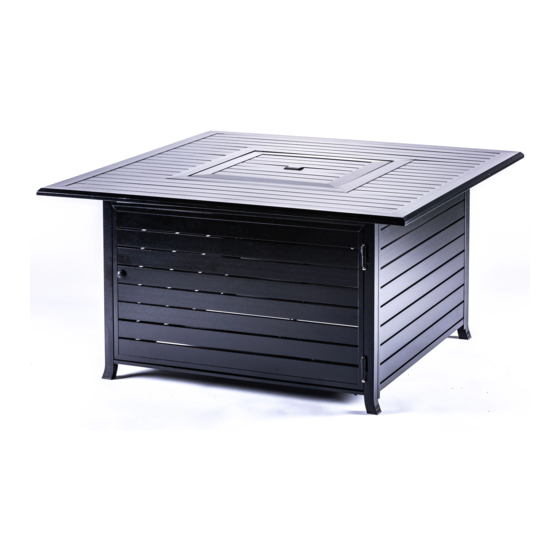
OUTDOOR FIRE PIT
MODEL NO.:
WELLFP-S-CA2(5)/CDFP-S-CA/ CDFP-S-CA HB
/CDFP-S-Camocha /CSFP-S-CAwood
/vc-CDFP-S-Camocha/vc-CDFP-S-Cawood/v-CDFP-S-CAS
1
Advertisement
Table of Contents

Related Manuals for Legacy Heating WELLFP-S-CA2


Summary of Contents for Legacy Heating WELLFP-S-CA2
- Page 1 Owner's Manual OUTDOOR FIRE PIT MODEL NO.: WELLFP-S-CA2(5)/CDFP-S-CA/ CDFP-S-CA HB /CDFP-S-Camocha /CSFP-S-CAwood /vc-CDFP-S-Camocha/vc-CDFP-S-Cawood/v-CDFP-S-CAS ANS Z21.97-2010, Outdoor Decorative Gas Appliances CGA CR 97-003 Outdoor Gas Fireplaces INSISTS ON THE HIGHEST STANDARD OF QUALITY IN MANUFACTURING. IN CASE OF ANY ISSUES DO NOT RETURN TO STORE.
-
Page 2: Package Contents
PACKAGE CONTENTS PART DESCRIPTION QUANTITY Table Top Back panel Door Left Panel Right Panel Cover Lavarock Battery Bottom... -
Page 3: Hardware Contents
HARDWARE CONTENTS Item Description M6x25 screw M6X30 screw M6 washer M8X16 bolt M8 washer Propane Tank Strape Wrench SAFETY INFORMATION SAFETY INFORMATION Please read and understand this entire manual before attempting to assemble, operate or install this appliance. If you have any questions regarding the product, please call customer service 1-800-379-2185 Monday-Friday,... -
Page 4: Carbon Monoxide Hazard
SAFETY INFORMATION DANGER DANGER EXPLOSION – FIRE HAZARD CARBON MONOXIDE HAZARD Keep solid combustibles, such as building materials, This fire pit is a combustion appliance. All combustion paper, or cardboard a safe distance away from the fire appliances produce carbon monoxide (CO) during the pit as recommended by the instructions. -
Page 5: Burn Hazard
SAFETY INFORMATION WARNING WARNING This product is fueled by propane gas. Propane gas is invisible, odorless, and flammable. An odorant is California Proposition 65 Warning: normally added to help detect leaks and can be Combustion by-products produced when using this described as having a “rotten egg”... -
Page 6: Operation Checklist
OPERATION CHECKLIST Operation Checklist For a safe and pleasurable heating experience, perform this check before each use. Before Operating: 1. I am familiar with entire owner’s manual and understand all precautions noted. 2. All components are properly assembled, intact and operable. 3. - Page 7 ASSEMBLY INSTRUCTIONS 1.Attach propane tank straps (FF) to the bottom plate (J) in two cross corners as shown. 2.Turn over the door (D), back panel(C), left panel (E) and right panel (F) and use 8pcs M6X25 (AA) screws and 8pcs M6 washers (CC) to assemble left panel and right panel into door and back panel.
- Page 8 ASSEMBLY INSTRUCTIONS Turn over the body. 5. Assemble table top(B) into the body with 4pcs M8x16 bolts(DD) and M8 washers(EE).Make sure the control box is faced to door. CAUTION To ensure proper function,the guard on this burner should be free of lava rocks at all times.
-
Page 9: Pressure Relief Valve
ASSEMBLY INSTRUCTIONS 7. Open the door and remove the rubber cap on the electronic igniter by unscrewing and slide battery (I) into the battery slot. Make sure the positive side of the battery faces outwards. Screw the electronic ignitor cap over the battery tightly. -
Page 10: Operation
OPERATION Before performing a leak test, be sure that no sparks can occur and you are in a spacious outdoor area. Connect the propane gas tank to the regulator and turn the valve on the unit to the “off” position. Brush a soap and water mixture on all connections. Turn the gas supply on; if bubbles occur on any connection there may be a leak. -
Page 11: Maintenance
MAINTENANCE • Before performing any maintenance always disconnect propane gas tank. • Keep the heating item free and clear from combustible materials. • Visually inspect burner for obstructions and keep tank enclosure free and clear from debris. • Use a soft brush to get rid of the mild stains, loose dirt and soil after the burner and pumice stones/ lava rocks/LavaGlass are completely cooled down. -
Page 12: Troubleshooting
TROUBLESHOOTING Problem Cause Solution Igniter pin and burner are wet Dry off with a soft cloth Igniter battery is incorrectly inserted Check which direction the battery is inserted Igniter pin is broken Contact Bond Manufacturing Co., Inc. for Heating unit won’t light a replacement part Electrode wire is loose or disconnected Reconnect wire to the igniter box located...
Need help?
Do you have a question about the WELLFP-S-CA2 and is the answer not in the manual?
Questions and answers