Control 4 T4 Series Installation Manual
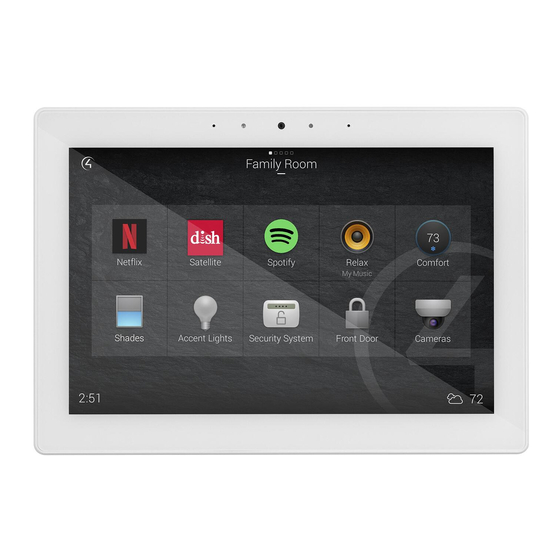
8" and 10" in-wall touchscreen
Hide thumbs
Also See for T4 Series:
- Installation manual (22 pages) ,
- Installation manual (6 pages) ,
- Installation manual (4 pages)
Table of Contents
Advertisement
Quick Links
8" and 10" T4 Series In-Wall Touchscreen
Installation Guide
Supported models
• C4-T4IW8-BL
8" T4 In-Wall Touchscreen, Black
• C4-T4IW8-WH
8" T4 In-Wall Touchscreen, White
• C4-T4IW10-BL
10" T4 In-Wall Touchscreen, Black
• C4-T4IW10-WH
10" T4 In-Wall Touchscreen, White
Introduction
The Control4® T4 Series 8- and 10-inch In-Wall Touchscreens offer
complete system control in an elegant and compact design. The
touchscreens are equipped with a full capacitive screen, audio
and video Intercom (with the built-in camera) using SIP, and
more.
This touchscreen works great in either new construction or
retrofit installations. For power and network connectivity, choose
from three options:
• Ethernet with PoE—The Ethernet network connection is
provided through the PoE Injector. No additional wiring is
needed.
• WiFi with PoE—The internal Wi-Fi will communicate with the
LAN's wireless AP, so no additional network wiring is needed.
PoE power is used to power the touchscreen.
Note: 802.11b is not recommended for video intercom.
We recommend using Wireless-N. See "Specifications"
and "Power and Network Installation Options" for more
information.
Box contents
• 8" or 10" T4 In-Wall Touchscreen
• Power box (to power the touchscreen)
• Two screws (to attach the power box to the wall box)
• Set screw (to secure the touchscreen to the power box)
• Set screw tool (3/32" straight-shaft hex driver)
1 1
Accessories available for purchase
• Pakedge 802.3at/af Gigabit PoE+ Injector (PI-30AT), or
Araknis Networks Gigabit PoE+ Injector
(AN-ACC-INJ-POE-30W), each sold separately.
• Wall box options (sold separately)—Metal and plastic, for
new construction or retrofit installations.
• In-Wall Touchscreen Wall Box Kits - New Construction
• Plastic (C4-NWB57C-P)
• Metal (C4-NWB57C-M)
• In-Wall Touchscreen Wall Box Kits - Retrofit
• Plastic (C4-RWB57C-P)
• Metal (C4-RWB57C-M)
For wall box installation details, see:
• In-Wall Touchscreen Wall Box Installation Guide-New
Construction (
ctrl4.co/wallbox-new
• In-Wall Touchscreen Wall Box Installation Guide-Retrofit
(
ctrl4.co/wallbox-retro
)
)
Advertisement
Table of Contents

Related Manuals for Control 4 T4 Series


Summary of Contents for Control 4 T4 Series
- Page 1 Introduction • Plastic (C4-NWB57C-P) • Metal (C4-NWB57C-M) The Control4® T4 Series 8- and 10-inch In-Wall Touchscreens offer • In-Wall Touchscreen Wall Box Kits - Retrofit complete system control in an elegant and compact design. The touchscreens are equipped with a full capacitive screen, audio •...
-
Page 2: Specifications And Requirements
Warnings Specifications and requirements Warning! Do not place the touchscreen near sources of Specifications heat or expose to direct sunlight for an extended period of time. C4-T4IW10-BL, C4-T4IW10-WH, Model Numbers AVERTISSEMENT ! Ne placez pas l’unité près des C4-T4IW8-BL, C4-T4IW8-WH sources de chaleur ou exposition pour diriger la lumière Resolution: 1920 ×... -
Page 3: Front View
Front view Top view A B C L Power button. Press to turn the display on and off, press and hold to select Power off or Restart, or press and hold for 10 seconds to reset the device. M Center pinhole. Not used. N Reset pinhole. - Page 4 Power and network installation options Figure 2: Ethernet with PoE—Requires Ethernet connection to PoE injector This device uses an Ethernet or Wi-Fi network connection and can be powered using PoE. Place touchcreen here Choose one of the following options to install the power and network communication.
- Page 5 Configuration Note: The Ethernet port on the power box does not have functioning indicator LEDs. 2 Go to “Attach the power box and touchscreen” below. Configure the touchscreen for wireless (optional) To configure the touchscreen for wireless: Attach the power box and touchscreen 1 After initialization, tap Network.
-
Page 6: Troubleshooting
Add and configure in Composer Pro Troubleshooting After the touchscreen is installed and appears on the home Boot up time network, use Composer Pro to add it to the Control4 system and configure it. When the device is booting up, it may take 10 seconds before the Use the Composer Pro System Design and Connections views to logo image appears on the screen. -
Page 7: Additional Resources
Additional resources The following resources are available for additional support. • Knowledgebase and forums in Technician Community • Technical Support • Control4 website: www.control4.com • Composer documentation in its online help. Warranty and legal notices Find details of this product’s 2-Year Limited Warranty at snapav.com/warranty , or request a paper copy from Customer Service at (866) 424-4489. - Page 8 control4.com | 888.400.4070 Copyright ©2020, Wirepath Home Systems, LLC. All rights reserved. Control4 and Snap AV and their respective logos are registered trademarks or trademarks of Wirepath Home Systems, LLC, dba “Control4” and/or dba “SnapAV” in the United States and/or other countries. Snap AV and Wirepath are also registered trademarks or trademarks of Wirepath Home Systems, LLC.