
Related Manuals for Audiovox SIR-CK3


Summary of Contents for Audiovox SIR-CK3
-
Page 1: Vehicle Installation
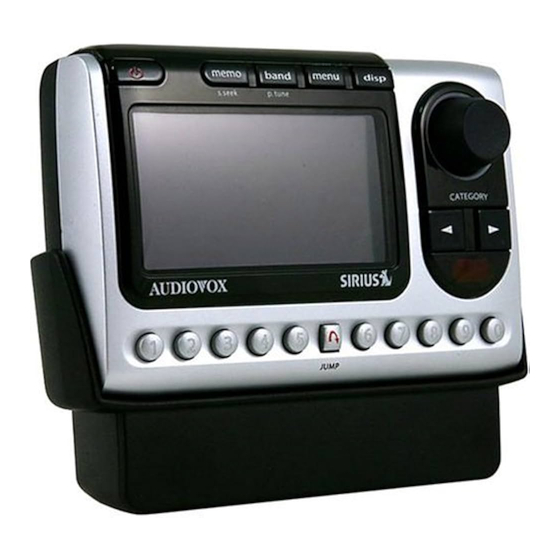
Vehicle Installation Guide SIR-CK3 Released: 8-9-04 PNP3 SHUTTLE s.seek p.tune C hannel N am e A rti st S ong C ategory 12: 00P JUMP A -1 128-7194 1 of 20... - Page 2 THIS PAGE LEFT BLANK INTENTIONALLY 128-7194 2 of 20...
-
Page 3: Table Of Contents
CONTENTS Congratulations ... 4 Cautions and Warnings ... 5 Contents SIR-CK3 ... 6 Hardware Kit ... 6 Installation/Wiring Precautions ... 7 Setting Up and Installing Your Kit ... 7 Interconnect Diagram ... 8 Installing the Cradle Using Double-Sided Tape ... 11 Using Other Manufacturer’s Mounts ... -
Page 4: Congratulations
Over 50 channels of world-class sports, news, talk and information. Your Model PNP3 Audiovox Shuttle must be used with an adapter kit, such as the Audiovox Home kit, Boom Box or Vehicle Kit as required by your specific installation needs. These kits are available at retailers where Audiovox main units are sold. -
Page 5: Cautions And Warnings
Cautions and Warnings 1. Do not install the Shuttle in a position that hinders your view through the windshield, or obstructs view ing of the dashboard indicators and displays. 2. Do not install the unit where it may obstruct the operation or deployment of safety devices, such as airbags, etc. -
Page 6: Contents Sir-Ck3
Contents SIR-CK3 HARDWARE KIT (P/N 150-1577) Audio Cable Install Manual Base (Optional) (P/N 1287194) (P/N 136-3804) (P/N SAT-RCA) Phillips Machine 1.6” W X 2”Long Screw (M4 x 8mm) Double Sided Foam Tape With Captive Lock (P/N 138-1305) and Flat Washer... -
Page 7: Installation/Wiring Precautions
1. Cabling Interconnections You can begin to enjoy Sirius® Satellite Radio as soon as the Shuttle and Vehicle Kit installation are complete. Set up your Audiovox Shuttle using the following installation instructions, or enlist the help of a professional installer: 2. -
Page 8: Interconnect Diagram
MUST BE SET TO ”FM ON” IN THE SHUTTLE USER MENU. (REFER TO THE OWNER’S MANUAL, PUBLICA- TION NO.128-7193.) 2. IF THE SIR-CK3 IS INSTALLED USING THE WIRELESS FM SWITCHING BOX, SAT-SWB, OPTION, DO NOT CONNECT THE AUDIO CABLE TO THE LINE OUT CONNEC- TOR OF THE CRADLE. - Page 9 CAUTION: Do not install the mounting base on a leather or fabric surface, or in a position that could impair your vision, block air bag(s) or obstruct vehicle dashboard controls and/or radio CD/casette operational displays. NOTE: The adhesive backing on the base will not permit easy repositioning once it has been mated to the surface;...
- Page 10 BASE SCREW HOLES ASSEMBLY (4) FOR DIRECT MOUNTING HARD MOUNTING PLATE MOUNTING BASE ASSEMBLY PLASTIC LINER MOUNTING AND ADHESIVE PLATE BACKING e. If the outside air temperature is cold, it may be beneficial to warm the adhesive backing on the base using a portable hair dryer, or by holding the backing surface in front of a vehicle heater vent.
-
Page 11: Installing The Cradle Using Double-Sided Tape
NOTE: Allow a 72-hour period for the adhesive backing to cure completely. 3. Installing the Cradle Using Double-Sided Tape You can mount the cradle directly to your dashboard or other flat surface without using the cradle mount in the kit. To do this, do not remove the mounting plate assembly from the cradle. - Page 12 LATCH TAB LOCK/UNLOCK LEVER SHUTTLE LATCHING CRADLE FRONT VIEW CRADLE GUIDE SPINES b. After making sure the connectors are properly lined up, gently press down on the shuttle to mate the connectors together. c. Slide the latch tab lever to the lock ( the tab will enter the shuttle latching tab recess to prevent vertical movement.
-
Page 13: Sirius Program Listening Options
6. Sirius Program Listening Options The Shuttle and Cradle provide an audio output signal in three manners: 1. When using the SIR-CK3 cradle with the FM switching box option, the audio signal can be transmitted to a car radio on one of over 100 selectable FM frequencies using the menu options included in your PNP3 shuttle. -
Page 14: Mounting The Vehicle Antenna
7. Mounting the Vehicle Antenna The antenna should be placed on a relatively flat surface on the vehicle exterior, preferably on the roof (high point) or on the trunk (convertible). To mount the antenna: a. Plug the antenna into the ANT connector on the back of the cradle. - Page 15 e. Plan the routing of the antenna cable to the Shuttle RF input. Make sure you avoid any obstructions that could crimp, kink or twist the cable; use protective grommets wherever rough openings are encountered. f. Route the cable from the antenna position to the interior of the vehicle, working the cable under the rear window molding;...
- Page 16 i. Plug the antenna cable into the ANT connector on the back of the cradle; then plug the cigarette lighter adapter into the lighter receptacle. The integral power LED of the power button ( ) will light red. j. You are now ready to enjoy Sirius programming within your vehicle.
- Page 17 THIS PAGE LEFT BLANK INTENTIONALLY -17- 128-7194 17 of 20...
-
Page 18: Warranty
AUDIOVOX CORPORATION (the Company) warrants to the original retail purchaser of this product that should this product or any part thereof, under normal use and conditions, be proven defective in material or workmanship within 12 months from the date of original purchase, such defect(s) will be repaired or replaced with new or reconditioned product (at the Company's option) without charge for parts and repair labor. - Page 19 THIS PAGE LEFT BLANK INTENTIONALLY -19- 128-7194 19 of 20...
- Page 20 © 2004 Audiovox Electronics Corporation, 150 Marcus Blvd., Hauppauge, New York 11788 128-7194 -20- 128-7194 20 of 20...
Need help?
Do you have a question about the SIR-CK3 and is the answer not in the manual?
Questions and answers