
Related Manuals for Whispbar Basic Carrier


Summary of Contents for Whispbar Basic Carrier
- Page 1 K631W Fitting Kit Fitting Instructions for Basic Carrier Instrukcja systemu montażu Revision No: 3B...
- Page 2 Fitting Kit K631W MAX kgs (lbs) Land Rover Freelander 2, 5dr SUV 07-12 75 kgs (165 lbs) 75 kgs (165 lbs) Freelander 2, 5dr SUV 07-15 75 kgs (165 lbs) 75 kgs (165 lbs) Freelander 2, 5dr SUV 12-14 75 kgs (165 lbs) 75 kgs (165 lbs) Freelander 2, 5dr SUV Jul 07-Feb 11 75 kgs (165 lbs)
- Page 3 Fitting Kit K631W Freelander 2, 5dr SUV 07-12 (EU) -250mm 500mm 925mm 905mm -9 -13/16ths" 19 11/16ths" 36 7/16ths" 35 5/8ths" Freelander 2, 5dr SUV 07-15 (CN) -250mm 500mm 925mm 905mm -9 -13/16ths" 19 11/16ths" 36 7/16ths" 35 5/8ths" Freelander 2, 5dr SUV 12-14 (EU) -250mm 500mm 925mm...
-
Page 4: First Time Installation
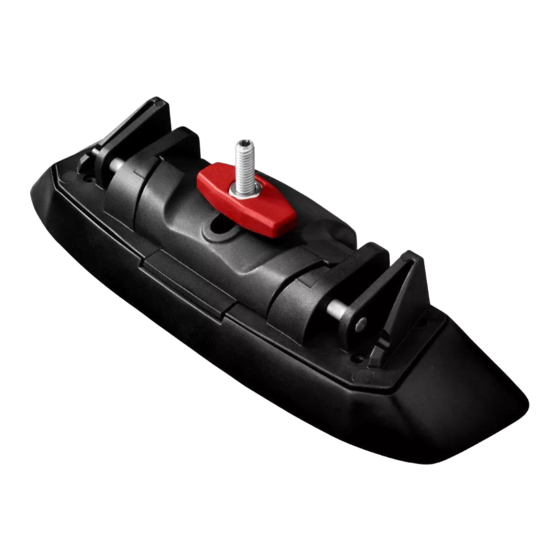
Fitting Kit K631W First Time Installation Remove parts from inside the package and check. Contact your dealer if any parts are missing or damaged. These instructions show type A crossbar fitted. They also apply to type B, C and D. This kit fits type A, B, C and D. - Page 5 Fitting Kit K631W Use hex screwdriver to reverse adjusting screw 10 turns. Press adjusting screw and pull crossbar legs out. Refer to the crossbar instructions for crossbar adjustment method. Ensure each end of the crossbar is adjusted equally. Attaches to factory-fitted mounting points Please check the front of this manual for information relating specifically to your vehicle.
- Page 6 Fitting Kit K631W Remove plastic clamp block by gripping bar leg with fingers and push firmly with thumbs until clamp block drops out behind leg. Select plastic internal block (from fitting kit) and insert into foot. Repeat for all legs. Fitment Locate ditch mouldings on roof.
- Page 7 Fitting Kit K631W Pull ditch moulding back towards you. Remove centre section. Remove as shown. Locate vehicle's fixed points.
- Page 8 Fitting Kit K631W Remove plastic bungs as shown. Rotate as shown. Mark reference point with a pen onto removed section of ditch mould. Mark reference point with a pen onto removed section of ditch mould.
- Page 9 Fitting Kit K631W Mark as shown. Use drill bit supplied, to drill holes in marked positions. Re-install ditch mould in roof channel. Align holes.
- Page 10 Fitting Kit K631W Select grubscrews and screw into the vehicle's fixed points. Do not over tighten. Repeat for all four positions. Place crossbars on pads ensuring the pads fit into the holes underneath the foot and the grubscrew passes through the hole in the foot.
- Page 11 Fitting Kit K631W Tighten the plastic knob. The side with the nut showing should be facing up. Ensure the plastic knob is in the position shown when fully tightened. Repeat for all legs. Check crossbar is securely attached to the vehicle.
- Page 12 Fitting Kit K631W Removal of crossbars Remove the products from the vehicle when not in use. Make sure all loose parts are stored safely. Using the Hex Key and the capscrews, secure the ditch mould to the vehicle. CAUTION: Recheck all fasteners immediately after a load is applied to the crossbars.
-
Page 13: Maintenance
Fitting Kit K631W Maintenance Clean the car roof and surfaces of the product that will be in contact with the car roof. Follow the fitting instructions for fitting the product to your vehicle. Make sure all steps are carried out in order. Set crossbars a minimum distance of 700mm (27 1/2") apart where no other distance is specified in the fitting... - Page 14 Make sure all loose parts are stored safely. Yakima Europe Coöperatief U.A. Archimedesbaan 25 3439 ME Nieuwegein The Netherlands +31 2080 81425 www.whispbar.eu www.whispbar.co.uk Yakima Products, Inc. 4101 Kruse Way, Lake Oswego, OR 97035 www.whispbar.com www.whispbar.ca...
- Page 15 Fitting Kit K631W Pierwszy montaż Sprawdź zawartość opakowania i upewnij się, czy zawiera wszystkie części znajdujące się na liście. Jeśli nie, skontaktuj się z odpowiednim sklepem. Instrukcja opisuje sposób montażu belek typu A. Może być również stosowana do belek typu B, C i D. Kit pasuje do belek typu A, B, C oraz D.
- Page 16 Fitting Kit K631W Zdejmij osłony za pomocą klucza. Przyciśnij i usuń blokadę. Zamontuj stopy. Sprawdź czy oba końce belek mają taką samą długość. Montaż w punkty fabryczne Czytać na z przodu instrukcji znajdziesz specyfikacje dla twojego samochodu. Wypośrodkuj równe odległości belek (patrz: instrukcja montażu belek)
- Page 17 Fitting Kit K631W Zdjąć blok zacisku z tworzywa sztucznego chwytając stopę poprzeczki palcami i mocno docisnąć kciukami aż blok zaciskowy wysunie się za stopę. Usuń wewnętrzną blokadę i umieść ją w stopie. Powtórz czynność dla reszty stóp. Montaż Wsuń łapki w kanał montażowy na dachu. Ostrożnie usunąć...
- Page 18 Fitting Kit K631W Przesuń uszczelkę do siebie. Usuń część środkową. Zdjąć jak pokazano. Zlokalizuj punkty fabryczne samochodu.
- Page 19 Fitting Kit K631W usuń zaślepki punktów montażowych jak na rysunku. Obracają się, jak pokazano. Zaznaczyć punkt odniesienia za pomocą długopisu. Zaznaczyć punkt odniesienia za pomocą długopisu.
- Page 20 Fitting Kit K631W Zaznaczyć jak pokazano. Użyj dołączonego wiertła do wiercenia otworów w zaznaczonych pozycjach. Ponownie zainstalować kształtkę rowkową w kanale na dachu. Dopasować otwory.
- Page 21 Fitting Kit K631W Wybierz śrubę z zestawu i skręć nią łapkę. Nie dokręcaj zbyt mocno Powtórz czynność w czterech miejscach. Plasser takstativet på gummiputene og forsikre deg om at hullene på gummiputnene passer undersiden av foten og at skruen går gjennom hullet i foten. Powtórz czynność...
- Page 22 Fitting Kit K631W Skręć motylkiem. Ułóż motylek równolegle do dachu samochodu. Sprawdź czy motylek znajduje się w pozycji jak na rysunku. Powtórz czynność dla reszty stóp. Upewnij się, czy belka została poprawnie zamontowana Zamknij osłony za pomocą klucza.
- Page 23 Fitting Kit K631W Usunięcie belek Zdemotuj bagażnik dachowy jeśli go nie używasz. Przykreć gumową kształtkę za pomocą klucza francuskiego. UWAGA: Sprawdź czy dokładnie dokręciłeś śruby...
-
Page 24: Zasady Użytkowania
Fitting Kit K631W Zasady użytkowania Przed zamontowaniem belek oczyść powierzchnię dachu samochodu. Postępuj zgodnie z instrukcją montażu danego zestawu. Sprawdź czy nie pominąłęś żadnego punktu. Jeżeli nie pisze inaczej, ustaw belki w odległości min. 700mm. Jest to szczególnie istotne przy przewożeniu długich przedmiotów. - Page 25 K631W Regularnie naoliwiaj zamki i zawiasy. Zdemotuj bagażnik dachowy jeśli go nie używasz. Yakima Europe Coöperatief U.A. Archimedesbaan 25 3439 ME Nieuwegein The Netherlands +31 2080 81425 www.whispbar.eu www.whispbar.info.pl Yakima Products, Inc. 4101 Kruse Way, Lake Oswego, OR 97035 www.whispbar.info.pl...
Need help?
Do you have a question about the Basic Carrier and is the answer not in the manual?
Questions and answers