Table of Contents
Advertisement
Advertisement
Table of Contents

Subscribe to Our Youtube Channel
Related Manuals for Bemer B.Box Pro


Summary of Contents for Bemer B.Box Pro
- Page 1 How To Use Your BEMER Pro Device...
- Page 2 Step by Step Product Knowledge BEMER Pro Understanding the BEMER components • B.Box Pro, • B.Body Fixing Strap, • B.Body Pro, • Glasses, • B.Pad, • Car Adapter Plug, • B.Grip, • Foot Protector, • B.Spot, • Wall Mount, • B.Light, •...
- Page 3 Step by Step Product Knowledge Tilting the B.Box To put back into flat position, just press down at the top back and gently slide toward the front. Place your thumbs on the lighter grey top and hold the darker grey bottom with the rest of your fingers.
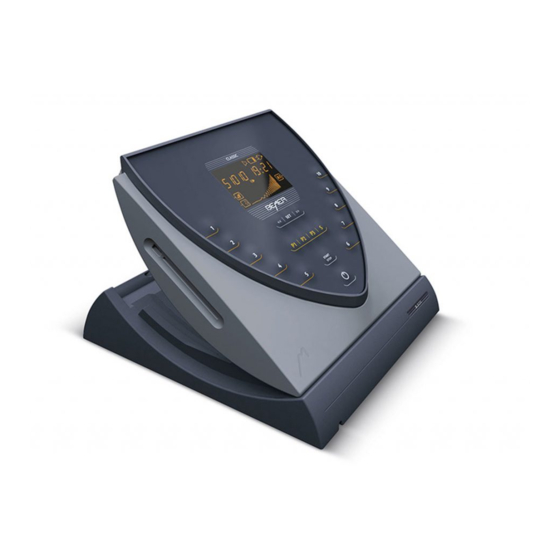
- Page 4 Step by Step Product Knowledge Operating the BEMER Pro B.Box Pro • Touch screen • Edit mode • Programmable • 2-in-1 functionality • Set the local time Turning on the B.Box Takes approx. 45 seconds to activate the computer inside.
- Page 5 Step by Step Product Knowledge Operating the BEMER Pro You will see 4 Modes • Intensity, • Program, A1 Port • Special (Sleep) A2 Port • Light...
- Page 6 Step by Step Product Knowledge Operating the BEMER Pro IMPORTANT NOTE: ALWAYS connect the magnetic plugs gently! top – down outside – in bottom - up...
- Page 7 Step by Step Product Knowledge Operating the BEMER Pro Reason for not letting the magnetic plug slam into the port • If any of the 6 six pins on the applicator’s plug are dislodged, the connection to the port is lost and the applicator will not work.
- Page 8 Step by Step Product Knowledge Operating the BEMER Pro Using 2 ports at the same time Connect plug for any applicator to A1 port Select the Mode you want and desired setting. Push start. Connect plug for another applicator to A2 .
- Page 9 Step by Step Product Knowledge The Basic Plan For Use with B.Body Basic Plan Morning Afternoon Sleep Week 1 Intensity Level 1 with Plus Intensity Level 1 no Plus Week 2 Intensity Level 2 with Plus Intensity Level 2 no Plus Week 3 Intensity Level 3 with Plus Intensity Level 3 no Plus...
- Page 10 Step by Step Product Knowledge Basic Plan Why a Basic Plan? • We never know where or how deep in the tissue the biggest disturbance in microcirculation is . • A lot of people are very toxic and should start with low intensities.
- Page 11 Step by Step Product Knowledge The Plus Signal Understanding the Plus Signal On: when you see this icon Off: when you push the “Plus button and the icon above disappears Note: When the Plus is on, every 20 seconds the energy output of the electromagnetic field (in this example Intensity Level 3) will jump to Intensity Level 10.
- Page 12 Step by Step Product Knowledge The Plus Signal...
- Page 13 Step by Step Product Knowledge BEMER Pro Program Mode Push Programs and you will see…………… 3 pre-programmed settings P1, P2, and P3...
- Page 14 Step by Step Product Knowledge BEMER Pro Program Mode Program 1 (8 minutes): Intensity 2 for 2 minutes Intensity 3 for 2 minutes Intensity 4 for 4 minutes Note: each bar of the graph denotes a 2 minutes period of the entire session.
- Page 15 Step by Step Product Knowledge BEMER Pro Program Mode Program 2 (16 minutes): Intensity 2 for 4 minutes Intensity 3 for 4 minutes Intensity 4 for 4 minutes Intensity 6 for 4 minutes Note: each bar of the graph denotes a 2 minutes period...
- Page 16 Step by Step Product Knowledge BEMER Pro Program Mode Program 3 (20 minutes): Intensity 6 for 4 minutes Intensity 7 for 4 minutes Intensity 8 for 4 minutes Intensity 9 for 4 minutes Intensity 10 for 4 minutes Note: each bar of the graph denotes a 2 minutes period of the entire session.
- Page 17 Step by Step Product Knowledge BEMER Pro Program Mode Why Programs? NOTE: Each Intensity setting has a different energy output (meaning the electro-magnetic field strength) and reaches different layers. Combining different intensities within one application reaches different tissue layers in one application.
- Page 18 Step by Step Product Knowledge BEMER Pro Night Program To activate the Night Program just push on “Special” NOTE: The BEMER Night Program configuration: • Intensity Level 2 (7 Microtesla) • NO plus • 10 Hz Frequency...
- Page 19 Step by Step Product Knowledge BEMER Pro Night Program • To set wake up time, you will use: Up and down arrows to adjust for exact wake up hour and minutes • To switch back and forth between hour and minutes, you will use...
- Page 20 Step by Step Product Knowledge BEMER Pro Night Program This is an example of when the time line number is red. In this case, the amount of sleep is 5 hours and 59 minutes. This amount of time does not allow you to activate the Night Program.
- Page 21 Step by Step Product Knowledge BEMER Pro Night Program Example using Night Program: It is 23 Hours (11 PM). You set your wake up time for 6 AM. The numbers in the hour box should be “6” and the numbers in the minute box should be “00”.
- Page 22 Step by Step Product Knowledge BEMER Pro Night Program To activate the Night Now you see the left bar Program press: highlighted and the B.Body “START” graphic starts blinking. NOTE: The sleep program runs the first 2 hours after activation; then...
- Page 23 Step by Step Product Knowledge BEMER Pro Night Program Why a Night Program? • Supports redistribution of blood to the organs involved • Detoxification • Regeneration • Repair • Organs involved are: • Liver, • Kidneys, • Gastro-intestinal tract • Skin...
- Page 24 Step by Step Product Knowledge BEMER Pro Light Mode Press Light NOTE: You can use the light for any skin related issues. The red LED light only penetrates into the layers of the skin.
- Page 25 Step by Step Product Knowledge BEMER Pro Light Mode Select the desired amount of minutes NOTE: • Depending on the sensitivity of skin, you may want to start with 2 minutes.
- Page 26 Step by Step Product Knowledge BEMER Pro Light Mode Intensity 10 is highlighted because achieves the deepest skin penetration. However, depending on sensitivity of skin, using a lower setting may sometimes be advisable. NOTE: If using the light in the face, it is advisable to utilize the glasses.
- Page 27 Step by Step Product Knowledge BEMER Pro Settings NOTE: You can set your B.Box to your local time which shows in the upper right hand corner. Push SET icon on the bottom right hand side of the initial screen.
- Page 28 Step by Step Product Knowledge BEMER Pro Settings Setting the local time NOTE: If you haven’t set the clock, the sleep program will not work properly Military time is used counting from 00:00 to 24:00 Push the “TIME” icon...
- Page 29 Step by Step Product Knowledge BEMER Pro Settings Setting the local time Use UP or Down arrows to adjust for hour and minutes. Use Left or Right arrow to switch back and forth between minutes and hour. Press SAVE NOTE: you can only adjust either hour or minutes only...
- Page 30 Step by Step Product Knowledge BEMER Pro Settings Adjusting the Brightness Use the left Save the Push arrow to dim the desired setting Brightness display screen...
- Page 31 Step by Step Product Knowledge BEMER Pro Settings Adjusting the Volume Use left arrow Push Save the to adjust the Volume desired setting volume NOTE: 3 bars = loudest ; no bars = no volume...
- Page 32 The Program Editor You will see Use UP arrow to fill Use right arrow to an empty bar bar to desired setting create another bar NOTE: Longest setting is 20 minutes; get familiar with your BEMER first before creating your own Programs.
- Page 33 Step by Step Product Knowledge BEMER Pro Settings Hi / Low Setting UP arrow highlighted = High Down arrow highlighted = Low EMF is 3 times stronger than EMF is normal output normal output. NOTE: Local applicators should be used on “High”; however, to substitute the basic plan with the B.Pad or B.
- Page 34 Step by Step Product Knowledge BEMER Pro Settings INFO Press OK. Push INFO icon. This area gives you information about the software in use and how many hours each port has been in use...
- Page 35 Step by Step Product Knowledge BEMER Pro Settings Power Save If the Power Save is on, If Power Save is you will see the lightning turned off, bolt above. The unit lightning bolt Push left or right automatically shuts off...
- Page 36 Step by Step Product Knowledge B.Scan WORD OF CAUTION: • The B.Scan is NOT a diagnostic tool. • It merely detects whether an electromagnetic field emanates from any of the applicators.
- Page 37 Step by Step Product Knowledge BEMER Pro B.Body • You can lie on either side of it. • You can put it on top of your body (full body applicator) if that is more comfortable (e.g. for people who are immobile or bed ridden).
- Page 38 Step by Step Product Knowledge BEMER Pro BEMER Pro Local applicators B.PAD B.SPOT B.LIGHT • Multiple sessions possible if needed. • For deeper laying or denser tissue use higher intensities. • Caution: This tissue may have lots of inflammation and...
- Page 39 • Injuries (burns, cuts, bee stings, sprains, etc.) • Accidents • For chronic issues where we can identify the specific area • Accelerates and promotes localized repair and innate healing capacity. NOTE: BEMER is never a substitute for medical advice!
- Page 40 Step by Step Product Knowledge BEMER Pro NO Protocols? How to explain it? Do not be afraid of using the BEMER. It cannot harm you! • BEMER is not symptom or disease specific. • There are no specific settings to use for specific symptoms.
- Page 41 Step by Step Product Knowledge BEMER Pro - Caution BEMER is never a substitute for medical advice! BEMER cannot be used with an organ transplant when the user is till on immuno-suppressants! Seek medical advice first before using BEMER with •...
- Page 42 Step by Step Product Knowledge BEMER Pro General Knowledge and Recommendations: • Product care – do not expose to extreme temperatures • Things to avoid – do not keep liquids near B.Box • Surge protector – good idea to use surge protectors •...
Need help?
Do you have a question about the B.Box Pro and is the answer not in the manual?
Questions and answers